3/7/2021 Admin
Blazor Oqtane Survey Module

About Oqtane
The Oqtane Survey Module is a module that runs inside of Oqtane which is a Modular Application Framework. It leverages Blazor, an open source and cross-platform web UI framework for building single-page apps using .NET and C# instead of JavaScript. Blazor apps are composed of reusable web UI components implemented using C#, HTML, and CSS. Both client and server code is written in C#, allowing you to share code and libraries.
You can install Oqtane by following either of the directions here:
The Survey Module
The Survey Module is an Oqtane module that allows administrators to create user surveys.
Features
- Unlimited Surveys
- Unlimited Survey Questions
- Survey responses in pie charts
- Survey Question Types
- Text Box
- Text Area
- Date
- Date Time
- Dropdown
- Multi-Select Dropdown
Installing The Survey Module
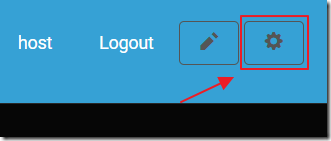
In a running version of Oqtane, log in as the Administrator, and open the Control Panel.
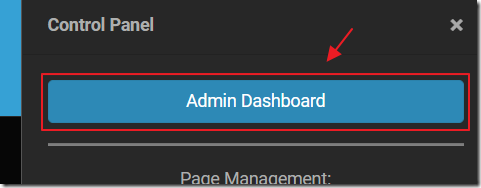
Open the Admin Dashboard.
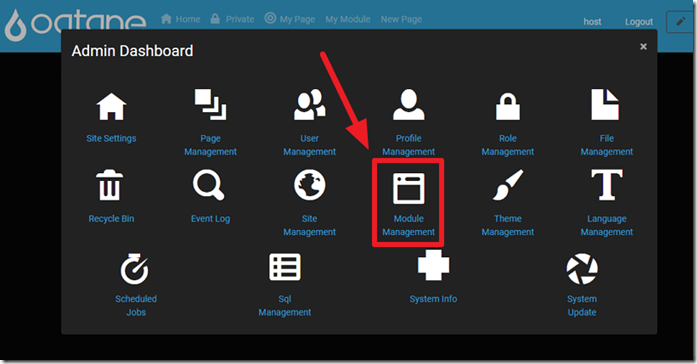
Open Module Management.
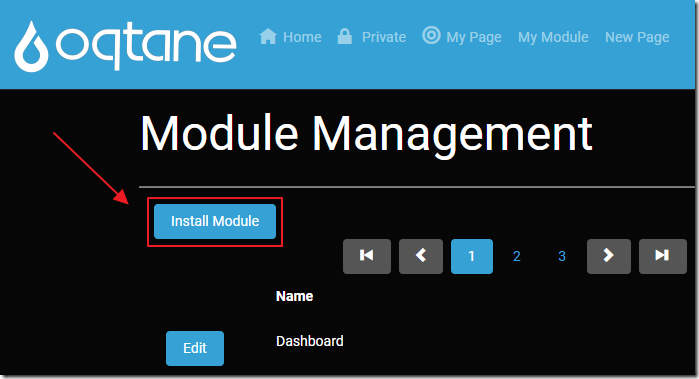
Click the Install Module button.
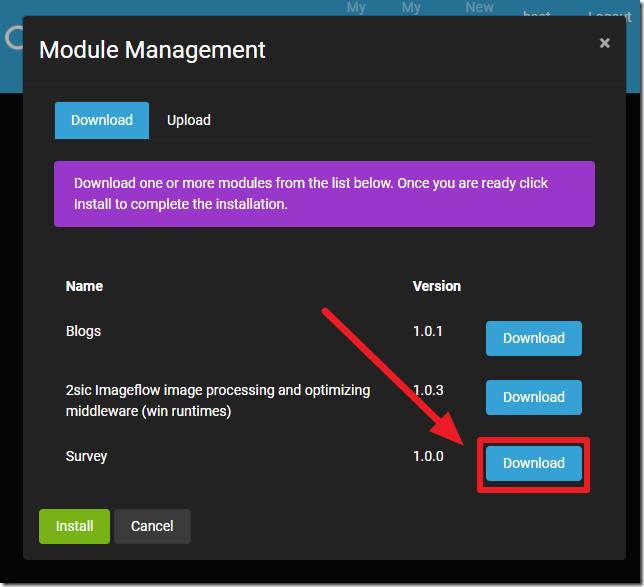
Locate the Survey module and click the Download button.
(this will download it from Nuget.org)
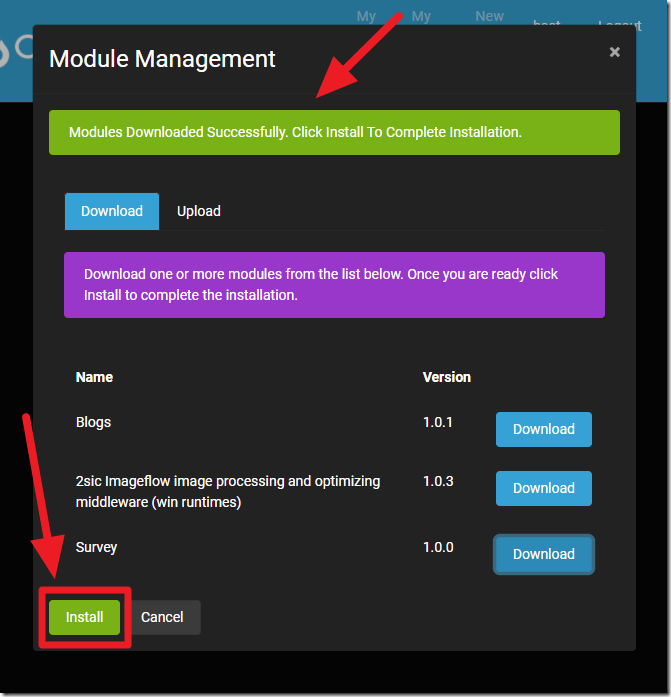
Click the Install button.
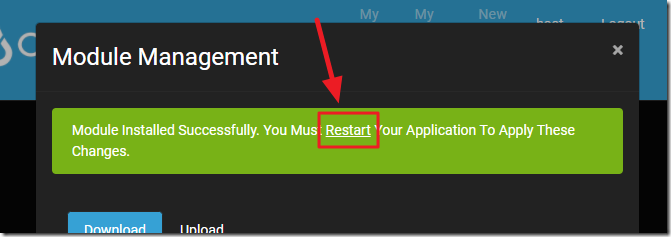
Click the Restart link.
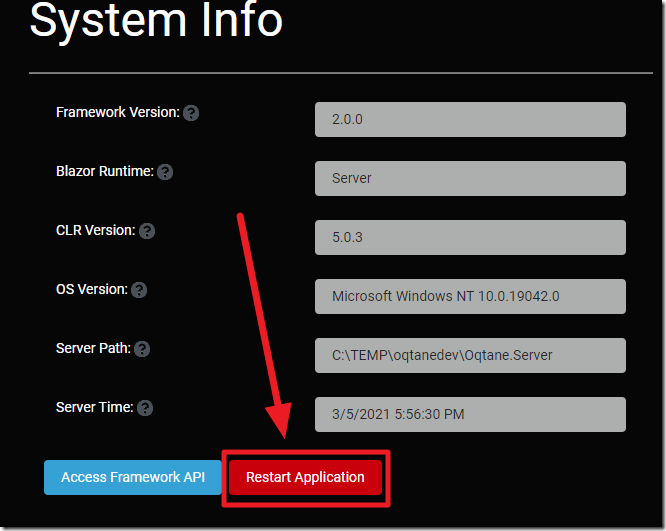
Click the Restart Application button.
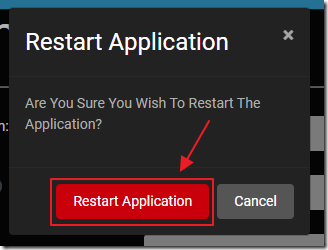
Click the Restart Application button on the popup.

After the site restarts, log in as the Administrator, and open the Control Panel.
Note: If running Oqtane in Visual Studio, you will have to restart the site in Visual Studio.
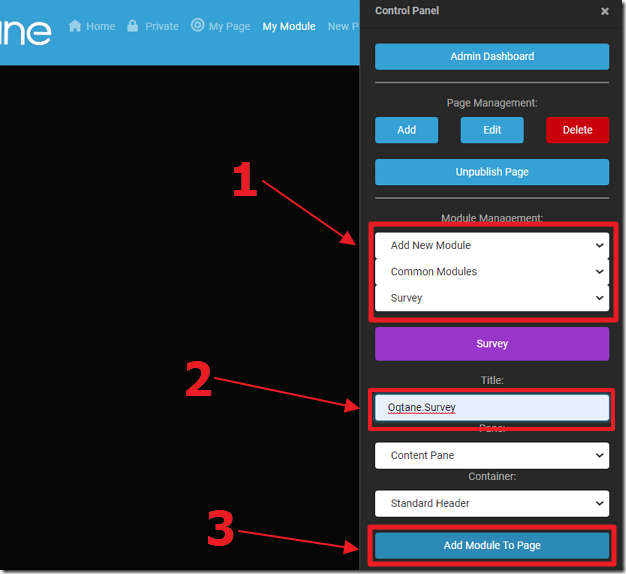
Use the Control Panel screen to add the module to the page.
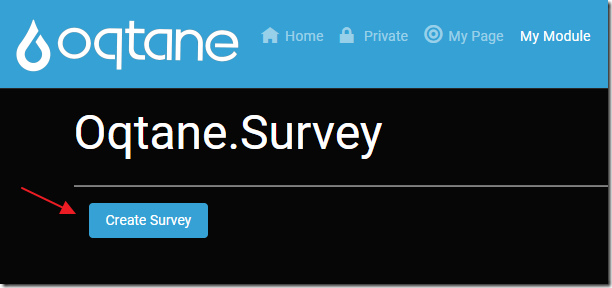
Click the Create Survey button to create a Survey.
Creating A Survey
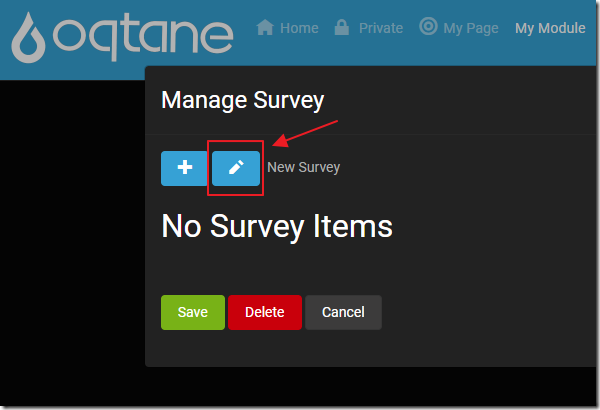
Clicking the pencil icon allows you to change the name of the Survey.
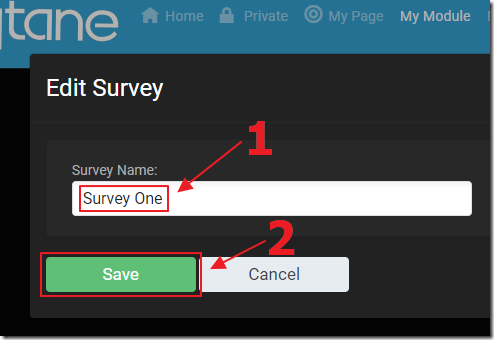
This opens a popup that allows you to enter a new name and click the Save button.
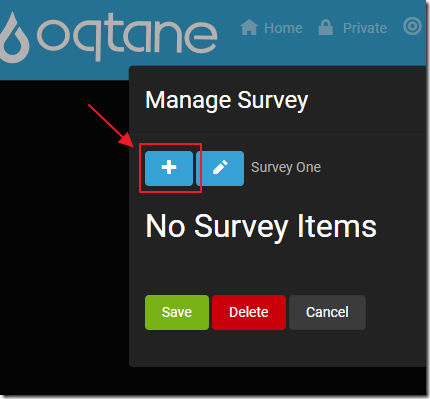
Clicking the plus icon allows you to add a new survey item.
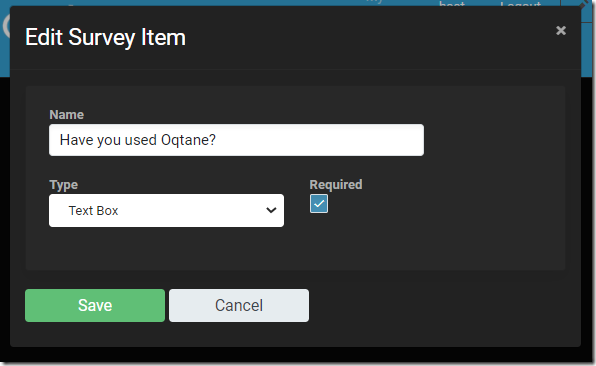
Enter the Survey question in the Name field.
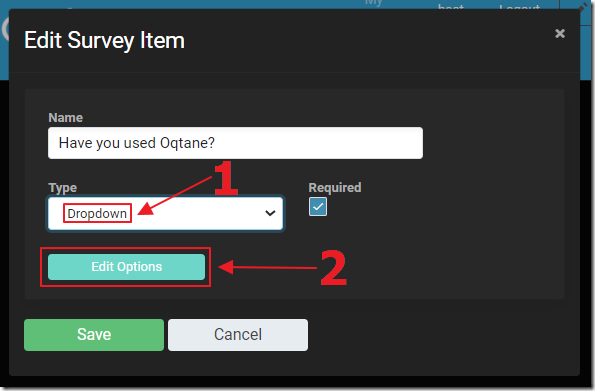
In the Type selection section, select the Survey question type.
If the Survey question type is a Dropdown or Multi-Select Dropdown, the Edit Options button will appear.
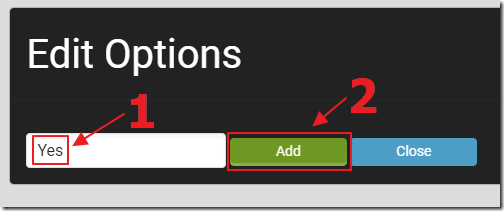
Clicking the Edit Options button brings up the Edit Options pop-up that allows you to enter the options that will show in the Dropdown or Multi-Select Dropdown.
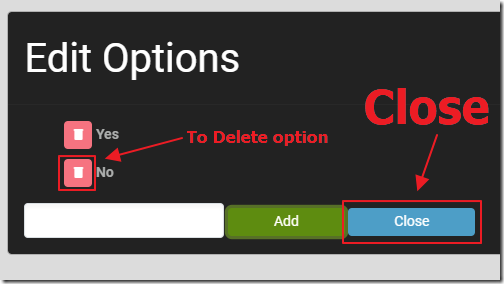
If you need to remove an option, you can click the red icon next to that option.
When you're done editing the options, click the Close button.
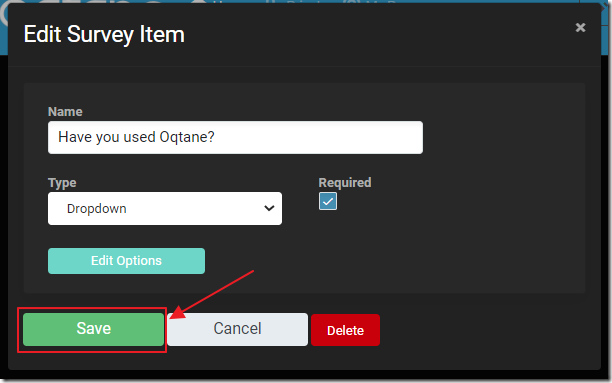
When you're done editing the Survey Item, click the Save button.
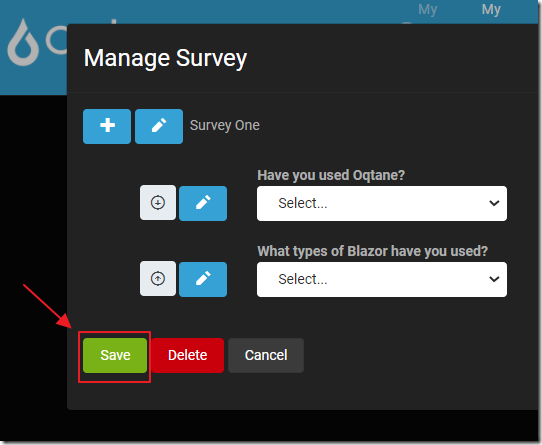
Enter additional Survey questions as desired.
When complete, click the Save button.
Taking A Survey
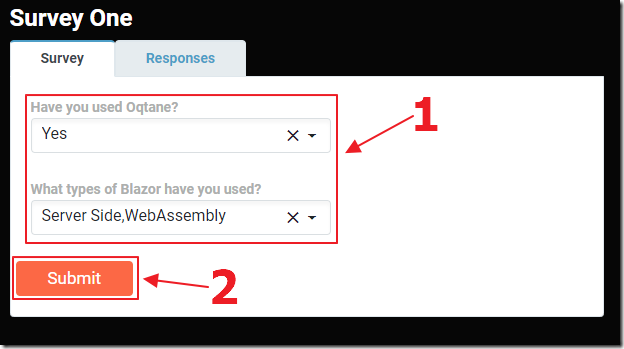
Taking a survey is simple, simply fill in an answer to each question, and click the Submit button.

A confirmation message will display when the Survey is complete.
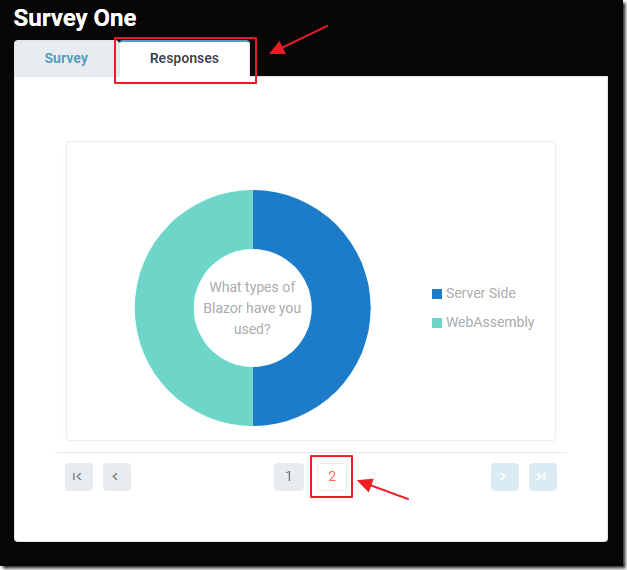
Switching to the Responses tab will show pie charts that display the tabulated results
Configuring Survey
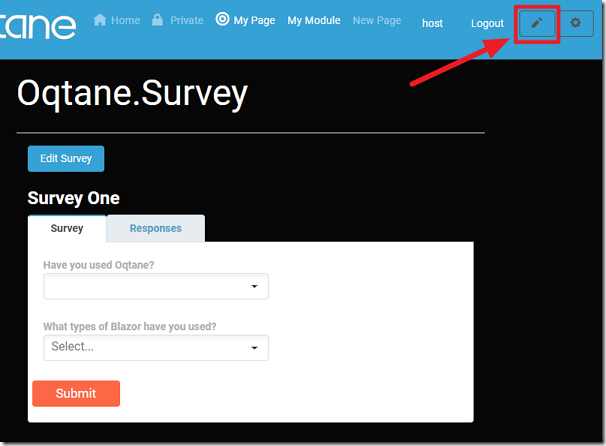
When logged in as an Administrator, the pencil icon will switch the Oqtane portal to the edit mode.
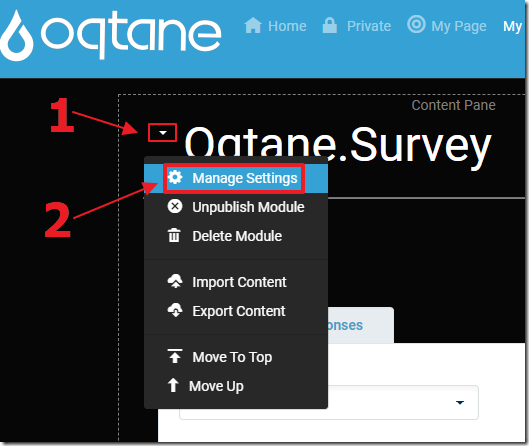
This will display the context menu that will allow you to open the Manage Settings dialog.
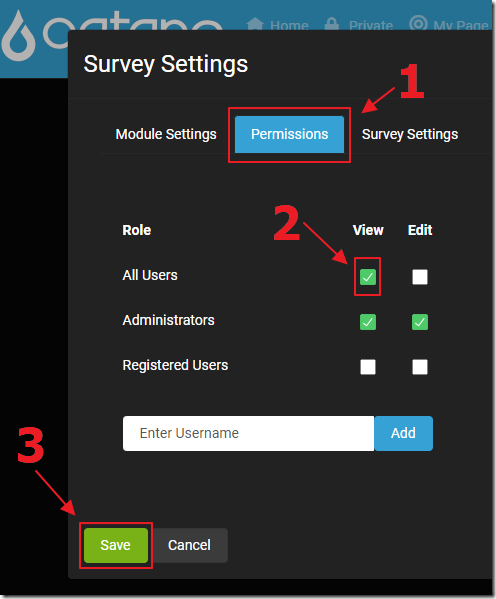
In the Settings dialog, switch to the Permissions tab, and ensure All Users can View the module instance.
How To Run The Source Code
See this blog post for guidance: Configuring The Blazor Oqtane Blog Module.
You can get the source code at this link: https://github.com/oqtane/Oqtane.Survey.
In order to deploy/install a module you should modify the folder path in the debug.cmd and release.cmd files to match the location on your system where the Oqtane framework is installed. Then when you execute this file it will create a Nuget package and copy it to the specified location where the framework will automatically install it upon startup.
To debug the module see the “Debugging External Oqtane Modules” section in this Blog post: “Oqtane Module Creator”.
Links (BlazorHelpWebsite.com)
Using Custom JavaScript in Blazor Oqtane
Using Radzen In Oqtane Modules
Using Syncfusion In Oqtane Modules
Configuring The Blazor Oqtane Blog Module
Creating a Custom Distribution of Blazor Oqtane Using Site Templates
