
11/4/2020 Admin
Configuring The Blazor Oqtane Blog Module

In this article we will explore the Blog module for Oqtane, the new web application framework that runs in Microsoft Blazor. There are two methods to create custom modules in Oqtane, inline, and as a separate Visual Studio project. This post will cover creating a separate Visual Studio project.
Install Oqtane
See the article: Installing Blazor Oqtane for instructions on installing Oqtane.
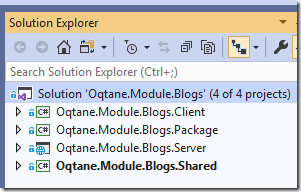
Download The Code from GitHub

Open Visual Studio.
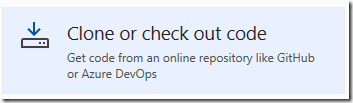
Select Clone or check out code.
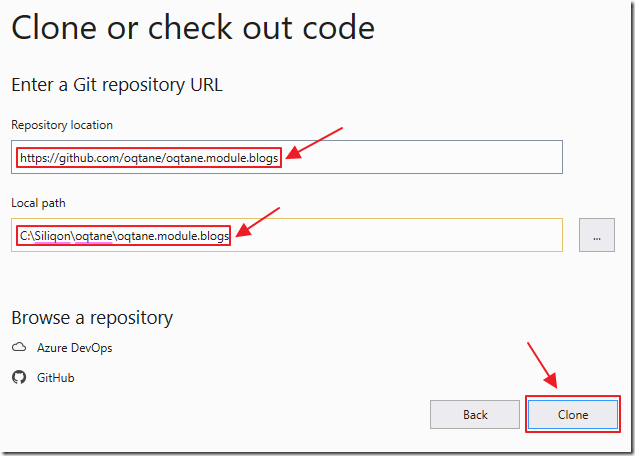
Enter https://github.com/oqtane/oqtane.module.blogs for Repository location.

The Local path can be anywhere you choose, however, by convention if you place the Blog module root folder at the same level as the oqtane framework, then you will not have to modify any folder configuration in the Package project.
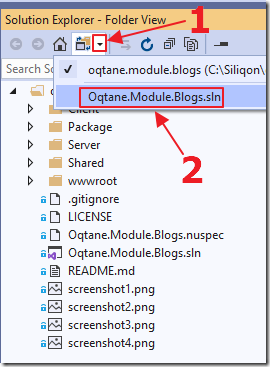
Open the .sln file in Visual Studio.
The Solution will open in Visual Studio.
Build The Project
We want to build the project, to create the NuGet package for the Module, and put that Nuget package in the Module folder of the Oqtane solution (so that Oqtane can load it).
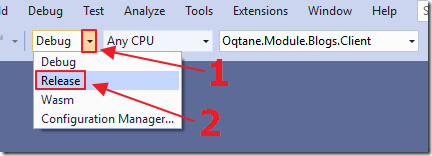
To do this, switch your configuration in Visual Studio to Release and build the solution and it will create the Nuget package for you (the Nuget package is only set to be created when building in Release mode).

Build the Solution.
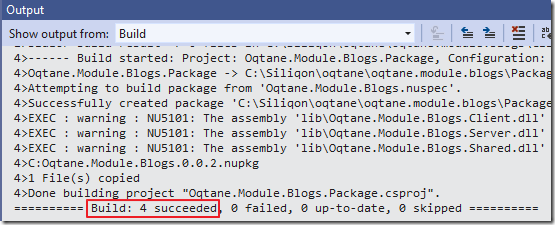
It should Build without errors.

When we view the \oqtane.framework\Oqtane.Server\wwwroot\Modules directory of the Oqtane solution, we see the NuGet package for the Blog module has been copied to that location.
Configure The Module in Oqtane
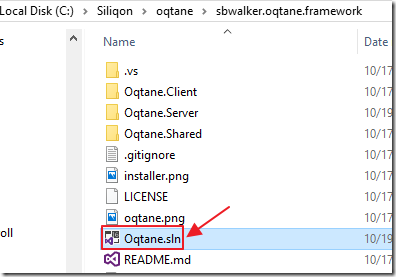
Open the Oqtane.sln in a separate instance of Visual Studio.
Keep the instance of Visual Studio that has the Blog module opened because we will return to it later.

Hot Ctrl+F5 to run the project.
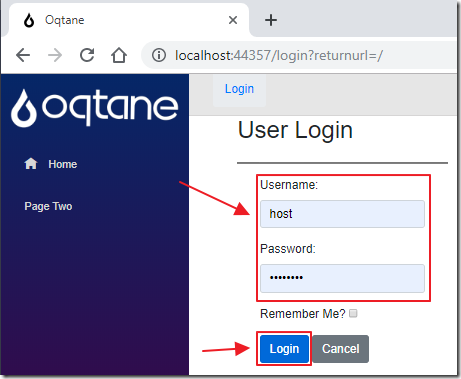
Log in as the host account.
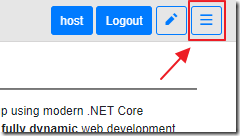
Click the Hamburger menu.
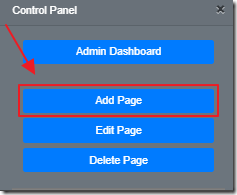
In the Control Panel, click the Add Page button.
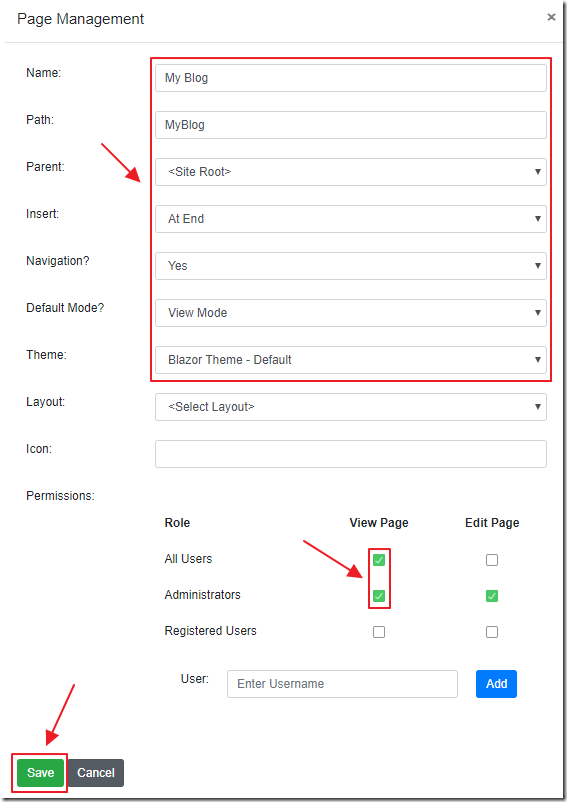
Enter the settings for a new page and click the Save button.
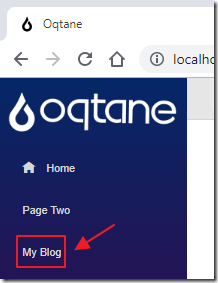
Navigate to the page.

Click on the hamburger menu.
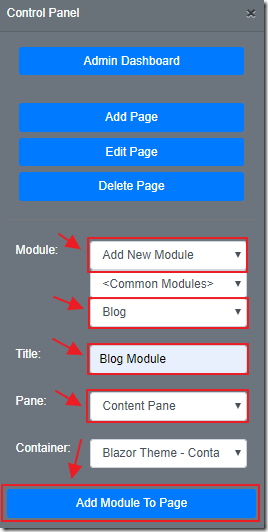
The Blog module will show up in the Module dropdown list (because it implements the IModule interface in its Module.cs file in its Server project).
Use the settings screen to add the module to the page.

The Blog module will display on the screen.
Click the pencil icon to edit the Blog module and its settings.

The page and the Blog module will now be in Edit mode.
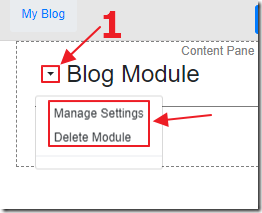
Clicking the settings caret will allow us to manage the Blog module.
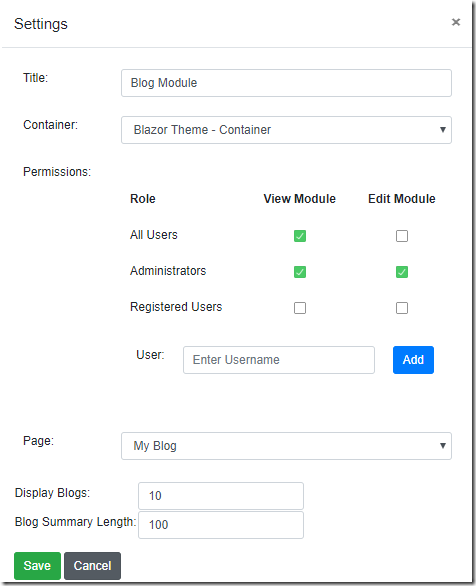
For example, the Manage Settings link will take us to the settings page for the module.
Clicking the Cancel button will close this dialog.
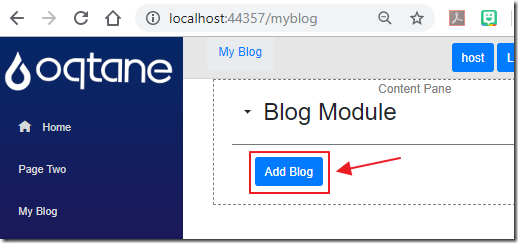
Click the Add Blog button to create a Blog.
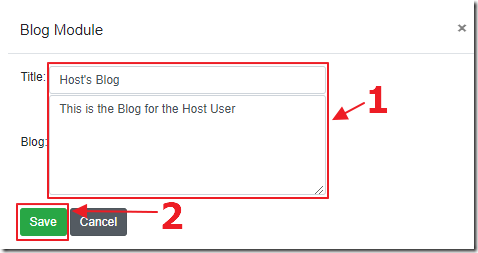
Enter the information for the Blog and click Save.

The Blog will display.
Click the Logout button.
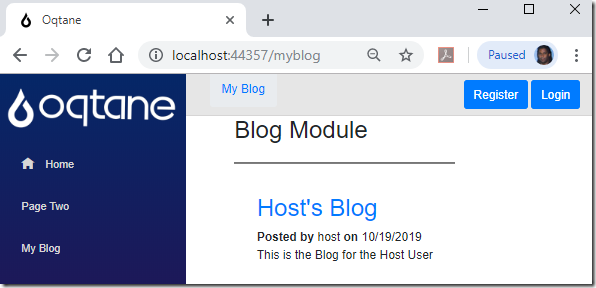
Visitors to the website will now be able to view the Blog.
Debugging

If you want to debug the Blog module, ensure that you open the Oqtane solution in one instance of Visual Studio, and the external Oqtane module in a separate instance of Visual Studio.
if you compile the solution in the Debug configuration it will automatically copy the DLLs, and static resources ,to the appropriate locations so that when you run Oqtane it will discover them automatically
In the Visual Studio instance that contains the Blog module, select Debug mode.

Then Rebuild Solution.

You will see that the .pdb files, required for debugging, have been copied to the Oqtane solution.

In the Visual Studio instance that contains the Oqtane solution, rebuild the solution, then select Debug, then Start Without Debugging.
Note: To see the latest version of the code, you must close the web browser and perform this step each time the code is changed.

This will load Oqtane in the web browser.

In the Visual Studio instance that contains the Blog module, set a breakpoint.

Select Debug, then Attach to Process.

Attach to the process that Oqtane is running under.

Return to the web browser, and navigate to the module.

When using the module, in the web browser, your break points will be hit, allowing you to debug the module.
Package The Module As a NuGet Package
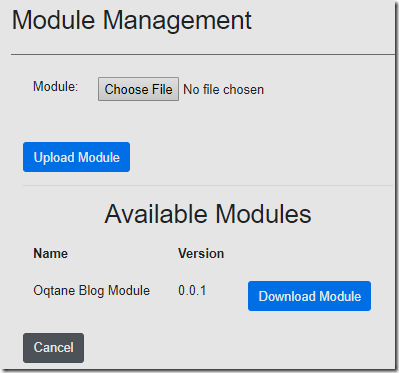
Oqtane modules are distributed as Nuget packages.
You can install the module in Oqtane, using Module Management, either by uploading it, or downloading it from Nuget in the Available Modules section (if you first upload the module to Nuget with the tag: Oqtane).
Links
Announcing Oqtane... a Modular Application Framework for Blazor!