3/7/2022 Admin
Oqtane Module Creator

Oqtane is an application that is built using Microsoft’s Blazor technology. It allows you to deploy and run modules written in Blazor. When Oqtane is deployed and running, it provides a dynamic web experience that can be run as client side Blazor or as server side Blazor.
What makes Oqtane different from other Blazor applications, is that it produces the entire website, not just a single application. Oqtane was created by Shaun Walker and is inspired by the DotNetNuke web application framework. Oqtane is a native Blazor application written from the ground up using modern .NET Core technology. It is a modular framework offering a fully dynamic page compositing model, multi-site support, designer friendly templates (skins), and extensibility via third party modules.
To learn more about Oqtane see What is Blazor Oqtane?
Install A Development Version Of Oqtane

To follow along with this tutorial, you will need to install Visual Studio 2022 (or later) with the ASP.NET and web development, and the .NET Core workloads.
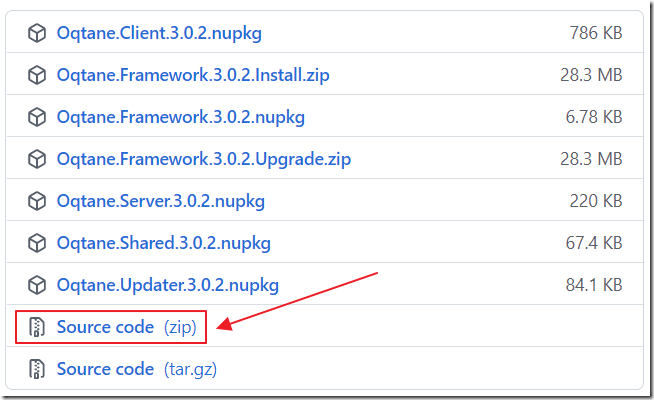
Go to https://github.com/oqtane/oqtane.framework/releases and download and unzip the latest release version of the Oqtane source code.
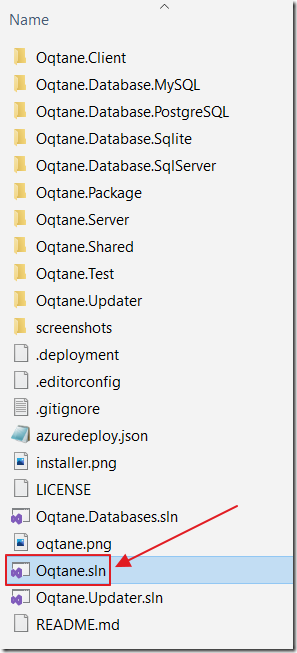
Open the Oqtane.sln solution file in Visual Studio.
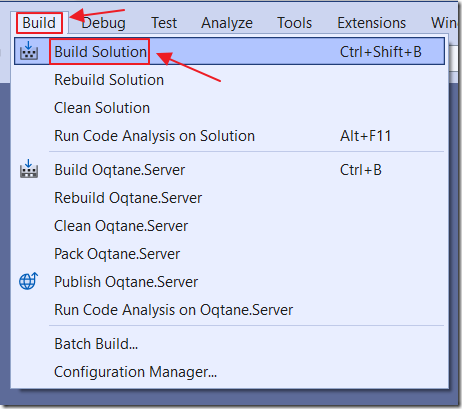
Select Build then Build Solution.
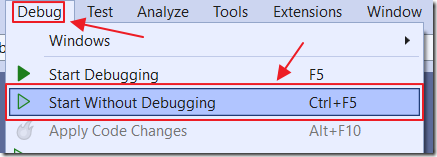
Select Oqtane.Server as the Startup Project, and then select Debug, then Start Without Debugging to run the application.
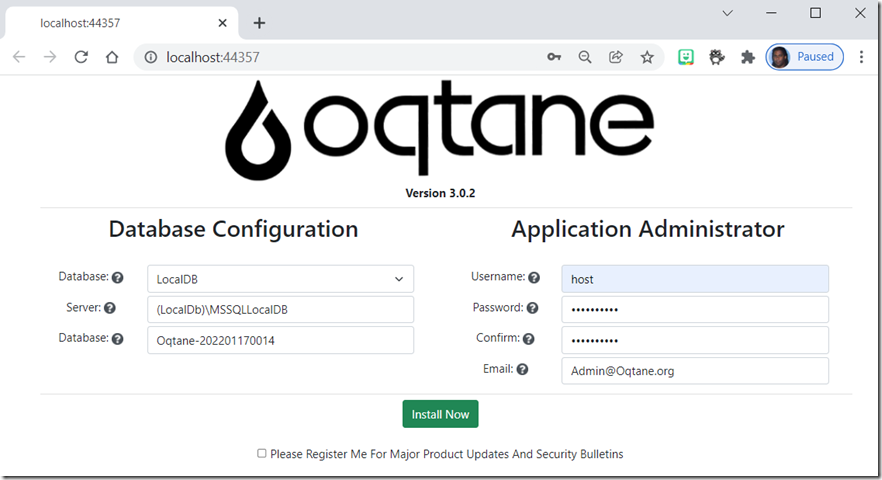
Fill in the information for the installer and click the Install Now button.
The account you enter for Username will be the Host (Administrator) account.
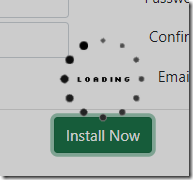
The site will install.
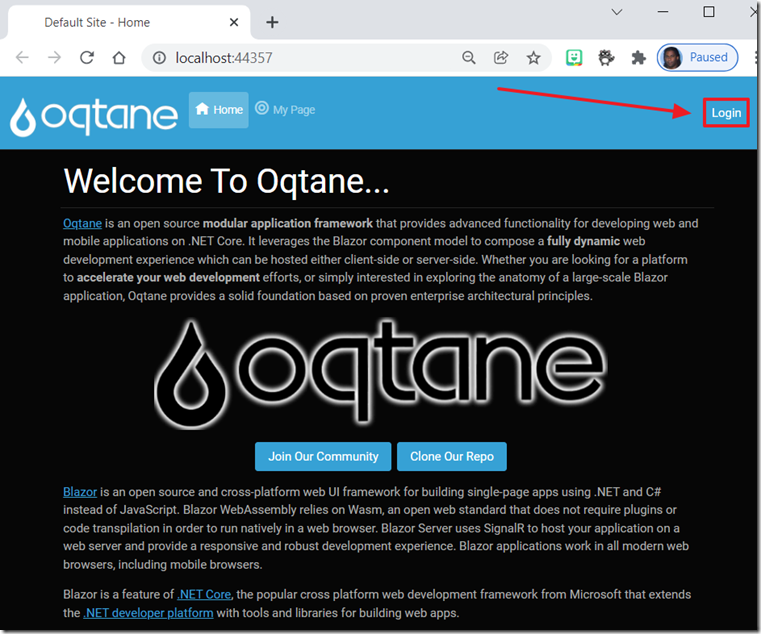
Your web browser will open, and the site will display.
Click the Login button to log in.
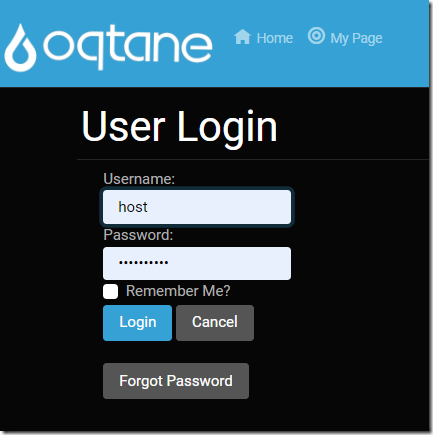
Log in with the Host account you created earlier using the installer.
Create an Oqtane Module
Creating an Oqtane module allows you to create a module that can be distributed to other Oqtane instances.
An Oqtane module, created using the Oqtane Module Creator, is created outside of the Oqtane solution in a folder at the same level as Oqtane. It contains all of the project and solution files configured so that it can build and deploy the artifacts to the Oqtane instance. It also has the ability to package a module into a Nuget package (when the Solution is built in Release mode).
Click the Gear icon.
Click on Admin Dashboard.
Click on Module Management
Click the Create Module button to open the Oqtane Module Creator.
Fill in the form and click Create Module.

A message will display indicating the Module has been created.

Note the Location that indicates where the module is located on your local hard drive.
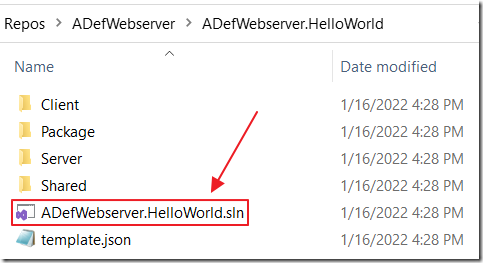
We can look at the file system to see that a new folder was created.
This folder contains all the code created by the wizard, including a Visual Studio solution file.
Open that Visuals Studio solution file in another instance of Visual Studio (keep the instance of Visual Studio that contains the Oqtane solution open).
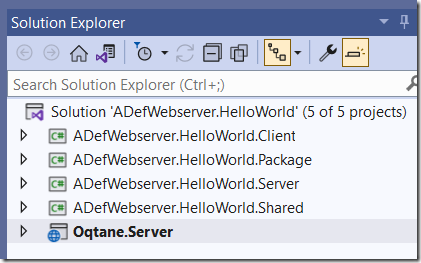
The solution will display in the Visual Studio Solution Explorer.

Select Build then Build Solution.
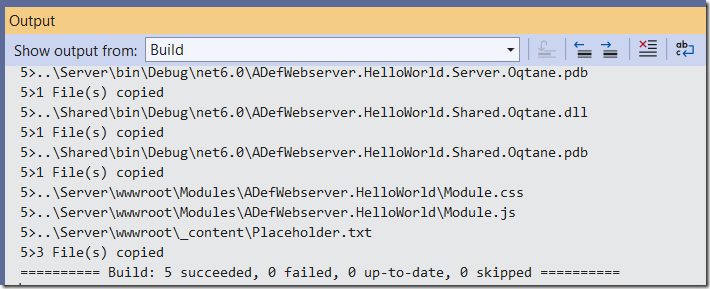
The module will build.

If you get “The file is locked by IIS Express Worker Process” build error messages, close the web browser running Oqtane and try to build again.
If that doesn’t work, close the Visual Studio instance that contains Oqtane and re-open the Oqtane solution.
Create the Nuget Package
We need to create a Nuget package and deploy it to the Oqtane site.
This is done by switching to Release mode.
Then select Build Solution.
In the Visual Studio Output window you will see the Nuget package has been created.
Return to the instance of Visual Studio running the Oqtane site and we can see that the Nuget package has been added to the Packages folder..
Restart Oqtane in the instance of Visual Studio running the Oqtane site.
Log in with the Host account.
Click the Gear icon to open the Control Panel and add the module to a page.
Explore The Module
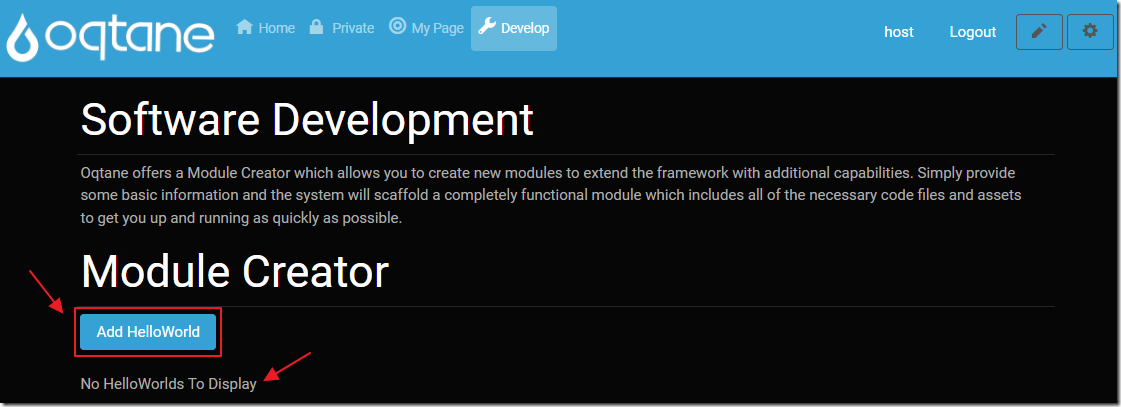
The module will display under the Module Creator banner.
It will display a Add HelloWorld button.

Clicking the Add HelloWorld button will bring up a popup that allows us to add items.
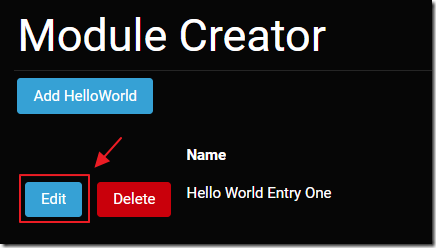
Clicking the Edit button next to an existing item will bring up a popup that allows us to edit the selected item.
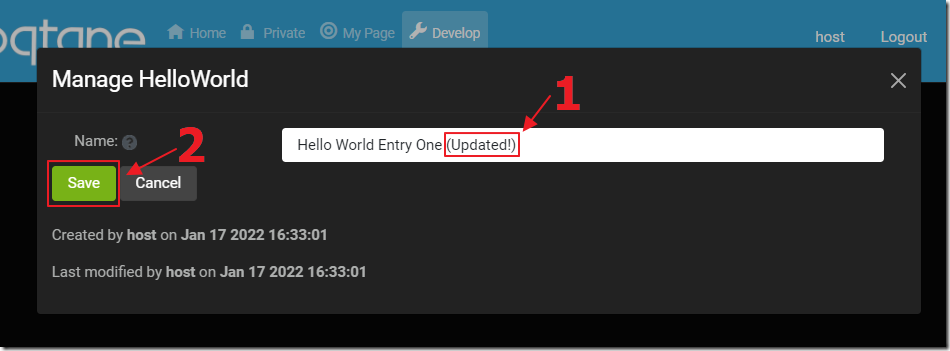
Any changes can be made and saved.
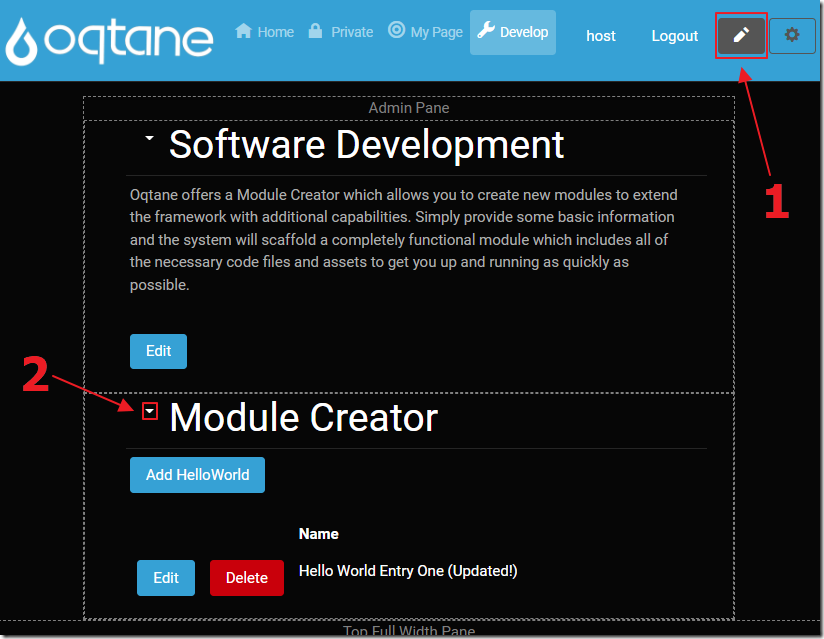
Clicking the Pencil icon will take us into tab edit mode. This allows access to the module instance settings.
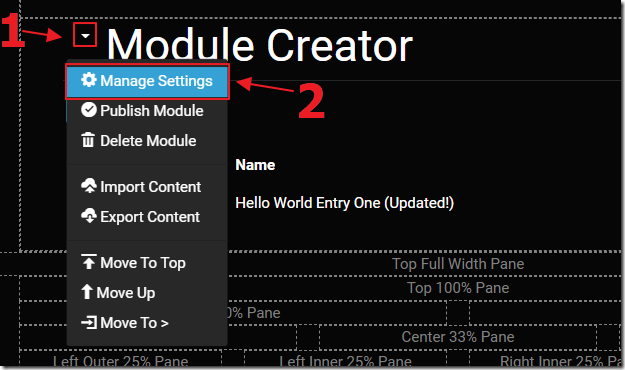
This provides access to Manage Settings.
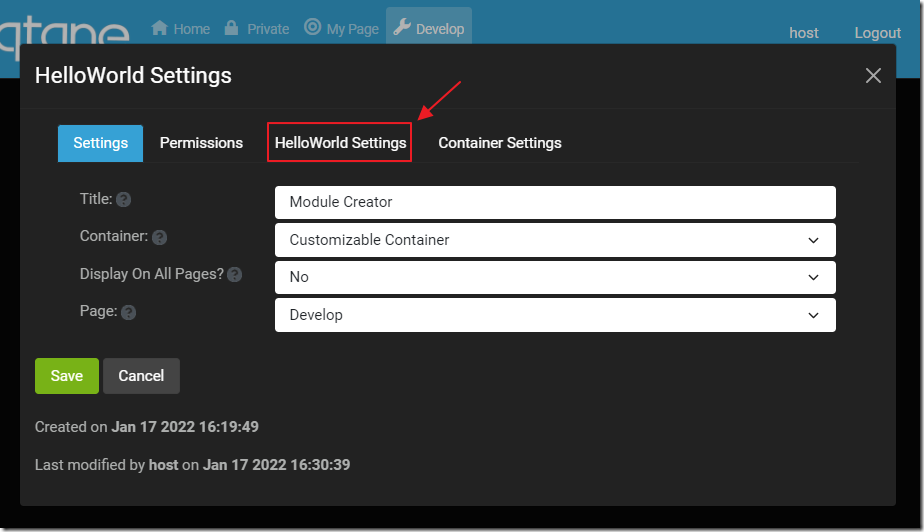
This provides access to the custom Settings for the module instance.
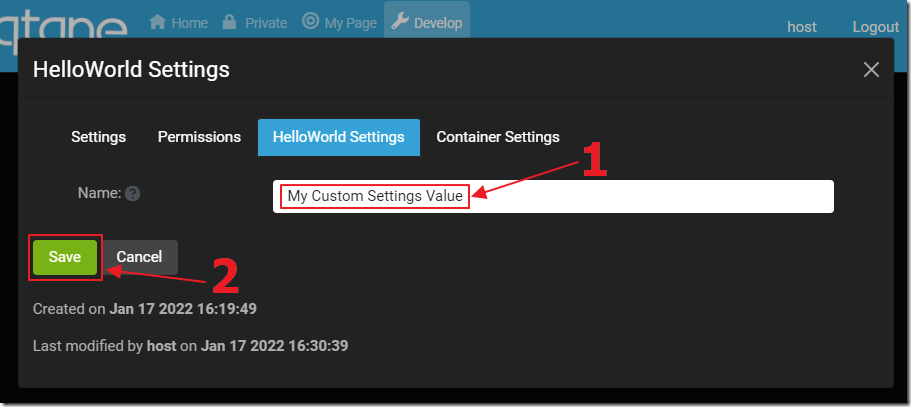
You can enter a custom settings value.
Explore The Module Definition

Click the Gear icon to open the Control Panel.
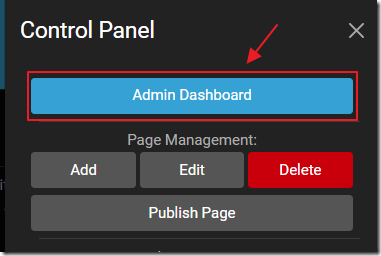
Select the Admin Dashboard.
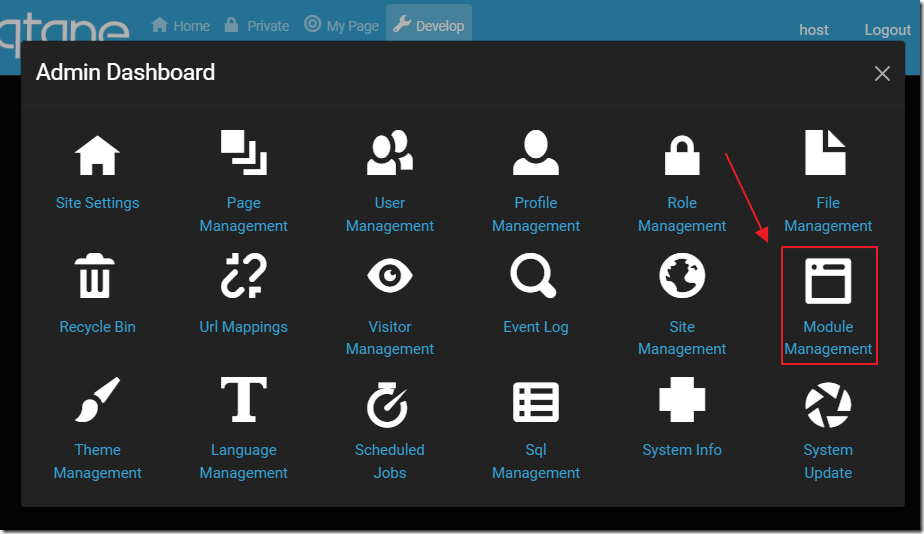
Select Module Management.
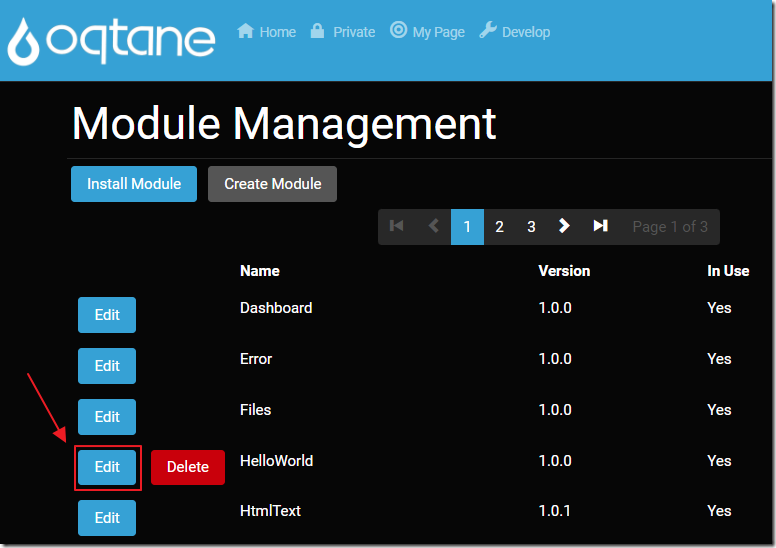
Click the Edit button to view the Module definition.
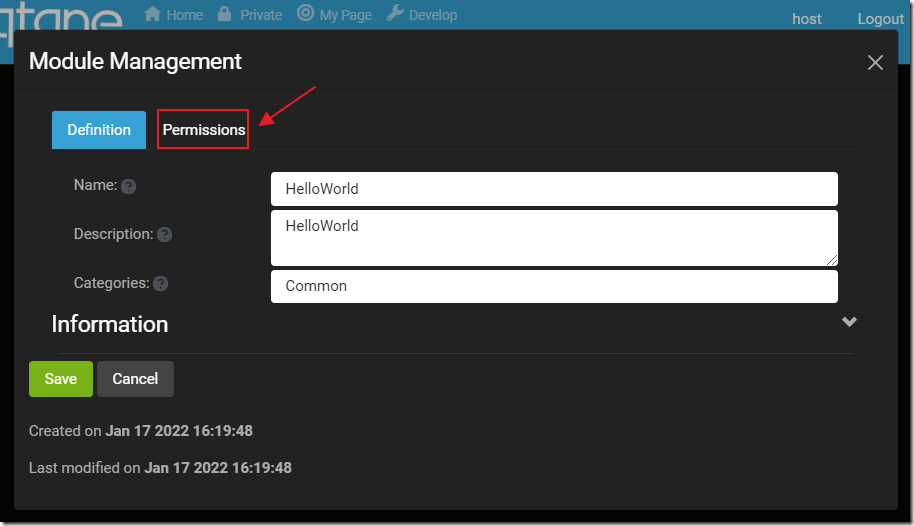
Click the Permissions tab…
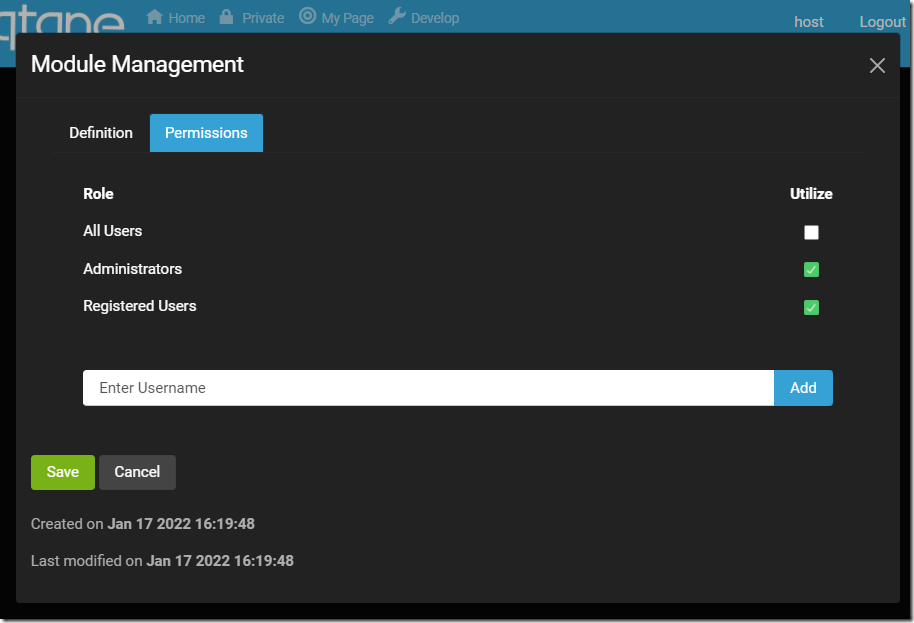
…and control the default visibility and access to the module.
Note: A module can have several instances in the Oqtane application, each with its own permissions.
Place The Module On A Page
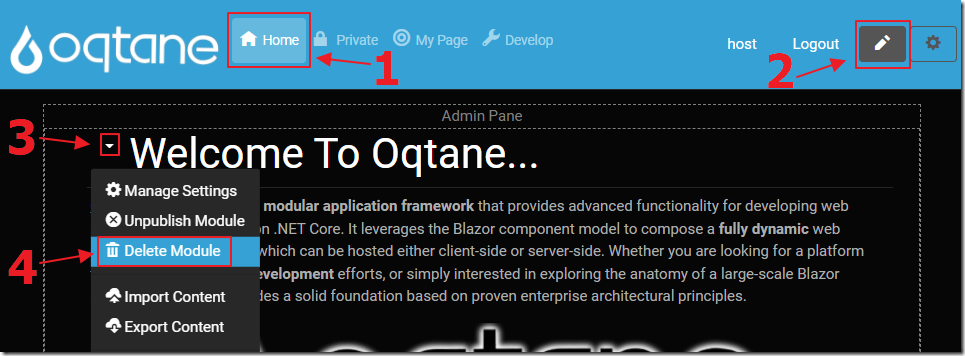
We can click on the Home tab to navigate to the main page, ensure we are in edit mode, and delete the existing instances of the HtmlText modules.
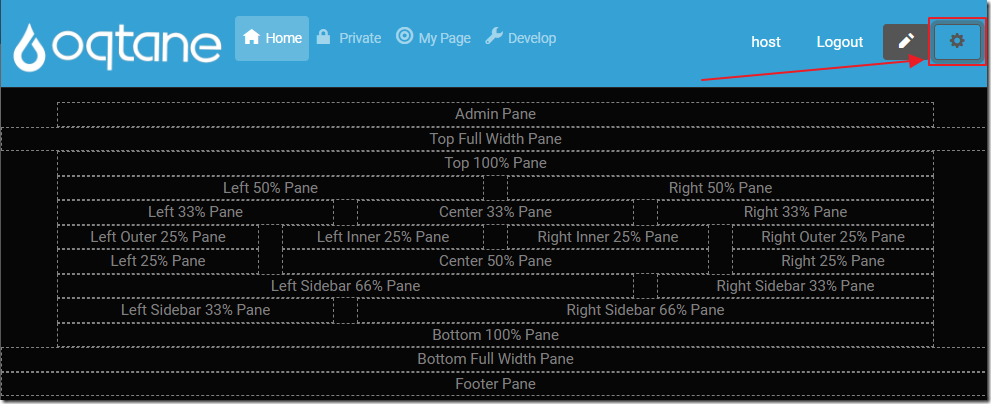
We can then select the Gear icon to open the Control Panel.
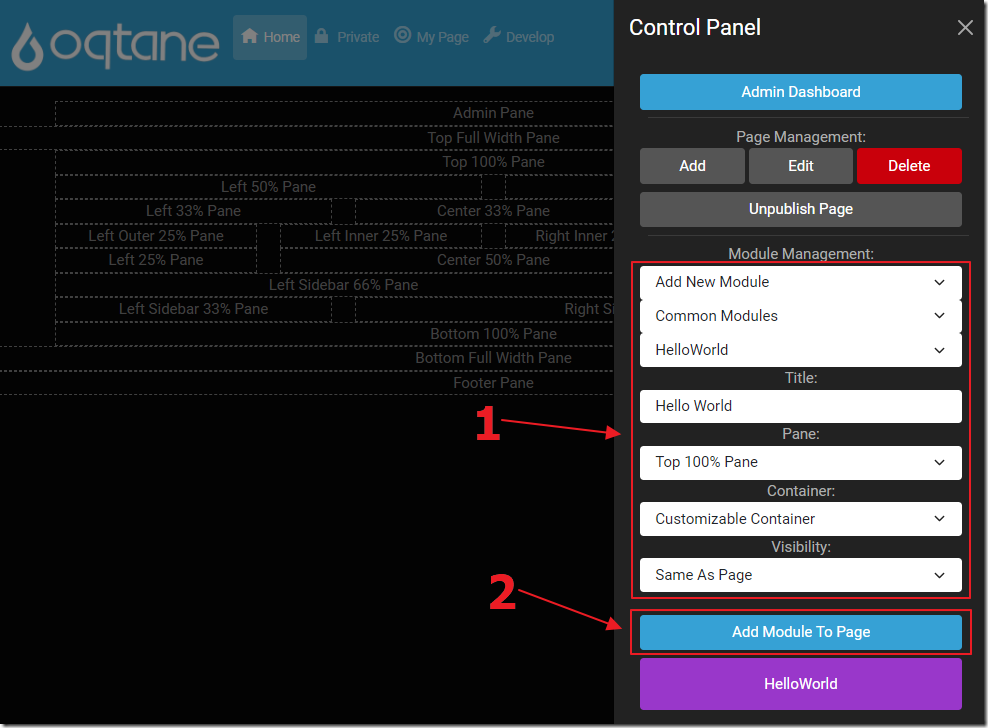
We can then add an instance of the module to the page.
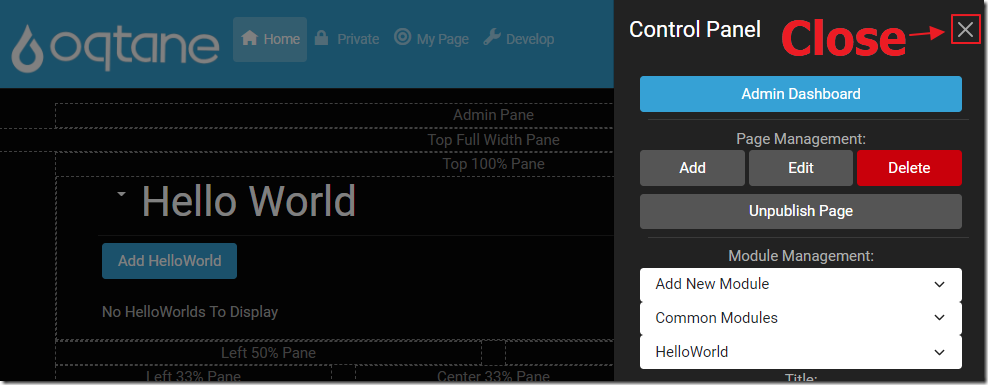
We can then close the Control Panel.
URL Routing
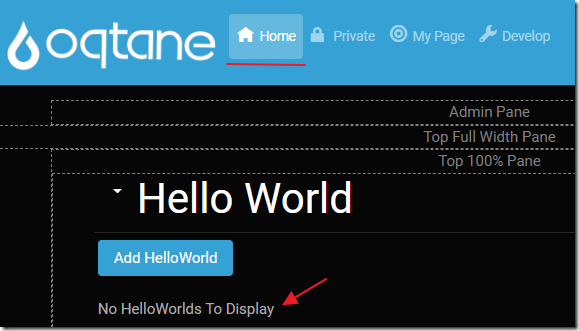
We will note that the instance of the module on the Home tab has no records.
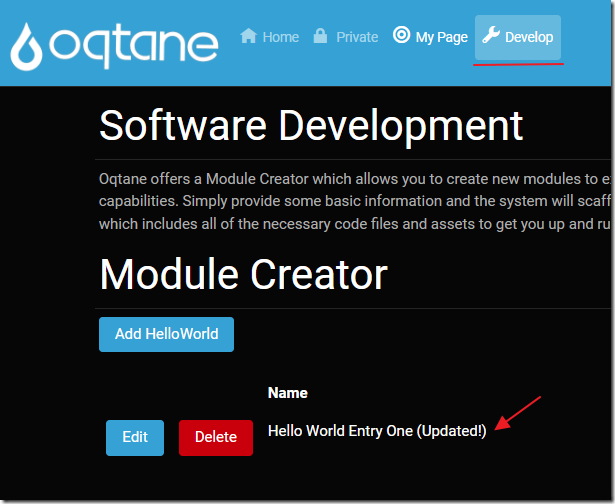
If we return to the module instance on the Develop tab, we see that there are records.

If we click on the Add HelloWorld button, on each instance of the module, and examine the URL, it provides insights into how this works.
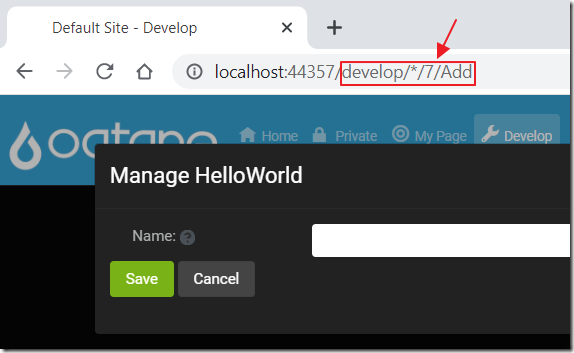
On the Develop tab the URL resembles the image above.
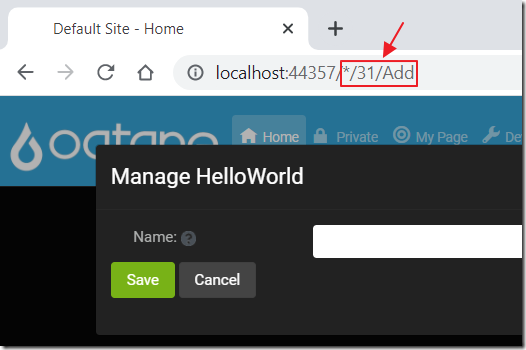
On the Home tab the URL resembles the image above.

The URL is composed of the following parts that help segment data for each module instance:
- Site - An Oqtane installation is composed of one or more tenants, each with its own site URL
- Path - An Oqtane tab can have a custom name for the URL path to load the page otherwise, the tab name is used for the URL path. If the path is omitted, the Home tab will be displayed.
- Module Instance Id - An Oqtane module can have multiple instances, each with a unique module ID
- Module Component - Typical controls are Edit and Settings. Additional controls can be created and loaded.
Looking At The Code and Data
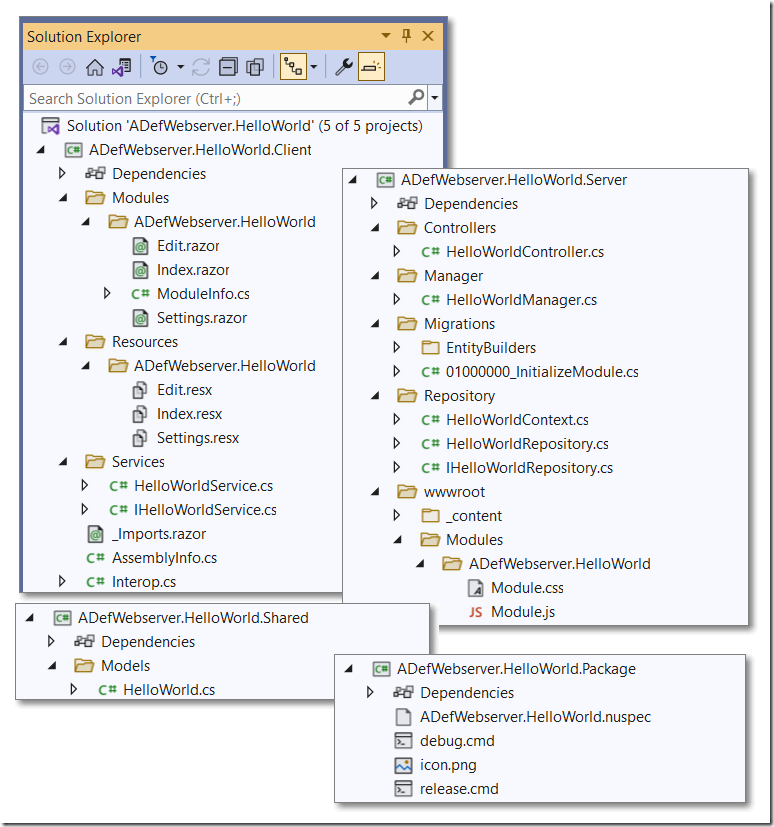
In Visual Studio, we can see that the wizard created a lot of code that gives us a good starting point for our custom module.
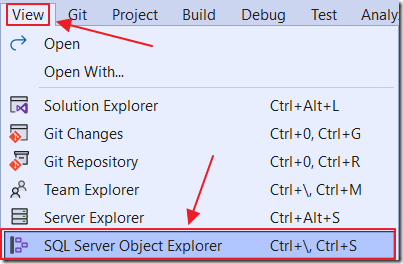
We can open the database using the Visual Studio SQL Server Object Explorer.
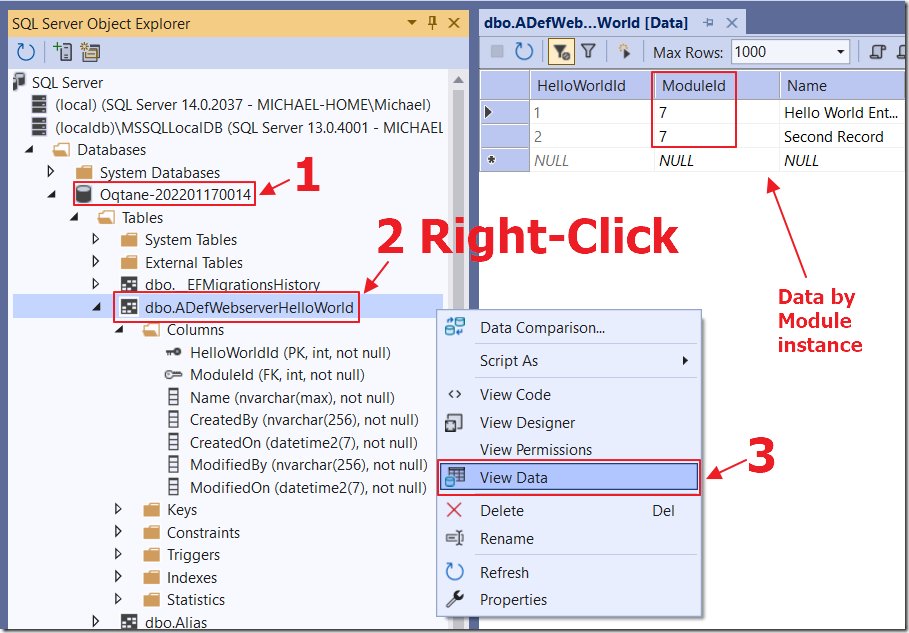
When we look in the database, we see that the table has been created to hold the data for the module code was created.
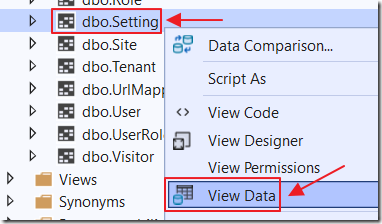
We can also look at the data in the Settings table.

We see the value we entered in the Settings popup earlier.
Update The Data Layer
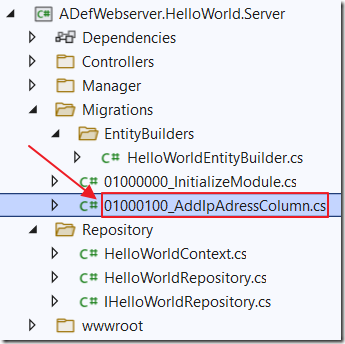
We can update the data layer of the module to an a IpAddress column.
Add a new file called 01000100_AddIpAdressColumn.cs using the following code:
using Microsoft.EntityFrameworkCore.Infrastructure;using Microsoft.EntityFrameworkCore.Migrations;using Oqtane.Databases.Interfaces;using Oqtane.Migrations;using ADefWebserver.HelloWorld.Migrations.EntityBuilders;using ADefWebserver.HelloWorld.Repository;namespace ADefWebserver.HelloWorld.Migrations{[DbContext(typeof(HelloWorldContext))][Migration("HelloWorld.01.00.01.00")]public class AddIpAddressColumn : MultiDatabaseMigration{public AddIpAddressColumn(IDatabase database) : base(database){}protected override void Up(MigrationBuilder migrationBuilder){var helloWorldEntityBuilder = new HelloWorldEntityBuilder(migrationBuilder, ActiveDatabase);//Add IpAddress column to ADefWebserverHelloWorld table//ADefWebserverHelloWorld table is declared in HelloWorldEntityBuilderhelloWorldEntityBuilder.AddStringColumn("IpAddress", 200, true, true);}protected override void Down(MigrationBuilder migrationBuilder){var helloWorldEntityBuilder = new HelloWorldEntityBuilder(migrationBuilder, ActiveDatabase);helloWorldEntityBuilder.DropColumn("IpAddress");}}}
Note: The best way to diagnose Migration issues is to rely on the Log file created in the Oqtane.Server\Content\Log folder.
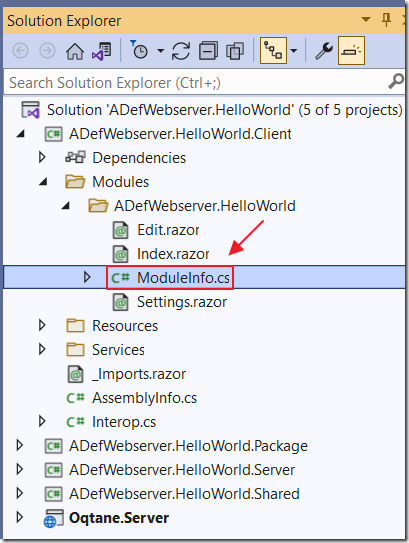
In the Client project, open the ModuleInfo.cs file and update the Version property to "1.0.1" and the ReleaseVersions property to "1.0.0,1.0.1" so the code reads:
using Oqtane.Models;using Oqtane.Modules;namespace ADefWebserver.HelloWorld{public class ModuleInfo : IModule{public ModuleDefinition ModuleDefinition => new ModuleDefinition{Name = "HelloWorld",Description = "HelloWorld",Version = "1.0.1",ServerManagerType = "ADefWebserver.HelloWorld.Manager.HelloWorldManager, " +"ADefWebserver.HelloWorld.Server.Oqtane",ReleaseVersions = "1.0.0,1.0.1",Dependencies = "ADefWebserver.HelloWorld.Shared.Oqtane",PackageName = "ADefWebserver.HelloWorld"};}}
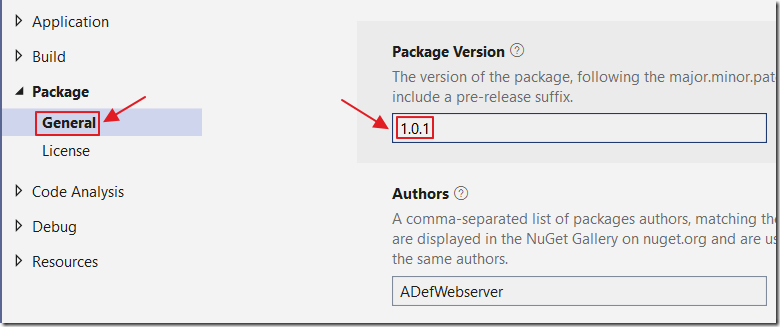
Also, go into the Properties of the Client, Server, and Shared projects, in the Visual Studio Solution Explorer, and update the Package Version to 1.0.1.
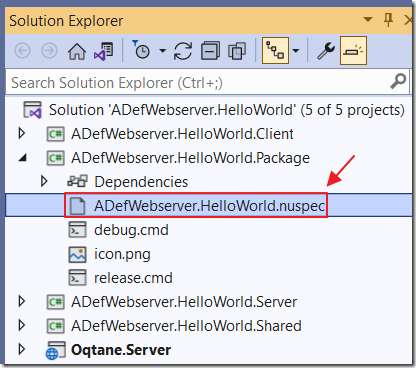
Finally, open the ADefWebserver.HelloWorld.nuspec file and change the version to "1.0.1".

Switch the ADefWebserver.HelloWorld solution to Release mode and then rebuild it.

This will cause a new, updated NuGet package to be created and deployed to the Oqtane site.
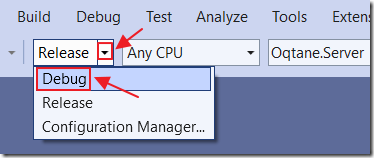
Switch the ADefWebserver.HelloWorld solution back to Debug mode
Close the web browser running the Oqtane site, and in the Visual Studio instance running the Oqtane site, restart the Oqtane site (using Start Without Debugging).
The Oqtane site will detect the updated NuGet package and run the updated .sql script.
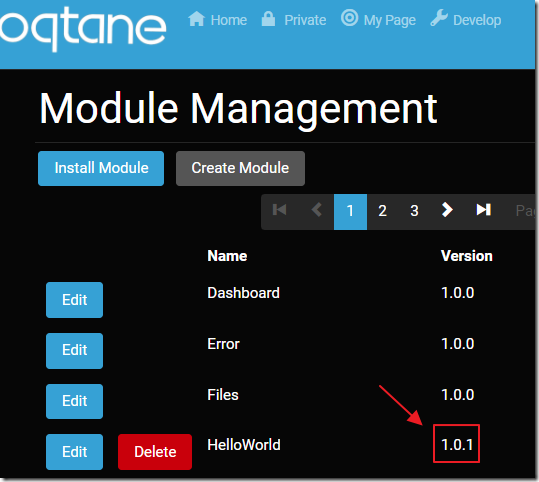
We can confirm this because the version for the module, in Module Management, will have changed to 1.0.1.
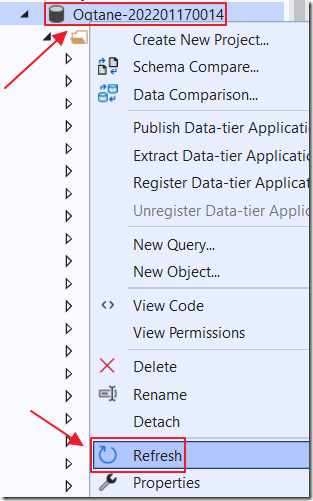
In the Visual Studio SQL Server Object Explorer Refresh the database.
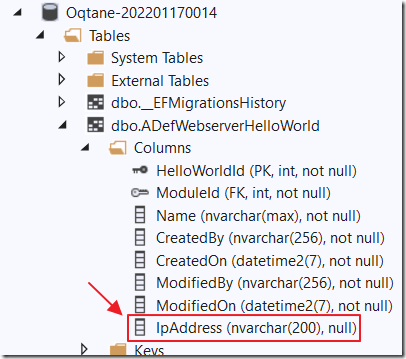
You will see that the new field has been added to the database table.
Update The Code
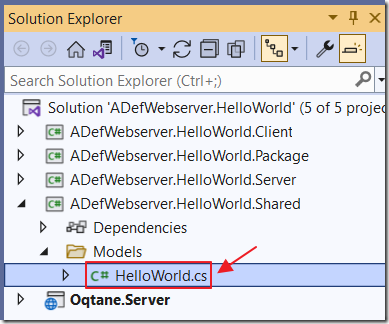
We will now update the code to save and display the IpAddress.
Open the HelloWorld.cs file (in the Shared project), and add a property for the IpAddress so the code now reads:
[Table("ADefWebserverHelloWorld")]public class HelloWorld : IAuditable{[Key]public int HelloWorldId { get; set; }public int ModuleId { get; set; }public string Name { get; set; }public string IpAddress { get; set; }public string CreatedBy { get; set; }public DateTime CreatedOn { get; set; }public string ModifiedBy { get; set; }public DateTime ModifiedOn { get; set; }}
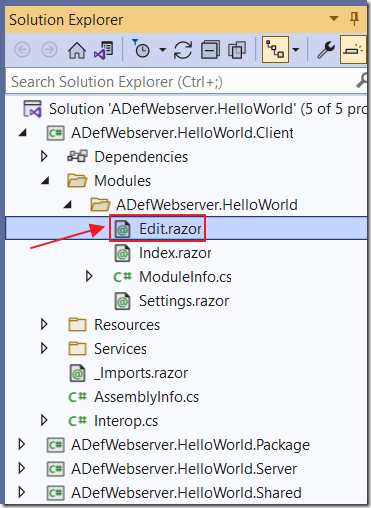
Next, open the Edit.razor control (in the Client project), and alter it, (changes are in yellow highlight), to record and display the IpAddress:
@using Oqtane.Modules.Controls@using ADefWebserver.HelloWorld.Services@using ADefWebserver.HelloWorld.Models@namespace ADefWebserver.HelloWorld@inherits ModuleBase@inject IHelloWorldService HelloWorldService@inject NavigationManager NavigationManager@inject IStringLocalizer<Edit> Localizer
<form @ref="form" class="@(validated ? " was-validated" : "needs-validation" )" novalidate><div class="container"><div class="row mb-1 align-items-center"><Label Class="col-sm-3" For="name" HelpText="Enter a name" ResourceKey="Name">Name: </Label><div class="col-sm-9"><input id="name" class="form-control" @bind="@_name" required /></div></div><div class="row mb-1 align-items-center"><Label Class="col-sm-3">IP Address: </Label><div class="col-sm-9"><Label Class="col-sm-3">@_ipAddress</Label></div></div></div><button type="button" class="btn btn-success" @onclick="Save">@Localizer["Save"]</button><NavLink class="btn btn-secondary" href="@NavigateUrl()">@Localizer["Cancel"]</NavLink><br /><br />@if (PageState.Action == "Edit"){<AuditInfo CreatedBy="@_createdby" CreatedOn="@_createdon" ModifiedBy="@_modifiedby" ModifiedOn="@_modifiedon"></AuditInfo>}</form>
@code {public override SecurityAccessLevel SecurityAccessLevel => SecurityAccessLevel.Edit;public override string Actions => "Add,Edit";public override string Title => "Manage HelloWorld";public override List<Resource> Resources => new List<Resource>(){new Resource { ResourceType = ResourceType.Stylesheet, Url = ModulePath() + "Module.css" }};private ElementReference form;private bool validated = false;private int _id;private string _name;private string _ipAddress;private string _createdby;private DateTime _createdon;private string _modifiedby;private DateTime _modifiedon;protected override async Task OnInitializedAsync(){try{if (PageState.Action == "Edit"){_id = Int32.Parse(PageState.QueryString["id"]);HelloWorld HelloWorld = await HelloWorldService.GetHelloWorldAsync(_id, ModuleState.ModuleId);if (HelloWorld != null){_name = HelloWorld.Name;_ipAddress = HelloWorld.IpAddress;_createdby = HelloWorld.CreatedBy;_createdon = HelloWorld.CreatedOn;_modifiedby = HelloWorld.ModifiedBy;_modifiedon = HelloWorld.ModifiedOn;}}}catch (Exception ex){await logger.LogError(ex, "Error Loading HelloWorld {HelloWorldId} {Error}", _id, ex.Message);AddModuleMessage(Localizer["Message.LoadError"], MessageType.Error);}}private async Task Save(){try{validated = true;var interop = new Oqtane.UI.Interop(JSRuntime);if (await interop.FormValid(form)){if (PageState.Action == "Add"){HelloWorld HelloWorld = new HelloWorld();HelloWorld.ModuleId = ModuleState.ModuleId;HelloWorld.Name = _name;HelloWorld.IpAddress = PageState.User.LastIPAddress;HelloWorld = await HelloWorldService.AddHelloWorldAsync(HelloWorld);await logger.LogInformation("HelloWorld Added {HelloWorld}", HelloWorld);}else{HelloWorld HelloWorld = await HelloWorldService.GetHelloWorldAsync(_id, ModuleState.ModuleId);HelloWorld.Name = _name;HelloWorld.IpAddress = PageState.User.LastIPAddress;await HelloWorldService.UpdateHelloWorldAsync(HelloWorld);await logger.LogInformation("HelloWorld Updated {HelloWorld}", HelloWorld);}NavigationManager.NavigateTo(NavigateUrl());}else{AddModuleMessage(Localizer["Message.SaveValidation"], MessageType.Warning);}}catch (Exception ex){await logger.LogError(ex, "Error Saving HelloWorld {Error}", ex.Message);AddModuleMessage(Localizer["Message.SaveError"], MessageType.Error);}}}
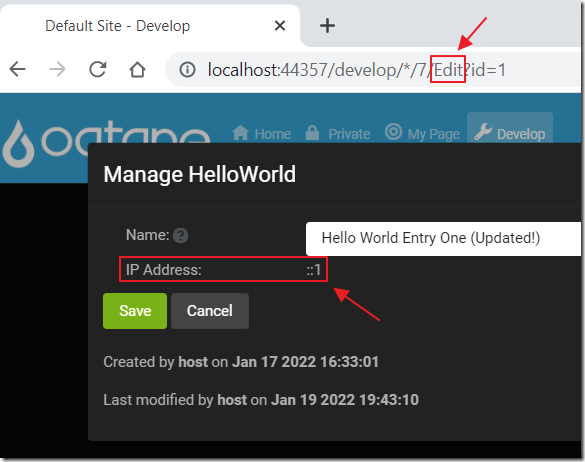
Build the Solution and then close the web browser running the Oqtane site, and in the Visual Studio instance running the Oqtane site, restart the Oqtane site (using Start Without Debugging).
The Edit control will now record and display the IP Address.
Debugging Oqtane Modules
![]()
Debugging Oqtane modules is easy, you will want to open the Oqtane solution in one instance of Visual Studio, and the Oqtane module in a separate instance of Visual Studio.
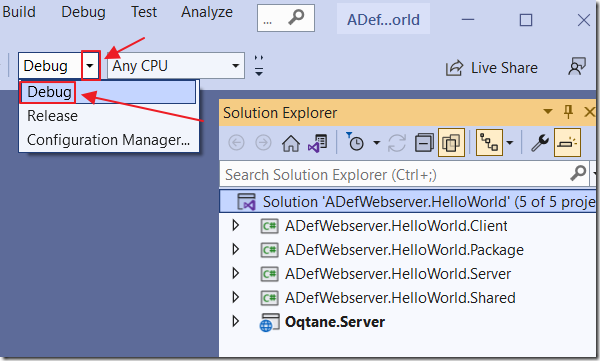
In the Visual Studio instance that contains the external module, select Debug mode.
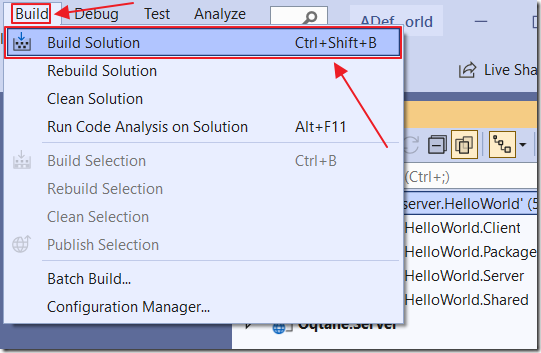
Then Build Solution.
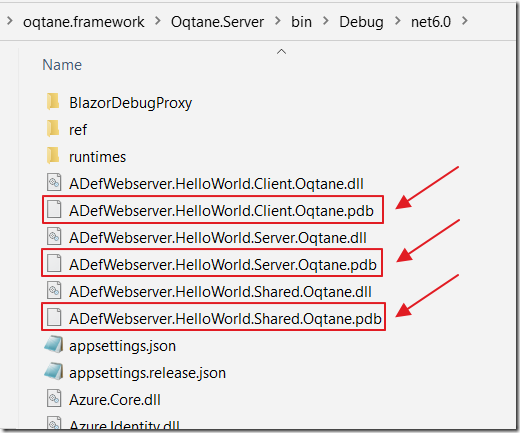
You will see that the .pdb files, required for debugging, have been copied to the Oqtane solution.
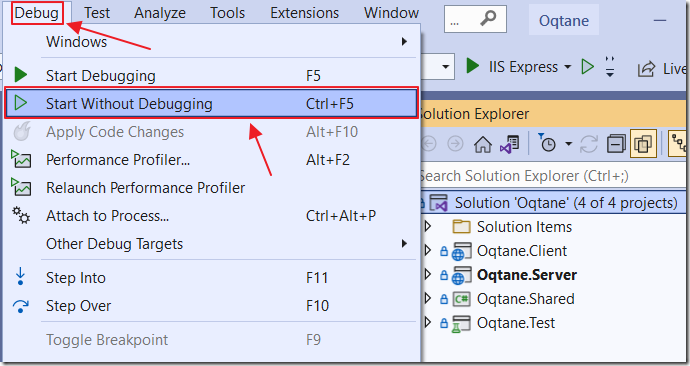
In the Visual Studio instance that contains the Oqtane solution, rebuild the solution, then select Debug, then Start Without Debugging.
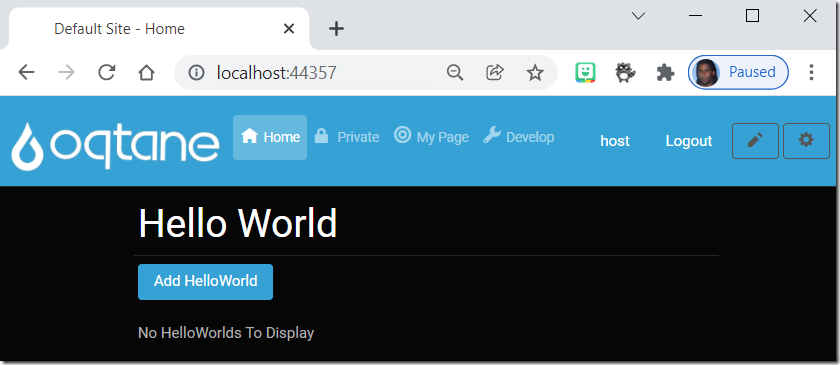
This will load Oqtane in the web browser.
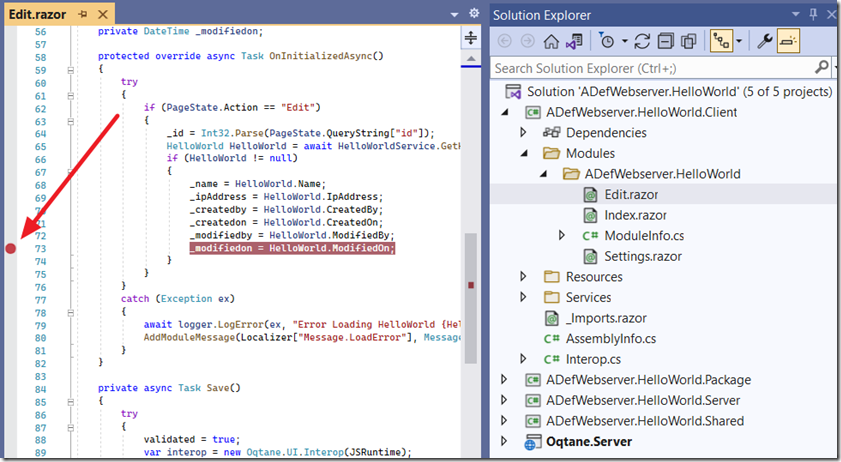
In the Visual Studio instance that contains the external module, set a breakpoint.
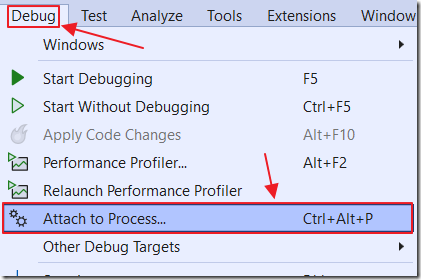
Select Debug, then Attach to Process.
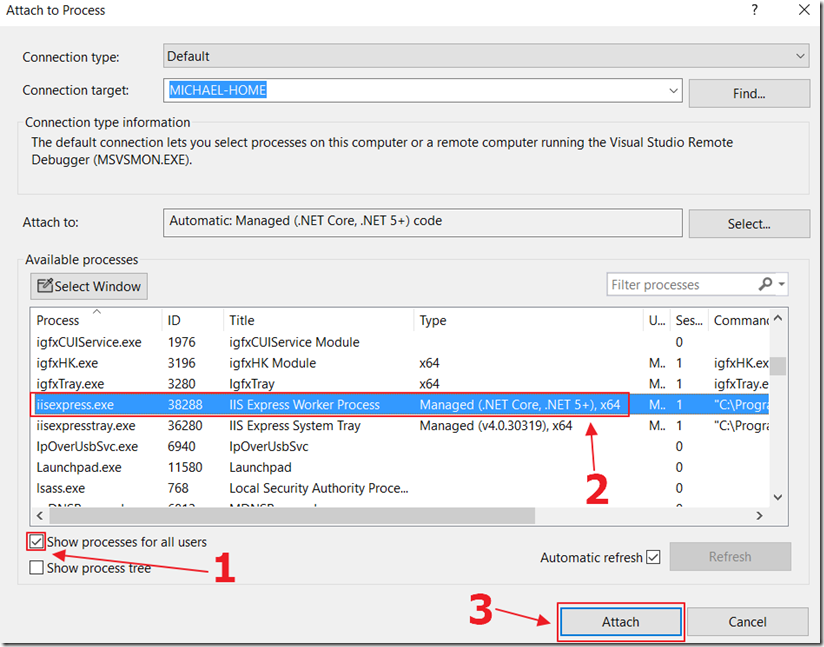
Attach to the iisexpress.exe process that Oqtane is running under.
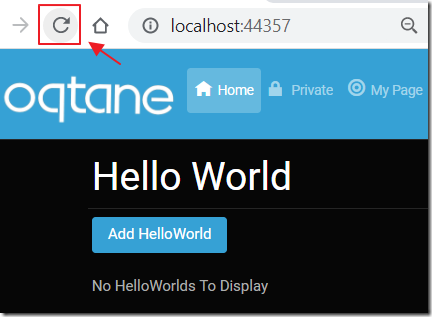
Return to the web browser, and refresh the page and navigate to a page that contains the module.
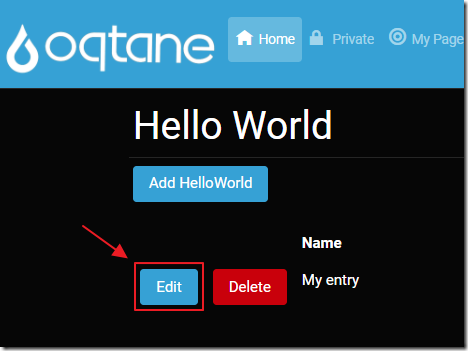
Perform an action that will trigger the code being debugged.
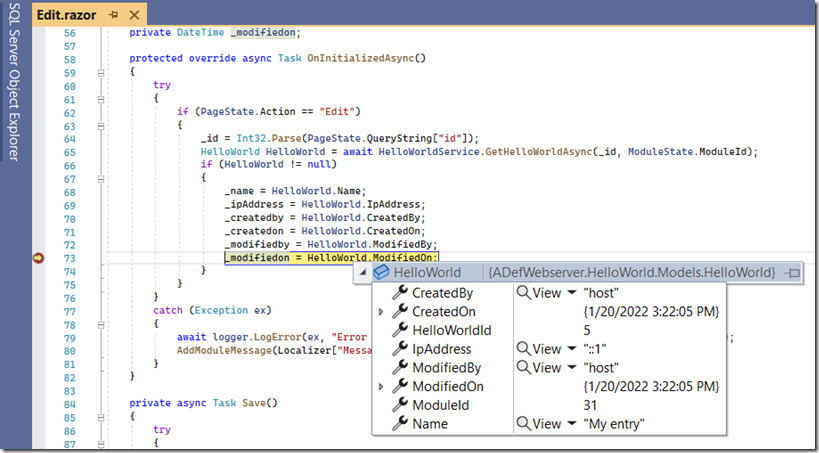
When using the module, in the web browser, your break points will be hit, allowing you to debug the module.
Distribute Your Oqtane Custom Module

We want to build the project, create the NuGet package for the Module, and put that Nuget package in the Module folder of the Oqtane solution.
Switch to Release mode (By default, the Nuget package is only set to be created when building in Release mode).
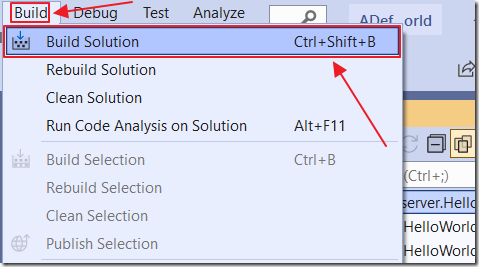
Build the Solution.
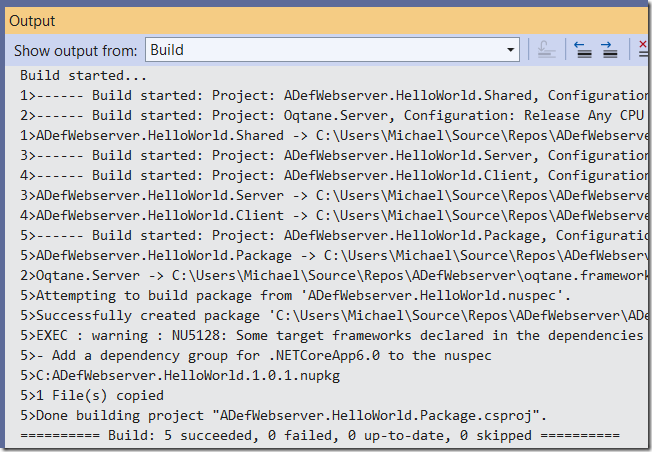
It should Build without errors.

When we view the Oqtane.Server/wwwroot/Modules directory of the Oqtane solution, we see the NuGet package for the Blog module has been copied to that location.
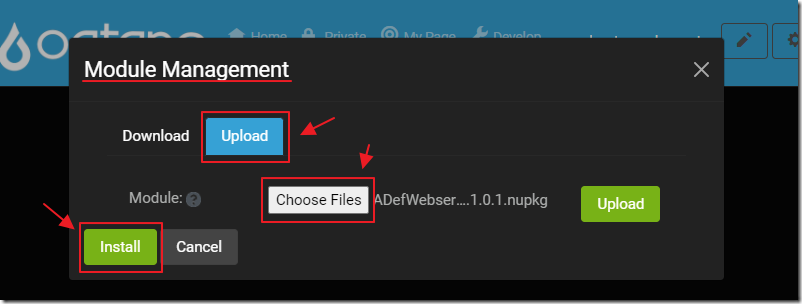
You can install the .nupkg module in other Oqtane installations using Module Management, either by uploading it, or downloading it from Nuget in the Available Modules section (if you first upload the module to Nuget with the tag: Oqtane
Note: the module creator creates a *.nuspec for your module which contains the required Nuget tags automatically.
Download
The sample project is available on the Downloads page on this site.
You must have Visual Studio 2022 (or higher) installed to run the code.
Links
Upgrading a Blazor Oqtane Module
Using Syncfusion In Oqtane Modules
Using Radzen In Oqtane Modules
Using Custom JavaScript in Blazor Oqtane
Creating a Custom Distribution of Blazor Oqtane Using Site Templates
Upgrading a Blazor Oqtane Module


