6/20/2022 Admin
Creating A Step-By-Step End-To-End Database MAUI Blazor Application
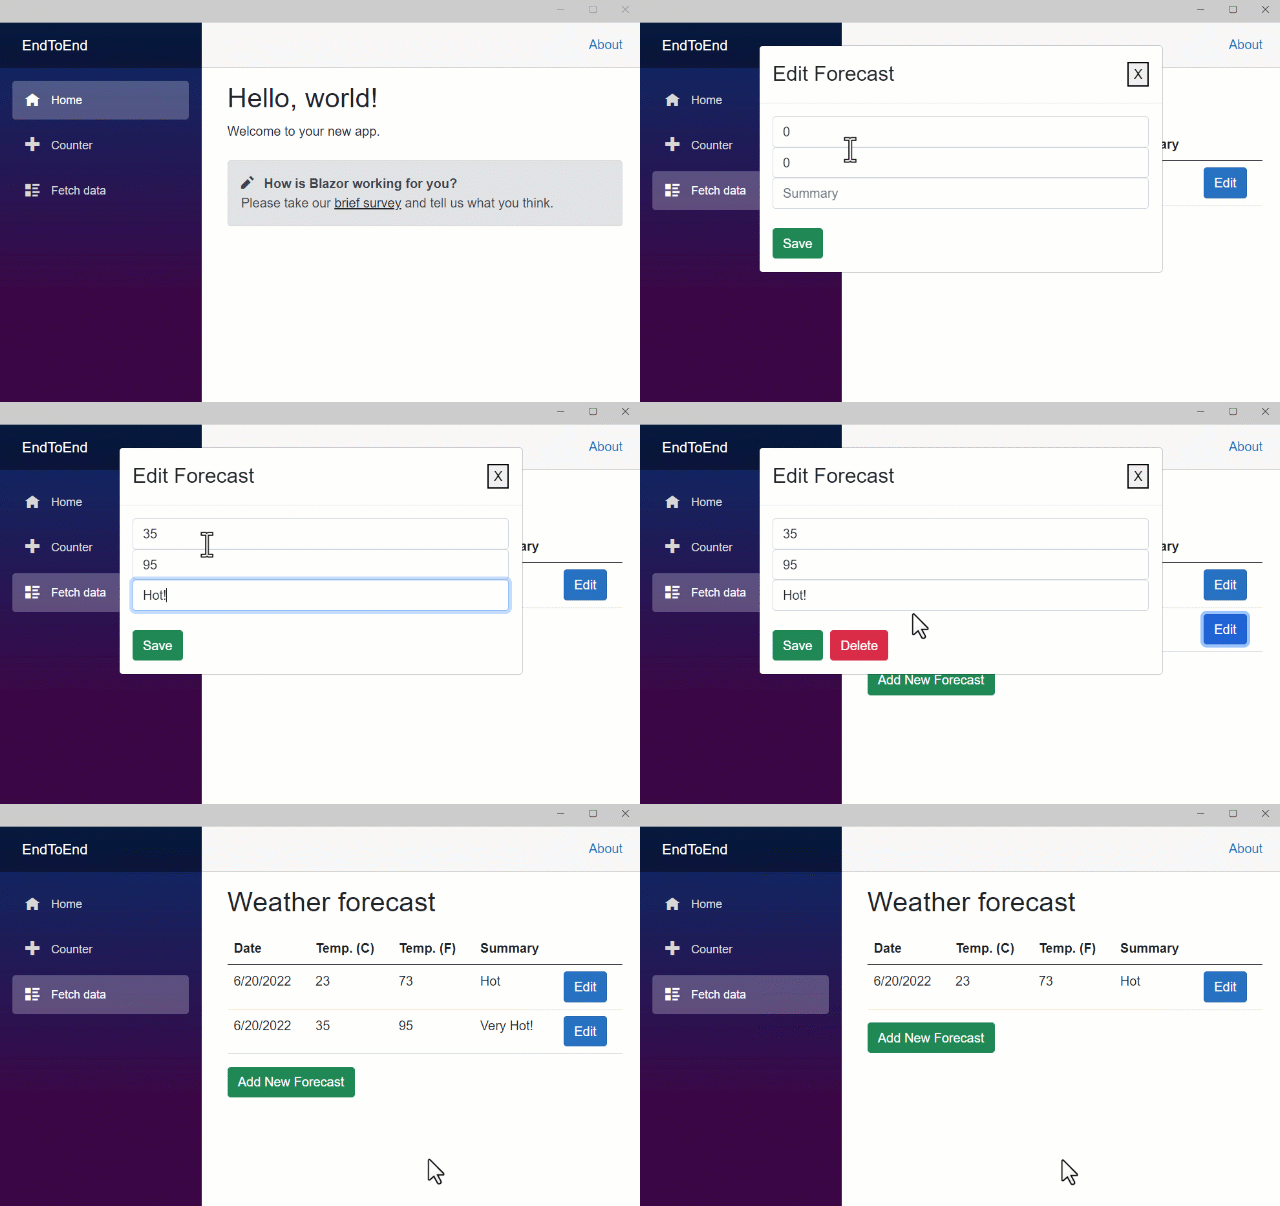
MAUI Blazor allows us to create applications that run natively on the operating system (rather than in a web browser). In addition to running our applications on Windows, MAUI Blazor allows us to run our applications on Android, iOS, and MacOS.
Note: MAUI Blazor allows you to create applications that run on multiple platforms, however, this tutorial only covers creating an application that runs on Windows.
A Look at The Completed Application
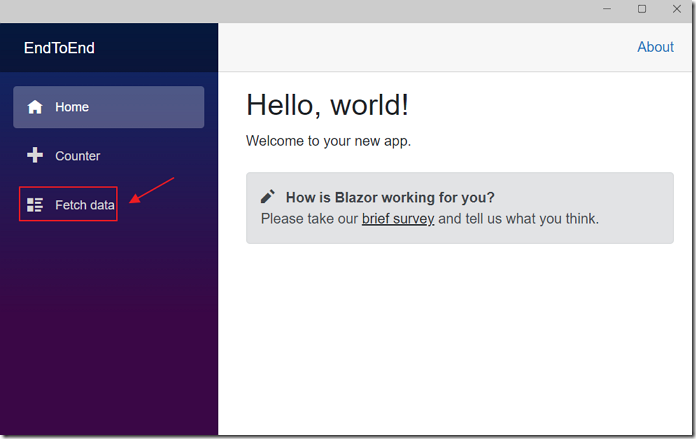
When the application is run, you will need to navigate to the Fetch data page to interact with the code described in the tutorial below.
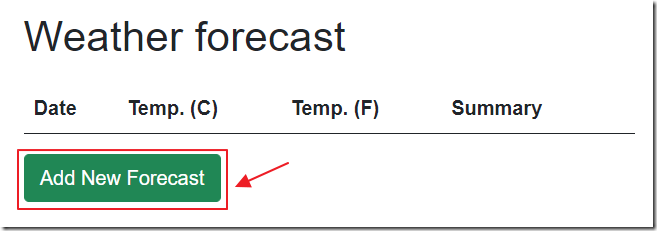
Click the Add New Forecast button to add a new forecast.
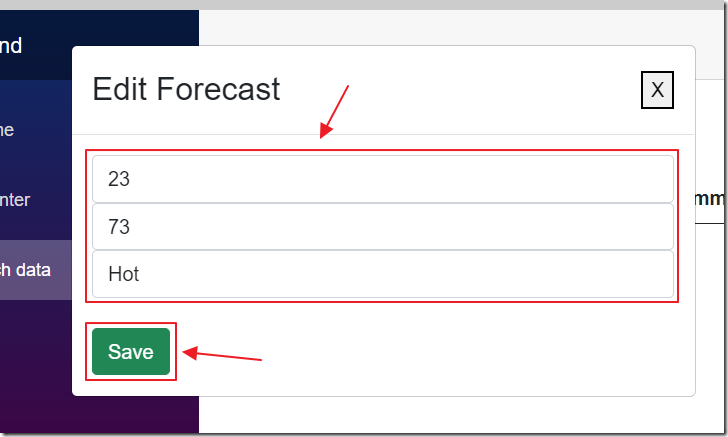
Enter the forecast in Celsius, Fahrenheit, and a Summary and click the Save button.
The data is saved to an SQLite database.
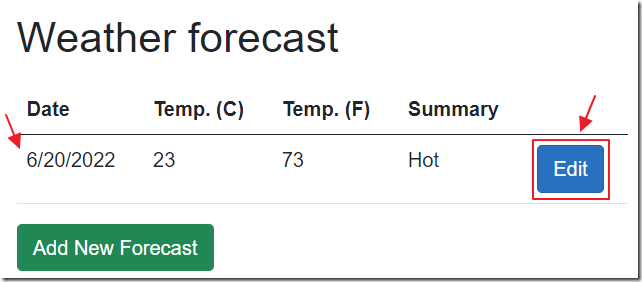
The forecast will appear in the grid.
Clicking the Edit button will allow you to edit the forecast by opening it up in a Popup.
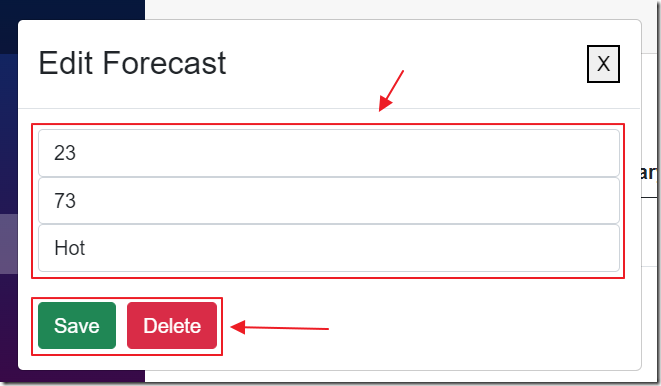
The Popup will allow you to make changes and click the Save button to update the record.
Optionally, you can click the Delete button to delete the record.
Clicking the X button will close the Popup without making any changes.
Prerequisites
- Visual Studio 2022 Preview (or higher) with the .NET Multi-platform App UI development workload.
Create The MAUI Blazor Application
Open Visual Studio.

Select Create a new Project.
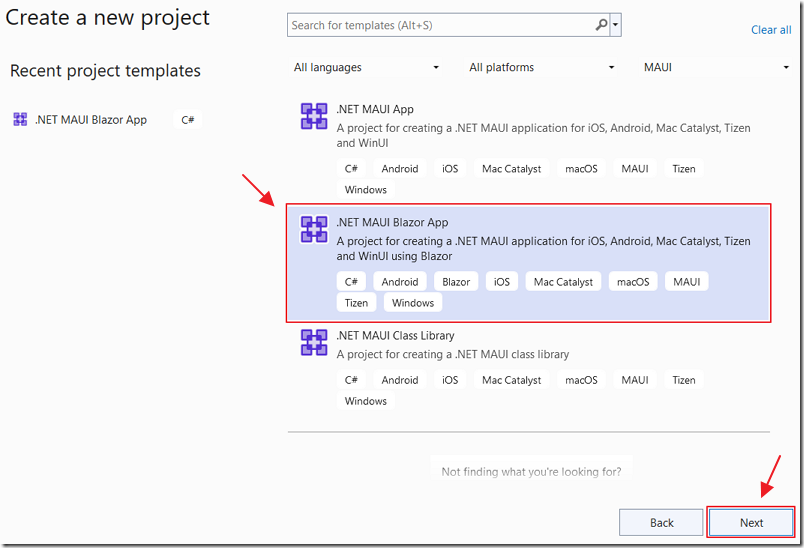
Select .Net MAUI Blazor App and click Next.
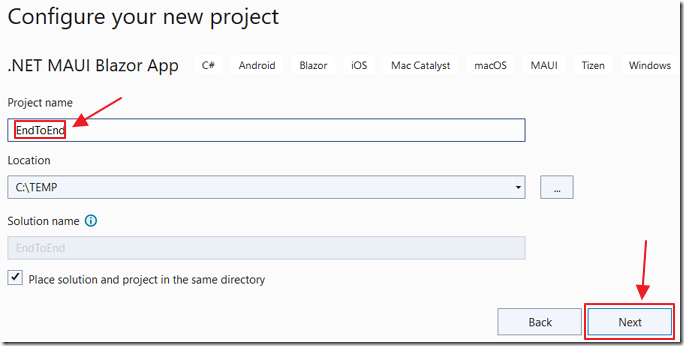
Name it EndToEnd and click Next.

Select .Net 6.
Click Create.
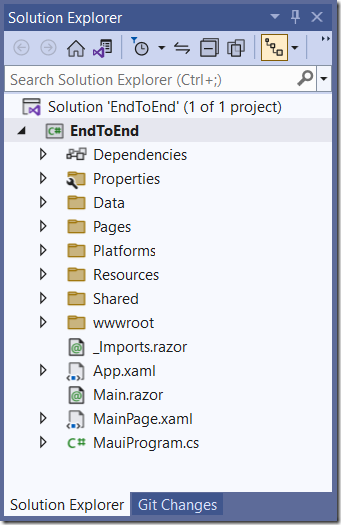
The project will be created.
Configure the SQLite Database
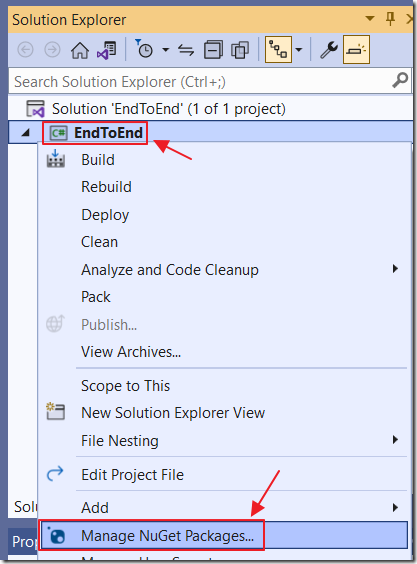
Right-click on the Project node and select Manage NuGet Packages…
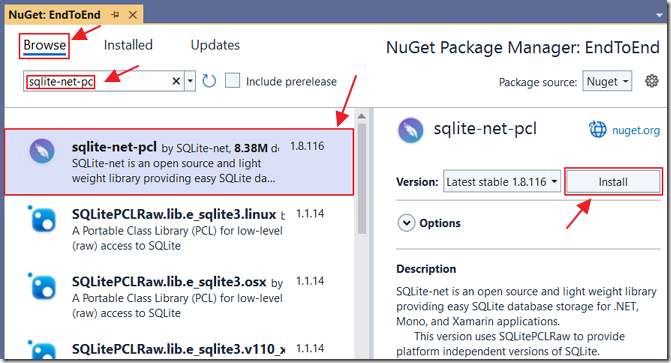
Add the following NuGet package: sqlite-net-pc
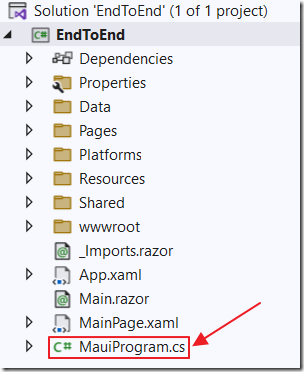
Next, open MauiProgram.cs.
Replace:
builder.Services.AddSingleton<WeatherForecastService>();
With:
// Set path to the SQLite database (it will be created if it does not exist)var dbPath =Path.Combine(Environment.GetFolderPath(Environment.SpecialFolder.LocalApplicationData),@"WeatherForecasts.db");// Register WeatherForecastService and the SQLite databasebuilder.Services.AddSingleton<WeatherForecastService>(s => ActivatorUtilities.CreateInstance<WeatherForecastService>(s, dbPath));
Create Weather Forecast Service
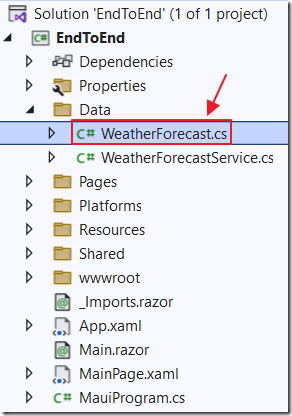
Open WeatherForecast.cs and replace all the code with the following code:
using SQLite;namespace EndToEnd.Data;public class WeatherForecast{[PrimaryKey, AutoIncrement]public int Id { get; set; }public DateTime Date { get; set; }public int TemperatureC { get; set; }public int TemperatureF { get; set; }[MaxLength(4000)]public string Summary { get; set; }}
This code defines the WeatherForecast database table that will hold the data.
Code in the WeatherForecastService (CreateTableAsync) will use this definition to create the table in the SQLite database.
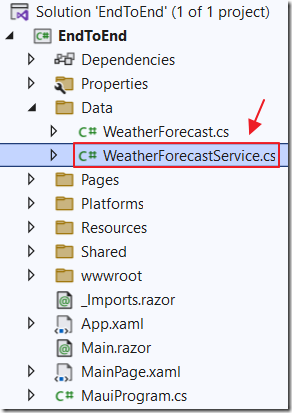
Open WeatherForecastService.cs and replace all the code with the following code:
using SQLite;namespace EndToEnd.Data;public class WeatherForecastService{string _dbPath;public string StatusMessage { get; set; }private SQLiteAsyncConnection conn;public WeatherForecastService(string dbPath){_dbPath = dbPath;}private async Task InitAsync(){// Don't Create database if it existsif (conn != null)return;// Create database and WeatherForecast Tableconn = new SQLiteAsyncConnection(_dbPath);await conn.CreateTableAsync<WeatherForecast>();}public async Task<List<WeatherForecast>> GetForecastAsync(){await InitAsync();return await conn.Table<WeatherForecast>().ToListAsync();}public async Task<WeatherForecast> CreateForecastAsync(WeatherForecast paramWeatherForecast){// Insertawait conn.InsertAsync(paramWeatherForecast);// return the object with the// auto incremented Id populatedreturn paramWeatherForecast;}public async Task<WeatherForecast> UpdateForecastAsync(WeatherForecast paramWeatherForecast){// Updateawait conn.UpdateAsync(paramWeatherForecast);// Return the updated objectreturn paramWeatherForecast;}public async Task<WeatherForecast> DeleteForecastAsync(WeatherForecast paramWeatherForecast){// Deleteawait conn.DeleteAsync(paramWeatherForecast);return paramWeatherForecast;}}
This code will create the SQLite database, if it does not already exist, and create the WeatherForecast table.
It also exposes methods that will allow code, to be added later, that will Create, Read, Update, and Delete data.
Create The User Interface
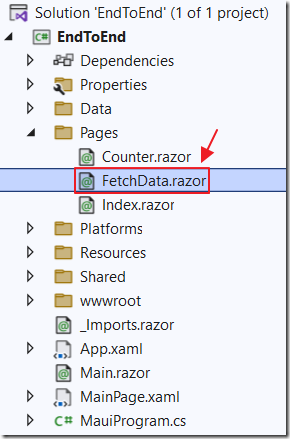
Open the FetchData.razor file.
Replace all the code with the following code:
@page "/fetchdata"@using EndToEnd.Data@inject WeatherForecastService ForecastService<h1>Weather forecast</h1><p style="color:red">@Error</p>@if (forecasts == null){<!-- Show this if the current user has no data... yet... --><p><em>Loading...</em></p>}
Add the following code that will display a UI of the data in the forecasts collection if it is not null (note, it can still be empty if there is no data):
else{<!-- Show the forecasts for the current user --><table class="table"><thead><tr><th>Date</th><th>Temp. (C)</th><th>Temp. (F)</th><th>Summary</th><th></th></tr></thead><tbody>@foreach (var forecast in forecasts){<tr><td>@forecast.Date.ToShortDateString()</td><td>@forecast.TemperatureC</td><td>@forecast.TemperatureF</td><td>@forecast.Summary</td><td><!-- Edit the current forecast --><button class="btn btn-primary"@onclick="(() => EditForecast(forecast))">Edit</button></td></tr>}</tbody></table><p><!-- Add a new forecast --><button class="btn btn-success"@onclick="AddNewForecast">Add New Forecast</button></p>
Finally, add the following code that will display a popup to edit a forecast:
@if (ShowPopup){<!-- This is the popup to create or edit a forecast --><div class="modal" tabindex="-1" style="display:block" role="dialog"><div class="modal-dialog"><div class="modal-content"><div class="modal-header"><h3 class="modal-title">Edit Forecast</h3><!-- Button to close the popup --><button type="button" class="close"@onclick="ClosePopup"><span aria-hidden="true">X</span></button></div><!-- Edit form for the current forecast --><div class="modal-body"><input class="form-control" type="text"placeholder="Celsius forecast"@bind="objWeatherForecast.TemperatureC" /><input class="form-control" type="text"placeholder="Fahrenheit forecast"@bind="objWeatherForecast.TemperatureF" /><input class="form-control" type="text"placeholder="Summary"@bind="objWeatherForecast.Summary" /><br /><!-- Button to save the forecast --><button class="btn btn-success"@onclick="SaveForecast">Save</button> <!-- Only show delete button if not a new record -->@if (objWeatherForecast.Id > 0){<!-- Button to delete the forecast --><button class="btn btn-danger"@onclick="DeleteForecast">Delete</button>}</div></div></div></div>}}
Create The Code For The User Interface
Add the following code that will create needed fields and populate the forecasts collection on page load:
@code{string Error = "";List<WeatherForecast> forecasts = new List<WeatherForecast>();WeatherForecast objWeatherForecast = new WeatherForecast();bool ShowPopup = false;protected override async Task OnInitializedAsync(){// Get the forecastsforecasts = await ForecastService.GetForecastAsync();}
Add the following code that will open the Popup to allow a new forecast to be added, or to edit an existing forecast:
void AddNewForecast(){// Make new forecastobjWeatherForecast = new WeatherForecast();// Set Id to 0 so we know it is a new recordobjWeatherForecast.Id = 0;// Open the PopupShowPopup = true;}void EditForecast(WeatherForecast weatherForecast){// Set the selected forecast// as the current forecastobjWeatherForecast = weatherForecast;// Open the PopupShowPopup = true;}
Add the following code that will close the Popup if the user clicks the X (cancel) button:
void ClosePopup(){// Close the PopupShowPopup = false;}
Add the following code that will save a forecast:
async Task SaveForecast(){// Close the PopupShowPopup = false;Error = "";try{// A new forecast will have the Id set to 0if (objWeatherForecast.Id == 0){// Create new forecastWeatherForecast objNewWeatherForecast = new WeatherForecast();objNewWeatherForecast.Date = System.DateTime.Now;objNewWeatherForecast.Summary = objWeatherForecast.Summary;objNewWeatherForecast.TemperatureC =Convert.ToInt32(objWeatherForecast.TemperatureC);objNewWeatherForecast.TemperatureF =Convert.ToInt32(objWeatherForecast.TemperatureF);// Save the resultvar NewWeatherForecast =await ForecastService.CreateForecastAsync(objNewWeatherForecast);// Add the Forcastforecasts.Add(NewWeatherForecast);}else{// This is an updateawait ForecastService.UpdateForecastAsync(objWeatherForecast);}}catch (Exception ex){Error = ex.Message;}}
Finally, Add the following code that will delete a forecast:
async Task DeleteForecast(){// Close the PopupShowPopup = false;try{Error = "";// Delete the forecastawait ForecastService.DeleteForecastAsync(objWeatherForecast);// Remove the Forcastforecasts.Remove(objWeatherForecast);}catch (Exception ex){Error = ex.Message;}}}
Links
Adding SQLite to the .NET MAUI application
Store local data with SQLite in a .NET MAUI app
.NET Multi-platform App UI documentation
New Resources to Get Started with .NET MAUI
.Net MAUI | Todo App | With Sqlite database
How do I implement authentication using SQLite in Blazor?
Blazor Help Website Links
Creating A Step-By-Step End-To-End Database Server-Side Blazor Application
Creating A Step-By-Step End-To-End Database Client-Side (WebAssembly) Blazor Application
Download
The project is available on the Downloads page on this site.
You must have Visual Studio Preview 2022 (or higher) installed to run the code.
