9/22/2020 Admin
Blazor Azure B2C User And Group Management
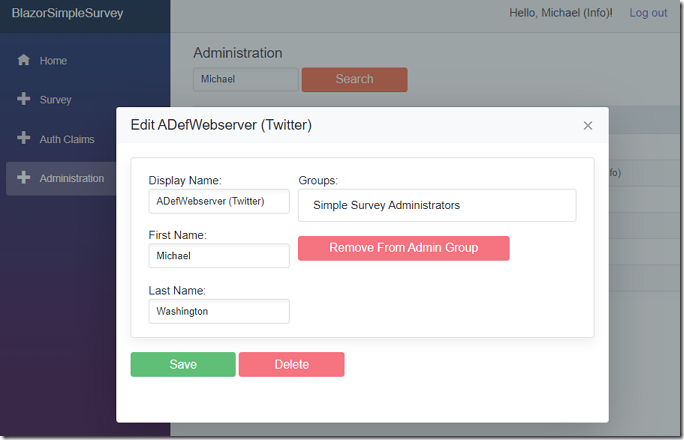
You can manage your users in your Azure Active Directory B2C tenant through your Blazor application, including adding and removing users from Groups.
Azure Active Directory B2C
Azure Active Directory B2C is a service that allows your Blazor website users to log in using their preferred social, enterprise logins (or they can create a new local account in your Azure B2C tenant). Because this is a Azure Active Directory tenant, you have access to powerful features such as Multi Factor Authentication and Conditional Access control.
You can get more details at the following link: Technical and feature overview - Azure Active Directory B2C | Microsoft Docs
The pricing is really affordable, basically you get the first 50,000 users for free.
Blazor Simple Survey
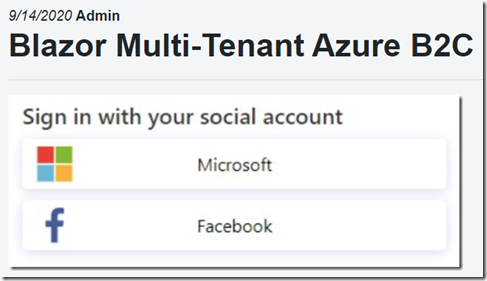
We start with the Blazor Simple Survey application covered in the article Blazor Multi-Tenant Azure B2C.
In that article, the construction of the basic application is covered as well as the following topics:
- Configuring Blazor to use Azure B2C
- Allow users from any Azure AD tenant to log In (Implementing Multi-Tenant Azure B2C)
- Implementing Custom Policies
- Logging a user into a Blazor application and storing their information in the local SQL Server
In this article we will cover the following user management features:
- Updating users
- Deleting users
- Detecting a user is in a role
- Adding users to roles
- Removing users from roles
Set-Up The User Management Application
The first step is to follow this link to find the directions to Register a Microsoft Graph application.
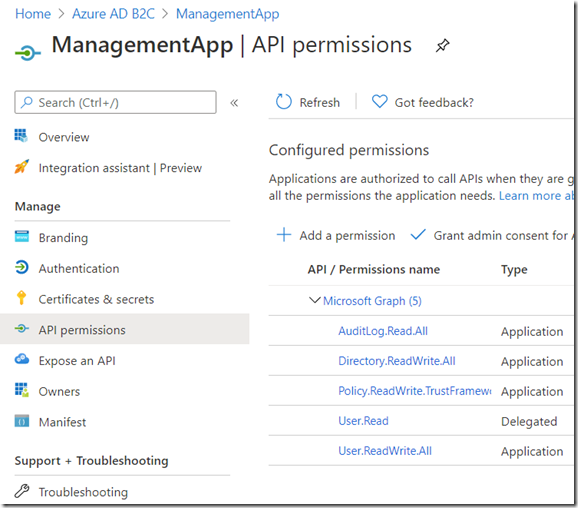
Ensure you add these permissions to the Azure Application you create:
- AuditLog.Read.All
- Directory.ReadWrite.All
- Policy.ReadWrite.TrustFramework
- User.Read
- User.ReadWrite.All
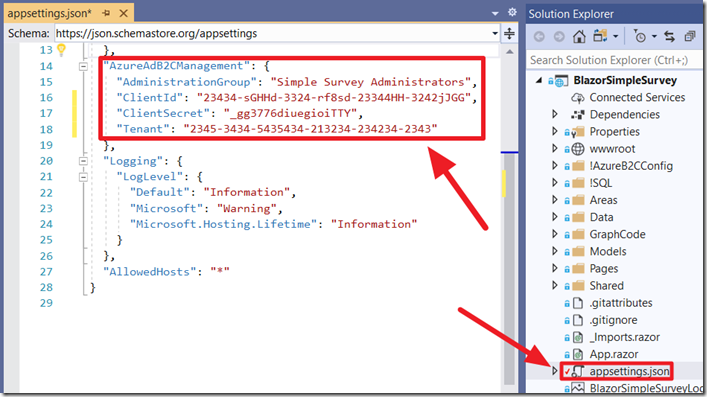
In the appsettings.json file of the Blazor Simple Survey application, fill in the settings from your Azure tenant and application, in the AzureAdB2CManagement section.
Set the AdministrationGroup to Simple Survey Administrators.

Using your Azure Global Administrator account, log into your Azure B2C Tenant and select Azure Active Directory.
![]()
Select Groups.
![]()
Select New group.

Create a new group called: Simple Survey Administrators.
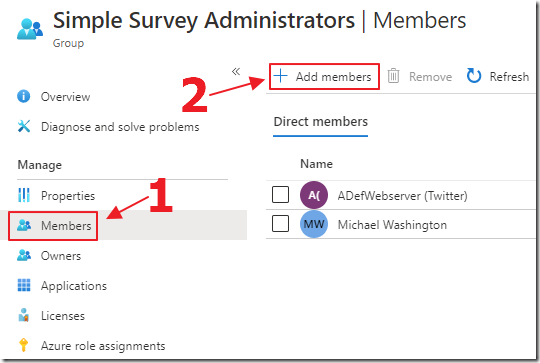
Select the Simple Survey Administrators group you just created, and then select the Members tab, and use the Add members link to add an existing account to be the first administrator.
You will have the option to add other administrators through the Blazor application, but, you need to specify at least one user to be in the Simple Survey Administrators group, to access the Administration screens in the Blazor application.
Detecting User Group Membership
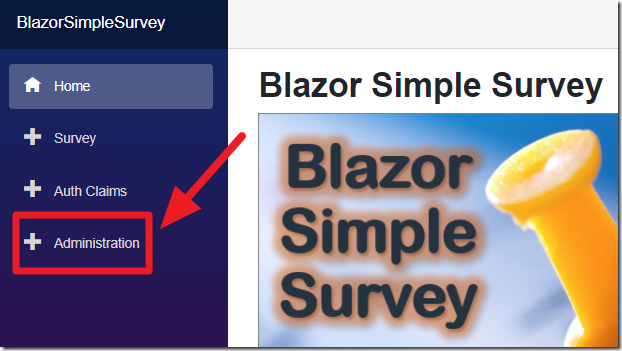
When a user logs into the Blazor Simple Survey application, we need to determine if they are in the AdministrationGroup configured in the appsettings.json file (currently set to Simple Survey Administrators).
If they are, we want to display the Administration link in the menu.

The first step is to install the Microsoft Graph NuGet packages (ensure you have Include prerelease checked when searching for the packages in Visual Studio):

Next, add the following code to support the API calls to the Microsoft Graph:
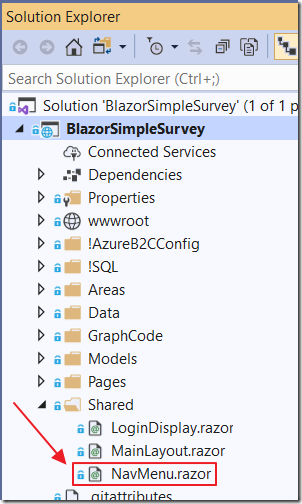
Next, we edit the code in the NavMenu.razor page.
First, we add using and inject statements to the top of the file:
@using Microsoft.Identity.Client;@using Newtonsoft.Json;@using Newtonsoft.Json.Linq;@inject IConfiguration _configuration@inject ProtectedApiCallHelper ProtectedApiCallHelper@inject AuthenticationStateProvider AuthenticationStateProvider
Next, we had some global properties:
string AdministrationGroup;bool isAdmin = false;string UserID = null;List<GraphUser> colGraphUsers = new List<GraphUser>();List<GraphGroup> colGroups = new List<GraphGroup>();
We then set the OnInitializedAsync method to the following:
protected override async Task OnInitializedAsync(){try{AdministrationGroup = _configuration["AzureAdB2CManagement:AdministrationGroup"];IConfidentialClientApplication confidentialClientApplication =ConfidentialClientApplicationBuilder.Create(_configuration["AzureAdB2CManagement:ClientId"]).WithTenantId(_configuration["AzureAdB2CManagement:Tenant"]).WithClientSecret(_configuration["AzureAdB2CManagement:ClientSecret"]).Build();// With client credentials flows the scopes is ALWAYS of the shape// "resource/.default", as the// application permissions need to be set statically// (in the portal or by PowerShell),// and then granted by a tenant administratorstring[] scopes = new string[] { "https://graph.microsoft.com/.default" };AuthenticationResult result = null;result = await confidentialClientApplication.AcquireTokenForClient(scopes).ExecuteAsync();var httpClient = new HttpClient();var apiCaller = new ProtectedApiCallHelper(httpClient);var authState = await AuthenticationStateProvider.GetAuthenticationStateAsync();var user = authState.User;UserID =user.Claims.FirstOrDefault(c => c.Type =="http://schemas.xmlsoap.org/ws/2005/05/identity/claims/nameidentifier")?.Value;if (UserID != null){await apiCaller.CallWebApiAndProcessResultASync($"https://graph.microsoft.com/v1.0/users/{UserID}/memberOf",result.AccessToken,DisplayGroups);}}catch{// do nothing if this fails}}
This calls the DisplayGroups method that loops through the detected groups for the user and determines if any of them matches the configured Administration group. If it does, the isAdmin property is set to true.
private void DisplayGroups(JObject result){colGroups = new List<GraphGroup>();foreach (JProperty child in result.Properties().Where(p => !p.Name.StartsWith("@"))){colGroups.AddRange(child.Value.ToObject<List<GraphGroup>>());}if (AdministrationGroup != ""){isAdmin =(colGroups.Where(x => x.displayName.ToLower() ==AdministrationGroup.ToLower()).FirstOrDefault() != null);}}
Finally, we alter the markup to only show the Administration link if isAdmin is true:
@if (isAdmin){<li class="nav-item px-3"><NavLink class="nav-link" href="administration"><span class="oi oi-plus" aria-hidden="true"></span> Administration</NavLink></li>}
The Administration Page
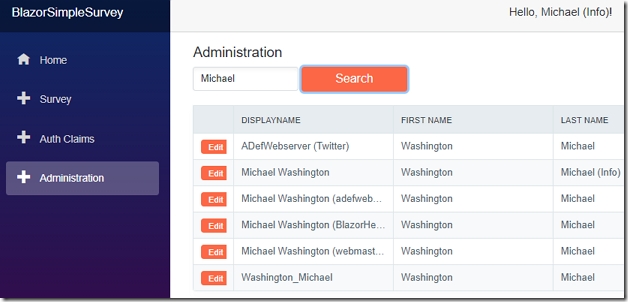
The Administration page displays the users in the Azure B2C tenant and allows you to search for specific users.
Note: The following code requires Radzen to be installed and configured. See this link: Free Blazor Components | 50+ controls by Radzen
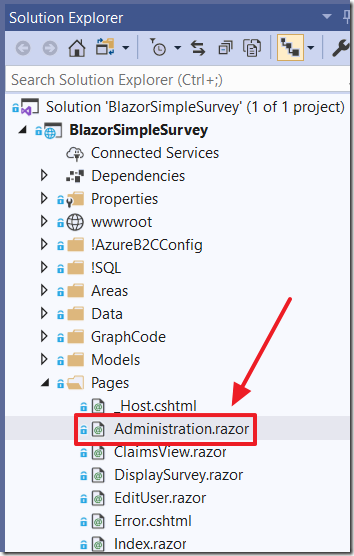
All the code to display and search users is contained in the Administration.razor page.
The same code to obtain a Microsoft Graph token as the NavMenu.razor page is used, but the specific call to the Microsoft Graph, to display all users, is as follows:
await apiCaller.CallWebApiAndProcessResultASync("https://graph.microsoft.com/v1.0/users",result.AccessToken,DisplayUsers);
When a search query is entered, to search for specific users, and the search button is pressed, the following Microsoft Graph query is used:
await apiCaller.CallWebApiAndProcessResultASync($"https://graph.microsoft.com/v1.0/users?" +$"$filter=startswith(displayName,'{strSearch}') " +$"or startswith(surname, '{strSearch}') " +$"or startswith(givenName, '{strSearch}')",result.AccessToken,DisplayUsers);
The following markup is used to display the search text box, the Search button, and the users in a data grid:
<RadzenTextBox Placeholder="Search Text..." @bind-Value="strSearch"Style="margin-bottom: 20px; width: 150px" /><RadzenButton Click="Search" Text="Search" Style="margin-bottom: 20px; width: 150px" /><RadzenGrid AllowFiltering="false"FilterCaseSensitivity="FilterCaseSensitivity.CaseInsensitive"AllowPaging="false" PageSize="5"AllowSorting="false" Data="@colGraphUsers.OrderBy(x => x.displayName)"TItem="GraphUser" ColumnWidth="200px"><Columns><RadzenGridColumn TItem="GraphUser" Property="id" Width="50px" Title=""><Template Context="GraphUser"><RadzenButton Text="Edit" Size="Radzen.ButtonSize.Small"Click="@(args =>dialogService.Open<EditUser>($"Edit {GraphUser.displayName}",new Dictionary<string, object>() { { "GraphUser", GraphUser } },new DialogOptions(){ Width = "700px", Height = "450px" }))"/></Template></RadzenGridColumn><RadzenGridColumn TItem="GraphUser" Property="displayName" Title="DisplayName" /><RadzenGridColumn TItem="GraphUser" Property="surname" Title="First Name" /><RadzenGridColumn TItem="GraphUser" Property="givenName" Title="Last Name" /></Columns></RadzenGrid>
Notice that the first column in the grid is a Template field that contains a Radzen button that opens a dialog.
Editing A User And Their Groups
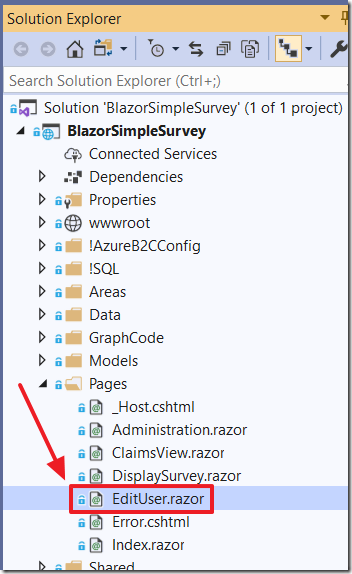
The remaining code, to edit a user and their groups, is contained in the EditUser.razor page that is opened by the Administration.razor page when a user is selected.
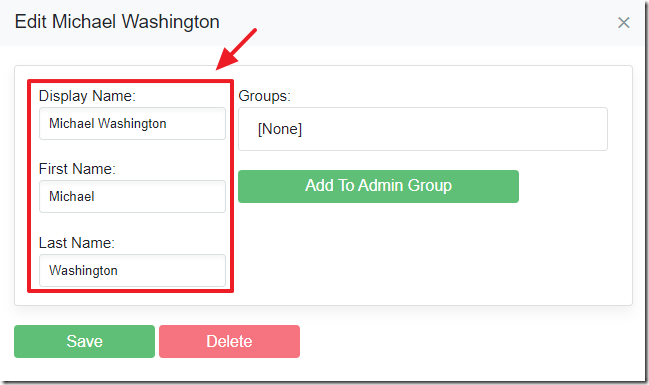
When the EditUser control is opened, in a Radzen Dialog control, the following parameter is set:
@code {[Parameter] public GraphUser GraphUser { get; set; }
This allows the user details to be displayed with the following markup:
<div class="col-md-4"><div>Display Name:</div><RadzenTextBox @bind-Value="GraphUser.displayName" Style="width: 200px" /><div style="margin-top:20px">First Name:</div><RadzenTextBox @bind-Value="GraphUser.givenName" Style="width: 200px" /><div style="margin-top:20px">Last Name:</div><RadzenTextBox @bind-Value="GraphUser.surname" Style="width: 200px" /><br /></div>

To save and update the details for a user, the following code is used:
async Task UpdateUser(){var UpdateUser = new User{DisplayName = GraphUser.displayName,Surname = GraphUser.surname,GivenName = GraphUser.givenName};await graphClient.Users[GraphUser.id].Request().UpdateAsync(UpdateUser);dialogService.Close(true);}
To delete a user, the following code is used that first opens a Radzen Dialog to confirm the deletion then deletes the user if confirmed:
async Task DeleteUserDialog() => await dialogService.OpenAsync("Delete User", ds =>@<RadzenCard Style="padding: 20px;"><p Style="margin-bottom: 10px;">Confirm?</p><div class="row"><div class="col-md-12"><RadzenButton Text="Yes" Click="DeleteUser"Style="margin-bottom: 10px; width: 150px" /><RadzenButton Text="No" Click="()=> ds.Close(false)"ButtonStyle="ButtonStyle.Secondary"Style="margin-bottom: 10px; width: 150px" /></div></div></RadzenCard>);async Task DeleteUser(){await graphClient.Users[GraphUser.id].Request().DeleteAsync();dialogService.Close(true);dialogService.Close(true);}
Editing User Groups
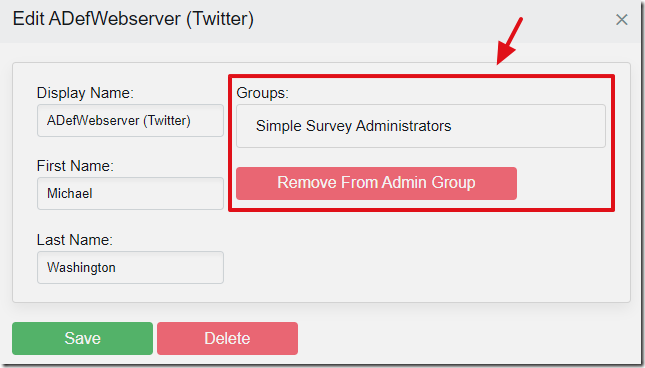
We want to display the groups a user is in, and if they are in the configured administration group, to display a button to optionally remove them from the group.
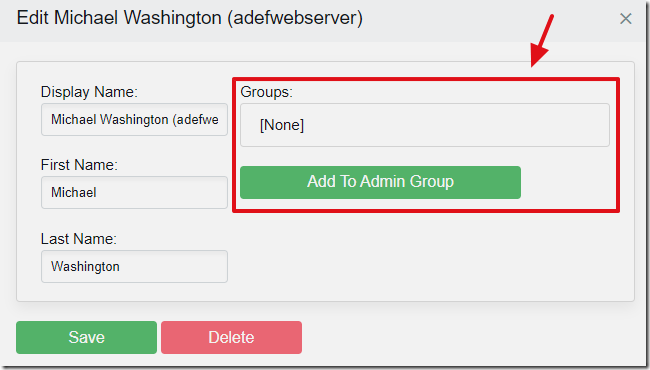
If they are not in the administration group, we want to display a button to optionally add them to that group.
To determine if a user is in the administration group, we first need to get the Id of the configured administration group, and set the variable AdminGroupId:
// Get Admin Group Idvar GroupCollection = await graphClient.Groups.Request().Filter($"startsWith(displayName,'{AdministrationGroup}')").GetAsync();AdminGroupId = GroupCollection.ToList().Where(g => g.DisplayName == AdministrationGroup).FirstOrDefault().Id;
We do this because we have configured the administration group, in the appsettings.json file, by name, not by Id, and Id is required to add and remove members of a group in the Microsoft Graph.
To add a user to the administration group, the following code is used:
async Task AddToAdminGroup(){// Get selected uservar selectedUser =graphClient.Users[GraphUser.id].Request().GetAsync();// Create a Directory Object for the selected uservar directoryObject = new DirectoryObject{Id = GraphUser.id};await graphClient.Groups[$"{AdminGroupId}"].Members.References.Request().AddAsync(directoryObject);dialogService.Close(true);}
To remove a user, from the administration group, the following code is used:
async Task RemoveFromAdminGroup(){await graphClient.Groups[$"{AdminGroupId}"].Members[$"{GraphUser.id}"].Reference.Request().DeleteAsync();dialogService.Close(true);}
Links
Creating A Blazor Server Azure B2C App
Manage resources with Microsoft Graph - Azure AD B2C | Microsoft Docs
Manage users with the Microsoft Graph API - Azure AD B2C | Microsoft Docs
