
7/3/2025 Admin
Embedding Power BI in Blazor (Blazor 9)
You can easily embed Power BI reports into a Server Side Blazor Application. This method allows you to display a Power BI report without requiring the user to have a Power BI account.
Note: To move to production you'll need a capacity.
Set-Up For The Application
To set up to run the sample application, we follow the directions in this article: Embed Power BI content with service principal and an application secret.

The first step is to start with a Power BI Report in https://app.powerbi.com/.
When viewing the report, you can look at the URL in the web browser to gather (and save for use in following steps):
- workspaceId
- reportId
(note: If you have issues completing the following directions, you may not have sufficient permissions)

Next, log into: https://portal.azure.com/ and copy the Tenant ID.

Now we need to create a Service Principal that will allow us to programmatically call the Power BI Embedded API.
We select App Registrations and click the link to create a New registration.

We create a new application.

Once the application (the Service Principal), is created, we select it, then click on the Overview tab and copy and save the ClientID.

Next, we click the Certificates & secrets tab and click the link to create a New client secret.

We create a client secret.

After it is created, we click the copy button to copy and save the ClientSecret.

Next, select Groups, then New Group.

Create a new Security Group.
Add the Service Principal you just created.

Click the Create button to save the group.
Next, to allow this Service Principal to access the Power BI Reports, we follow the directions here: Service principal API access….

On https://app.powerbi.com/ log into the Admin portal.

In Tenant settings, enable the option to Allow Service Principals to use Power BI APIs.

Select the Workspace that has your Power BI Paginated Report, and select Workspace access.

Select Add people or groups.

Add the Security Group (created earlier) to the Workspace.
Create The Project

The first step is to open Visual Studio 2022 (or higher) and create a Blazor Web App.

Use Server for Interactive render mode.

Select Manage NuGet Packages.

Install the Microsoft.Identity.Client and Microsoft.PowerBI.Api packages.

Open appsettings.json.
Use the following contents:
{"PowerBI": {"TenantID": "","ClientID": "","ClientSecret": "","WorkspaceId": "","ReportId": ""},"Logging": {"LogLevel": {"Default": "Information","Microsoft.AspNetCore": "Warning"}},"AllowedHosts": "*"}

Update the values with your own.

Add a new file at wwwroot\js\powerbiinterop.js with the following code:
// Exported function that Blazor will call to embed the reportexport function createReport(element, token, embedUrl, reportId) {// Make sure the Power BI client library is loaded globallyif (!window.powerbi) {console.error('Power BI client library (powerbi-client) is not loaded.');return;}// Grab the models enum for TokenTypeconst models = window['powerbi-client'].models;const config = {type: 'report',tokenType: models.TokenType.Embed,accessToken: token,embedUrl: embedUrl,id: reportId,settings: {panes: {filters: { visible: true },pageNavigation: { visible: true }}}};// If you’d embedded something into this element before, reset itwindow.powerbi.reset(element);// Embed the reportwindow.powerbi.embed(element, config);}

Open the App.razor page and add the following lines to the <body> section:
<!-- PowerBI API --><script src="https://cdn.jsdelivr.net/npm/powerbi-client@2.19.0/dist/powerbi.min.js"></script><!-- PowerBI createReport method --><script type="module" src="js/powerbiinterop.js"></script>

Open the Home.razor page and replace all the code with the following code to implement the UI:
@page "/"@rendermode InteractiveServer@using Microsoft.Identity.Client@using Microsoft.PowerBI.Api@using Microsoft.PowerBI.Api.Models@using Microsoft.Rest@inject IJSRuntime JSRuntime@inject IConfiguration Configuration<h3>PowerBI Embedded</h3><div @ref="PowerBIElement"style="width:100%; height:600px; max-width:2000px"></div>
Add the following code to implement the functionality:
@code {private ElementReference PowerBIElement;private IJSObjectReference? _module;private string TenantID => Configuration["PowerBI:TenantID"]!;private string ClientID => Configuration["PowerBI:ClientID"]!;private string ClientSecret => Configuration["PowerBI:ClientSecret"]!;private string WorkspaceId => Configuration["PowerBI:WorkspaceId"]!;private string ReportId => Configuration["PowerBI:ReportId"]!;protected override async Task OnAfterRenderAsync(bool firstRender){if (!firstRender)return;// 1) Load the JS module from wwwroot/js/powerbiInterop.js_module = await JSRuntime.InvokeAsync<IJSObjectReference>("import", "/js/powerbiInterop.js");// 2) Authenticate to Azure AD and get an access tokenvar authResult = await DoAuthentication();// 3) Use PowerBIClient to fetch report & embed tokenusing var client = new PowerBIClient(new Uri("https://api.powerbi.com/"),new TokenCredentials(authResult.AccessToken, "Bearer"));var report = await client.Reports.GetReportInGroupAsync(Guid.Parse(WorkspaceId),Guid.Parse(ReportId));var tokenResponse = await client.Reports.GenerateTokenAsync(Guid.Parse(WorkspaceId),Guid.Parse(ReportId),new GenerateTokenRequest(accessLevel: "view"));// 4) Call your JS function to embed the reportawait _module.InvokeVoidAsync("createReport",PowerBIElement,tokenResponse.Token,report.EmbedUrl,report.Id.ToString());}private async Task<AuthenticationResult> DoAuthentication(){var app = ConfidentialClientApplicationBuilder.Create(ClientID).WithAuthority($"https://login.microsoftonline.com/{TenantID}/v2.0").WithClientSecret(ClientSecret).Build();return await app.AcquireTokenForClient(new[] { "https://analysis.windows.net/powerbi/api/.default" }).ExecuteAsync();}public async ValueTask DisposeAsync(){if (_module is not null){await _module.DisposeAsync();}}}

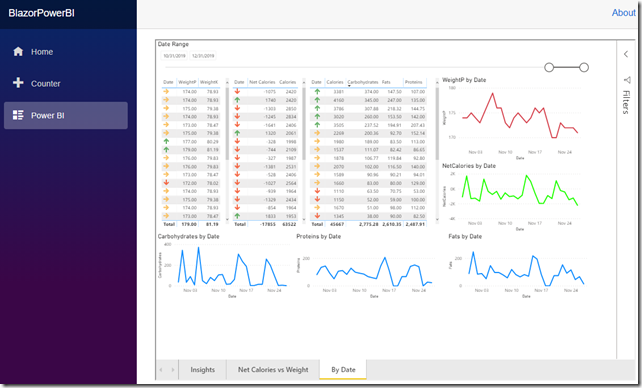
Run the application and your report will display.
Download
The project is available on the Downloads page on this site.
You must have Visual Studio 2022 (or higher) installed to run the code.
Links
Blazor Power BI Paginated Reports