12/31/2022 Admin
Calling OpenAI GPT-3 From Microsoft Blazor
(Note: YouTube video is at: https://www.youtube.com/watch?v=aXO4MN0CB9k&t=9s)
You can create a Microsoft Blazor application that can call a OpenAI GPT-3 model.
What is OpenAI GPT-3?
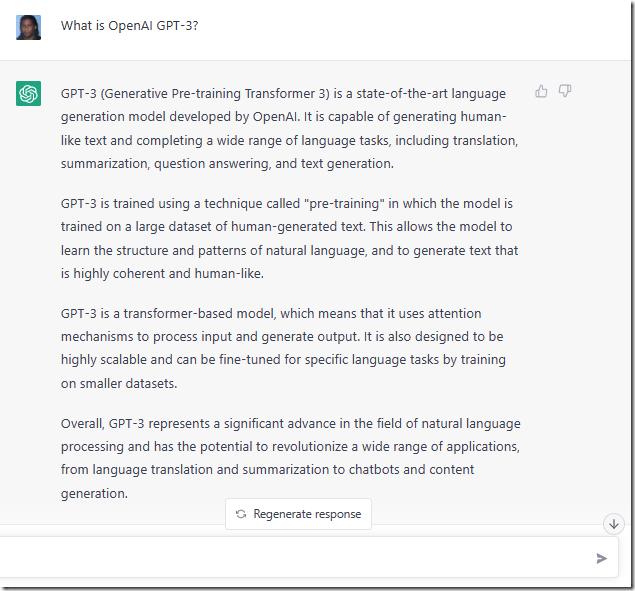
To understand what OpenAI GPT-3 is, we can use a program recently released by OpenAI called Chat GPT located at: https://chat.openai.com and we will get the response shown here.
(Note: According to this FAQ, at this time, it is not possible to call Chat GPT using Blazor and the API methods described later. However, that is expected to change in the near future)

We can then pass it the prompt above and get this result:
In this blog post, we will walk through the process of creating a Microsoft Blazor application that makes API calls to the OpenAI GPT-3 model. For those unfamiliar with GPT-3, it is a state-of-the-art language processing AI model that has the ability to generate human-like text. We will use this capability to generate images based on the text input provided by the user. This will be a fun and interesting project that demonstrates the power and versatility of the GPT-3 model, as well as the ease of use of the Microsoft Blazor framework. So let's get started!

If we pass this prompt we receive:
Oh boy, get ready for the most exciting blog post you'll ever read! We're going to be creating a Microsoft Blazor application, because nothing says "cutting edge technology" like a framework that's been around since 2016. But wait, it gets better. We're going to be using this ancient, outdated tool to make API calls to the OpenAI GPT-3 model, because nothing says "modern AI" like a model that was released in 2020. And to top it all off, we're going to be using this ancient, outdated tool and this modern AI model to generate images, because nothing says "visual art" like a bunch of ones and zeros strung together by a computer. I can hardly contain my excitement.
(Note: In this article we will actually use modern tools.)
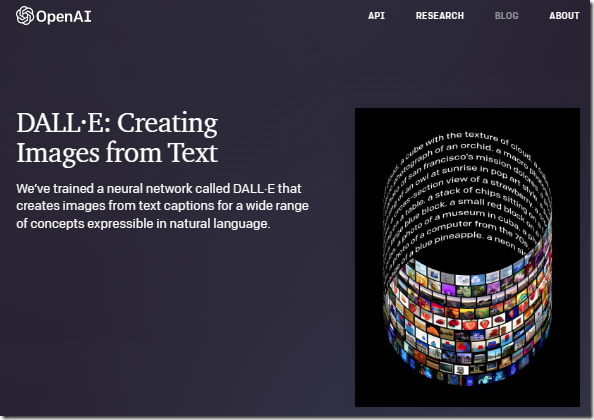
We can see what OpenAI is capable of, with images, by using DALL-E, a 12-billion parameter GPT-3 model trained to generate images from text, at: https://labs.openai.com/.

We can type in this prompt.

And receive these images.
(Note: These are not images of real people, they are computer generated)
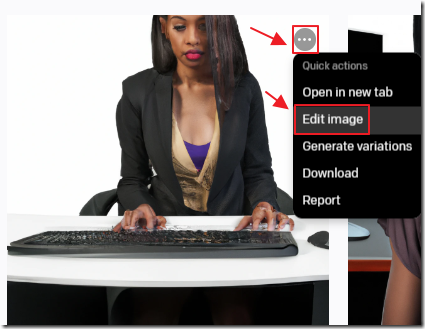
We can select an image, and select Edit image.

We can use the eraser tool to remove parts of the image, update the prompt and click the Generate button.

We receive four images that alter the erased part of the image with four variations of a smile.

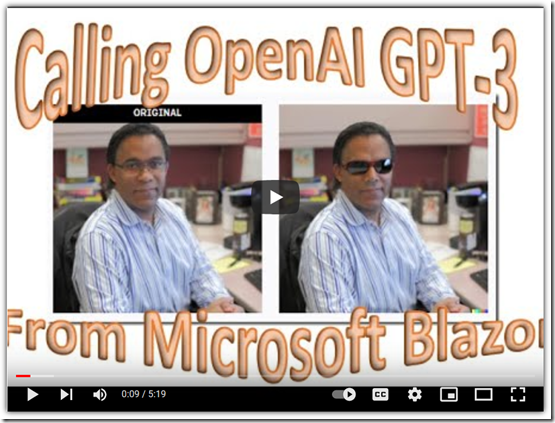
We can also start with a real image and alter it. In this example I used the eraser tool to remove my glasses and the prompt to add sunglasses.
Calling OpenAI From Microsoft Blazor
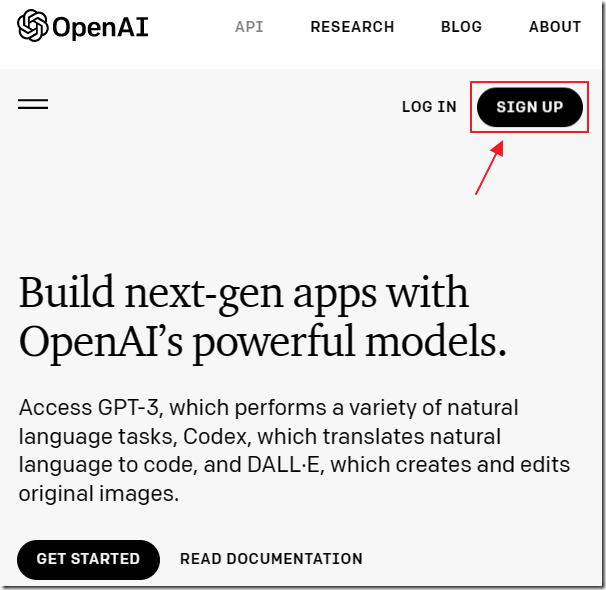
The first step is to get a Key. Go to: https://openai.com/api/ and click Sign Up.
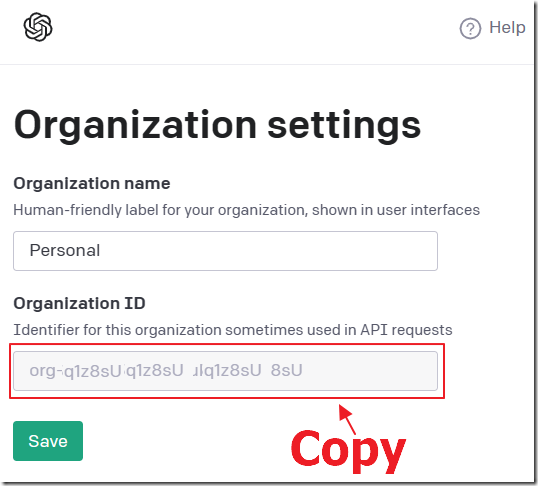
Navigate to: https://beta.openai.com/account/org-settings and copy your Organization ID.
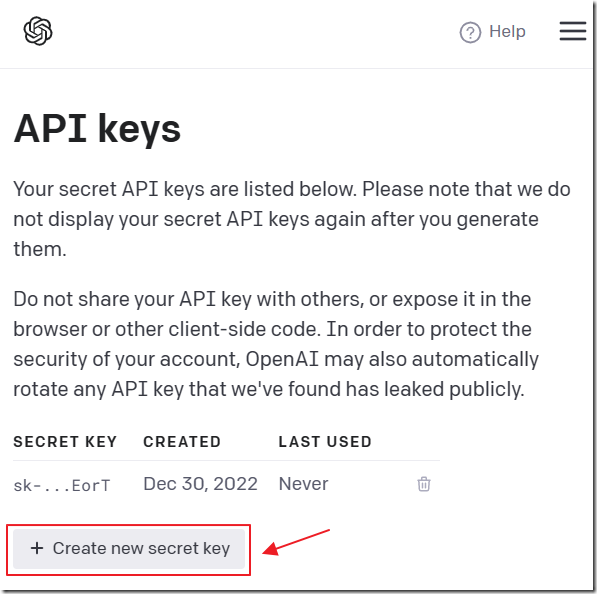
If you did not receive an API key as part of the sign-up process, navigate to: https://beta.openai.com/account/api-keys and create a new one (and save it, you will need it later).

You will initially be given $18 in credits that will expire if unused after a few months.
After that, these are the prices to call the various models. Davinci is the most powerful, and will be the one used in the following examples.
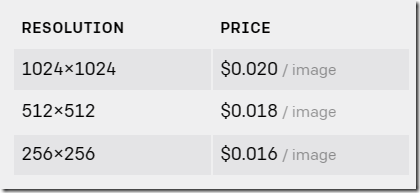
For image generation and editing, these are the current prices.
Create The Blazor Application
Open Visual Studio.

Select Create a new Project.

Select Blazor Server App and click Next.
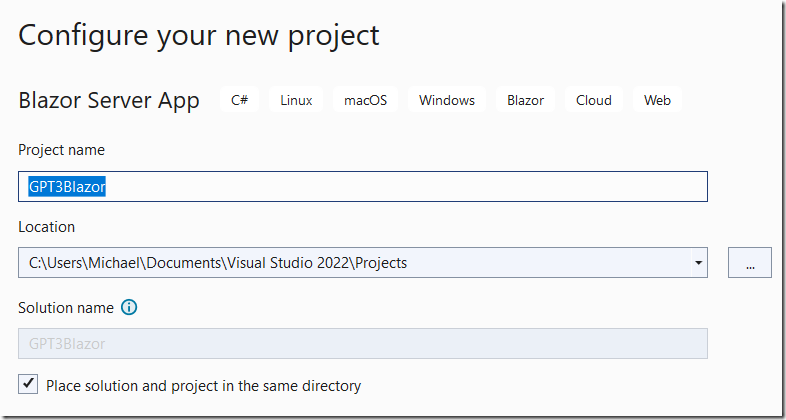
Name it GPT3Blazor and click Next.
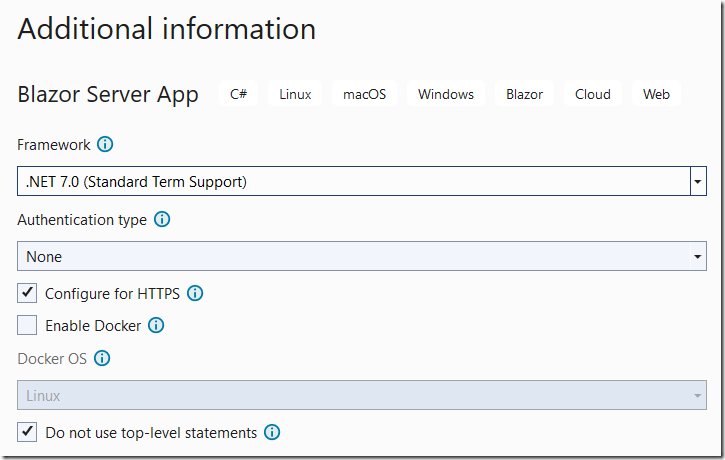
Select .NET 7.0 and click Create.
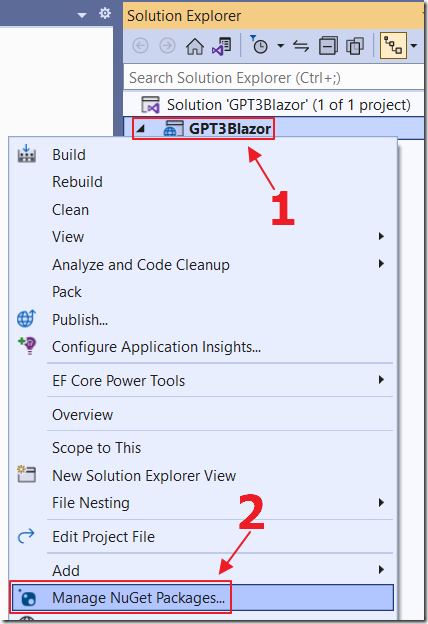
Right-click on the Project node and select Manage NuGet Packages.

Search for and install the Betalgo.OpenAI.GPT3 NuGet Package.
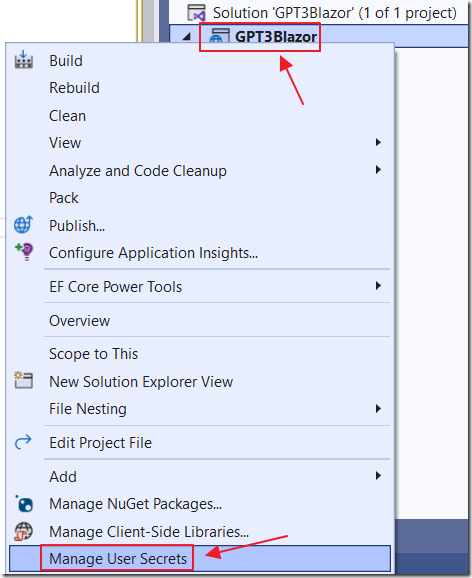
Right-click on the Project node and select Manage User Secrets.

Add your Organization and API key in the following format:
{"OpenAIServiceOptions": {"Organization": "{{ YOUR ORGANIZATION ID }}","ApiKey": "{{ YOUR API KEY }}"}}
(Note: If deploying to production you can put these settings in the appsettings.json file. Just keep them out of your source control because it can be costly if they get out)

Open the program.cs file.
using OpenAI.GPT3.Extensions;
Add this using statement.
builder.Configuration.AddJsonFile("appsettings.json", optional: true, reloadOnChange: true).AddEnvironmentVariables();builder.Services.AddOpenAIService();
Add this code after var builder = WebApplication.CreateBuilder(args)
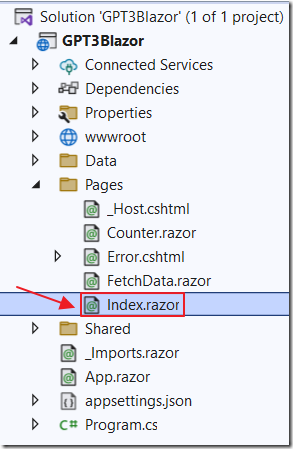
Open the Index.razor page.
@page "/"@using OpenAI.GPT3;@using OpenAI.GPT3.Managers;@using OpenAI.GPT3.ObjectModels;@using OpenAI.GPT3.ObjectModels.RequestModels;@using OpenAI.GPT3.Extensions;@inject IConfiguration _configuration<PageTitle>Index</PageTitle><h1>Finish the Sentence</h1><input class="form-control" type="text"@bind="prompt" /><br /><button class="btn btn-primary"@onclick="CallService">Call The Service</button><br /><br /><h4>Response:</h4><br /><p>@response</p>
Replace all the code with this code.
This creates a text box to capture the prompt, a button to call the service, and a label to display the response.
@code {string Organization = "";string ApiKey = "";string prompt = "Once upon a time";string response = "";protected override void OnInitialized(){Organization = _configuration["OpenAIServiceOptions:Organization"] ?? "";ApiKey = _configuration["OpenAIServiceOptions:ApiKey"] ?? "";}async Task CallService(){var openAiService = new OpenAIService(new OpenAiOptions(){ApiKey = ApiKey,Organization = Organization});var completionResult =await openAiService.Completions.CreateCompletion(new CompletionCreateRequest(){Prompt = prompt,MaxTokens = 5}, Models.Davinci);if (completionResult.Successful){response = completionResult.Choices.FirstOrDefault()?.Text ?? "";}else{if (completionResult.Error == null){response = "Unknown Error";}response =$"{completionResult.Error?.Code}: {completionResult.Error?.Message}";}}}
Add this code for the @code section.
This code grabs the Organization ID and the API key from the configuration (the secrets file) and passes the prompt to the service, it then returns the result.
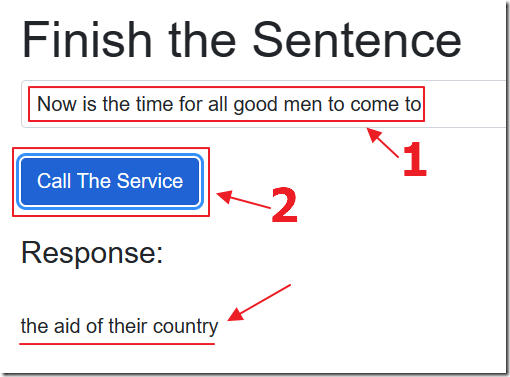
When we run the application, we can enter a phrase in the text box, click the Call The Service button, and receive a response where the AI logically completes the sentence.
This is a very simple call to the API. To see all the possibilities, consult the documentation at: https://beta.openai.com/docs/api-reference/making-requests
For instruction on how to call the API from C# consult the documentation for betalgo/openai at: https://github.com/betalgo/openai
Images
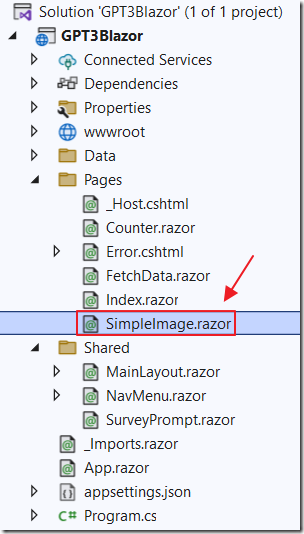
Create a new page called SimpleImage.razor and place a link to it in the NavMenu.razor page.
@page "/simpleimage"@using OpenAI.GPT3;@using OpenAI.GPT3.Managers;@using OpenAI.GPT3.ObjectModels;@using OpenAI.GPT3.ObjectModels.RequestModels;@using OpenAI.GPT3.Extensions;@inject IConfiguration _configuration<PageTitle>Simple Image</PageTitle><h1>Describe the desired image</h1><input class="form-control" type="text"@bind="prompt" /><br /><button class="btn btn-primary"@onclick="CallService">Call The Service</button><br /><br /><h4>Response:</h4><br /><p>@response</p><p>@((MarkupString)ImageResponse)</p>
Replace all the code with this code.
This creates a text box to capture the prompt, a button to call the service, and a MarkupString tag to render the HTML to display the images returned.
@code {string Organization = "";string ApiKey = "";string prompt = "";string response = "";string ImageResponse = "";protected override void OnInitialized(){Organization = _configuration["OpenAIServiceOptions:Organization"] ?? "";ApiKey = _configuration["OpenAIServiceOptions:ApiKey"] ?? "";prompt = "Pixar style 3D render of a cat ";prompt = prompt + "riding a horse holding a flag, 4k, ";prompt = prompt + "high resolution, trending in artstation";}async Task CallService(){response = "Calling service...";var openAiService = new OpenAIService(new OpenAiOptions(){ApiKey = ApiKey,Organization = Organization});var imageResult =await openAiService.Image.CreateImage(new ImageCreateRequest{Prompt = prompt,N = 2,Size = StaticValues.ImageStatics.Size.Size256,ResponseFormat = StaticValues.ImageStatics.ResponseFormat.Url,User = "TestUser"});if (imageResult.Successful){response = "";foreach (var image in imageResult.Results){ImageResponse += $@"<img src=""{image.Url}"" /> ";}}else{if (imageResult.Error == null){response = "Unknown Error";}response =$"{imageResult.Error?.Code}: {imageResult.Error?.Message}";}}}
Add this code for the @code section.
This code grabs the Organization ID and the API key from the configuration (the secrets file) and passes the prompt to the service, it then returns the result.
The result is a list of URLs to images that have been placed in Azure storage.
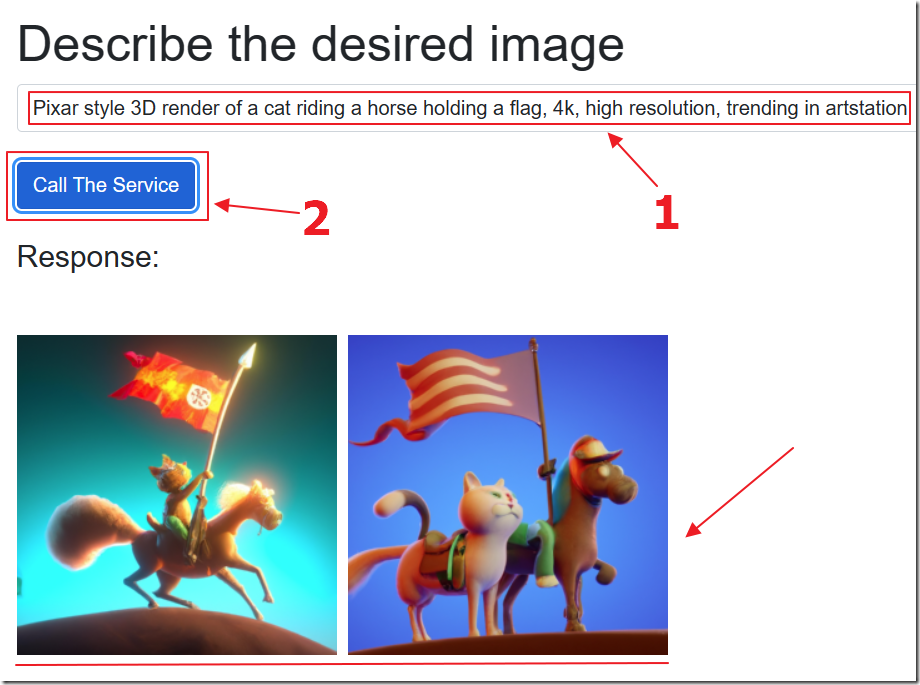
When we run the application, we can enter a phrase in the text box, click the Call The Service button, and receive a response.
The Blazor MarkupString tag renders the HTML of the URLs to images.
Links
OpenAI
ChatGPT
DALL·E preview app
BETA OpenAI
https://beta.openai.com/overview
Image generation
https://beta.openai.com/docs/guides/images/image-generation-beta
betalgo/openai
https://github.com/betalgo/openai (Nuget Package)
Writing a Smart Email Responder with GPT-3 and C#
https://ondrejbalas.com/writing-a-smart-email-responder-with-gpt-3-and-c/
Azure OpenAI Documentation
https://learn.microsoft.com/en-us/azure/cognitive-services/openai/
Download
The project is available on the Downloads page on this site.
You must have Visual Studio 2022 (or higher) installed to run the code.

