2/14/2022 Admin
Creating Azure Maps Applications In Blazor
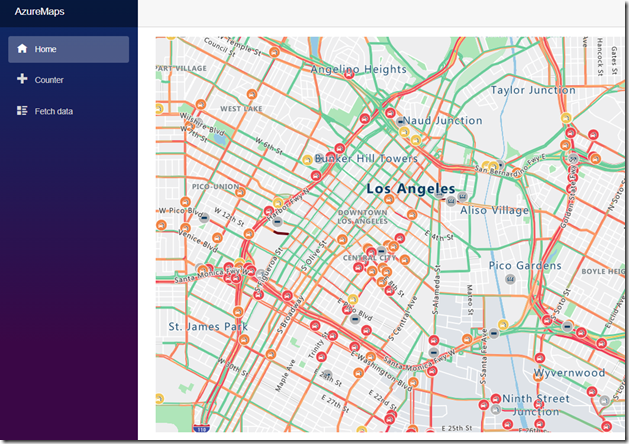
You can create Microsoft Azure Maps applications in Microsoft Blazor.
In addition to displaying maps, Azure Maps provides a full range of services including; Search, Traffic, Routing, Elevation, Spatial operations, Geolocation, Weather Service and more.
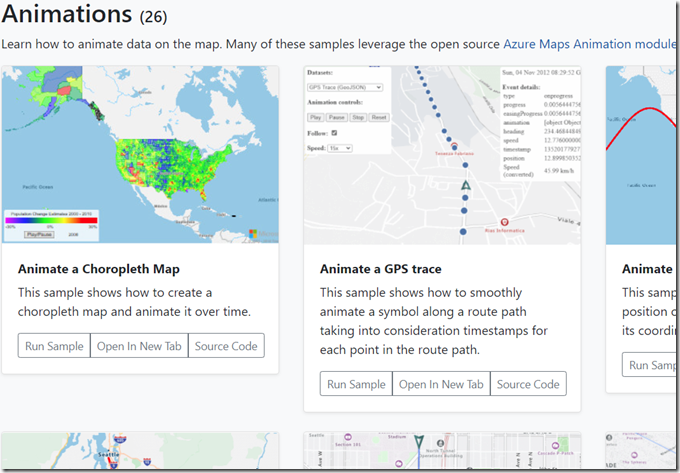
See: https://samples.azuremaps.com/ to view live examples what Azure Maps is capable of.
Setting Up Azure Maps
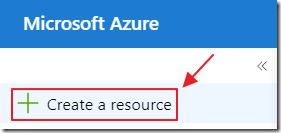
Log into your Azure account at https://portal.azure.com/ and select Create a resource.
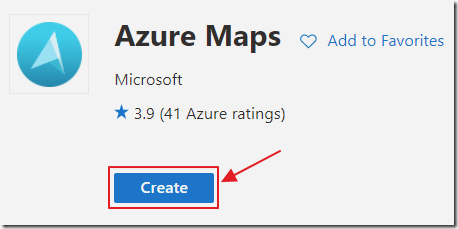
Search for Azure Maps and click Create.
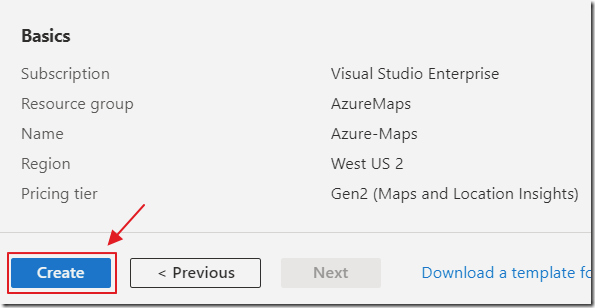
Fill in the Forms and click Create.
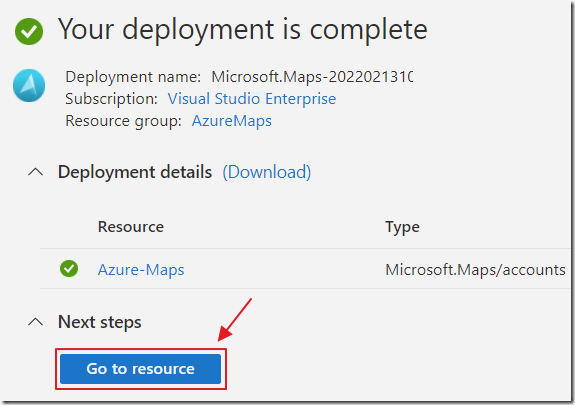
After the Azure Maps account is created you can navigate to it.
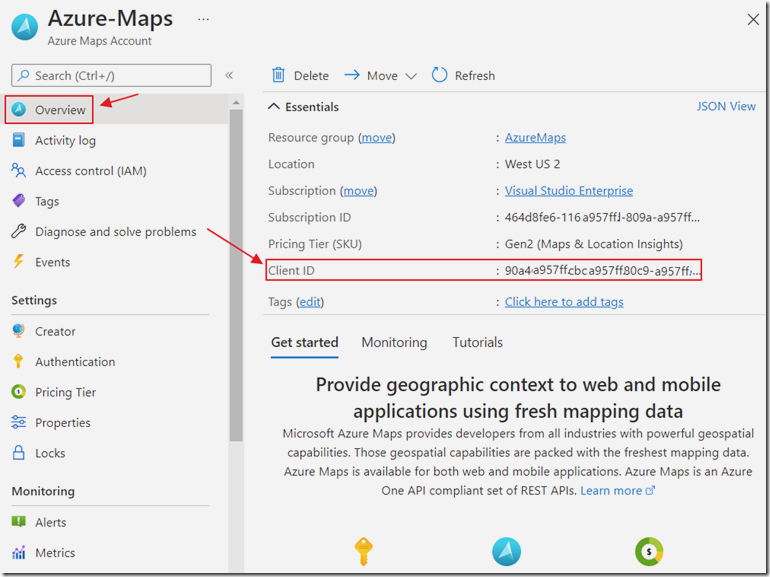
Copy the Client ID because you will need it in later steps.
Authentication
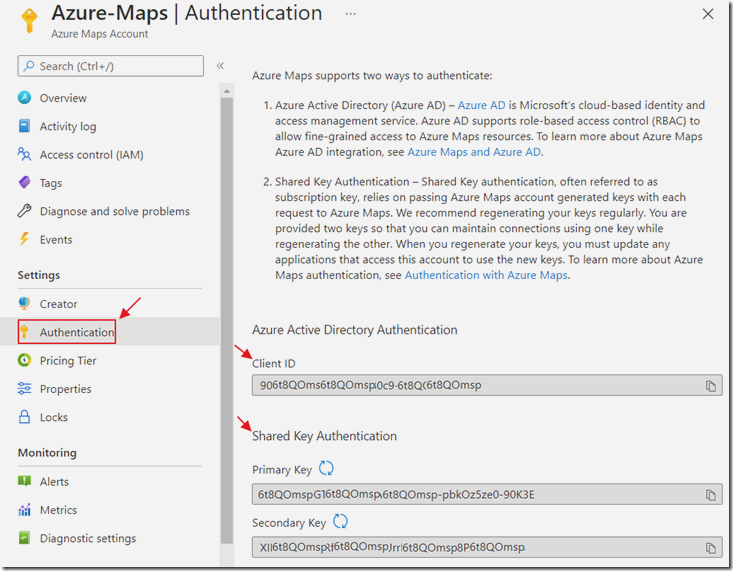
If you click on the Authentication tab, you will note that there are two methods of authenticating to call the Azure Maps API.
However, the Shared Key Authentication is not recommended by Microsoft for use in Web applications. Microsoft only recommends using them only for Daemon apps (see: https://docs.microsoft.com/en-us/azure/azure-maps/how-to-manage-authentication#choose-an-authentication-and-authorization-scenario).
Instead, we will be using AAD (Azure Active Directory) Authentication described here: https://docs.microsoft.com/en-us/azure/azure-maps/how-to-secure-webapp-users.

Go to App Registrations.
![]()
Create a New registration.

Give it a name and click the Register button.

Save the Client ID and Tenant ID because you will need them in a later step.
Click Certificates & secrets to create an App Key.

Click New client secret.
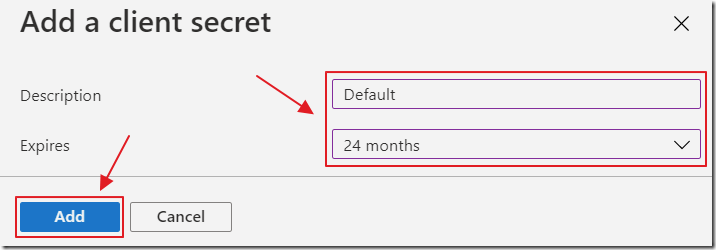
Give it a name and an expiration date and click Add to create the secret.

Click the button next to the value and save it, you will need it in a later step.
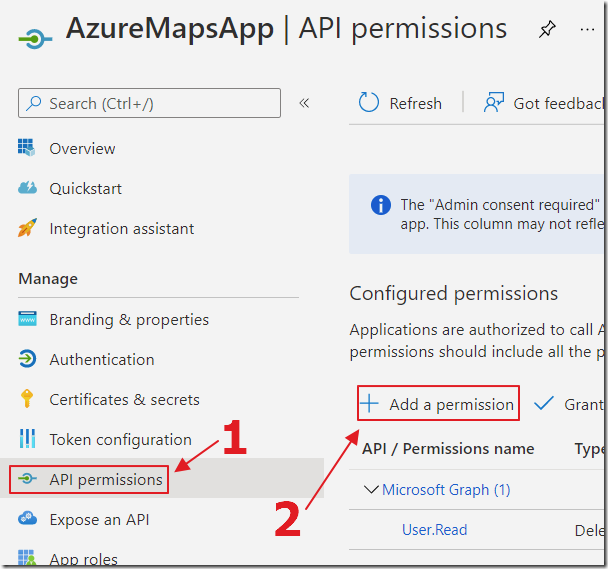
Click API permissions then Add a permission.
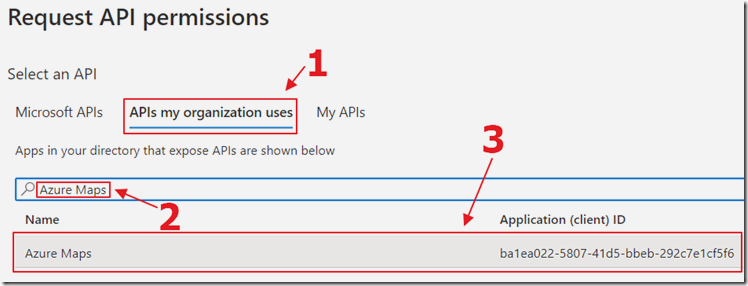
Select APIs my organization uses, search for Azure Maps and select it.
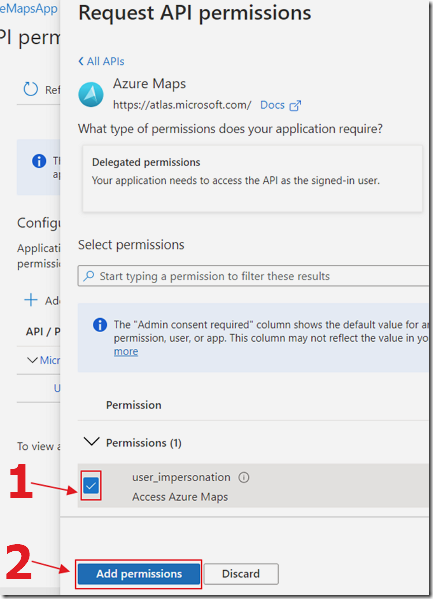
Check the box next to Access Azure Maps, and click Add permissions.
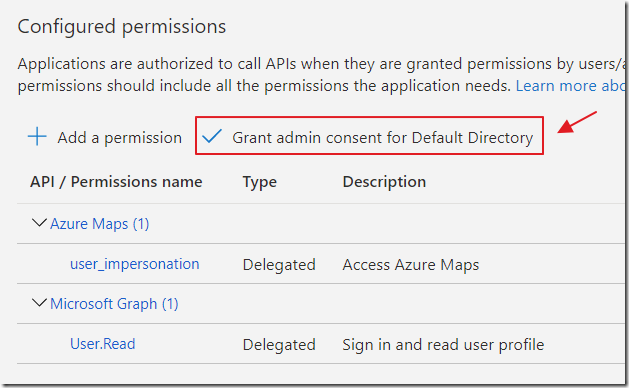
Finally, click the Grant admin consent button.
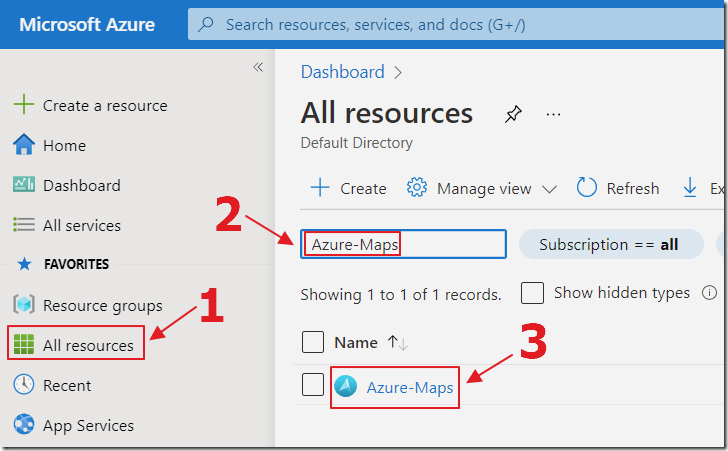
Return to the Azure Maps account created earlier.
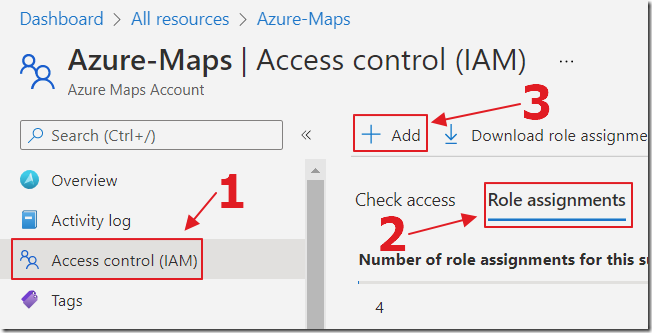
Select IAM, Role assignments, then Add Role assignment.

Search for Azure Maps, then select the Azure Maps Data Reader role, and click Next.
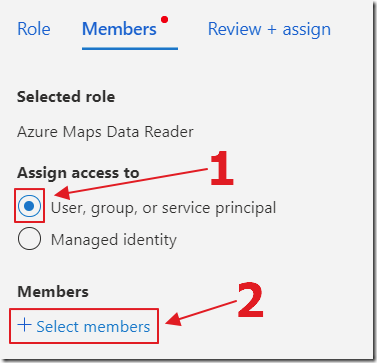
Click Select members.
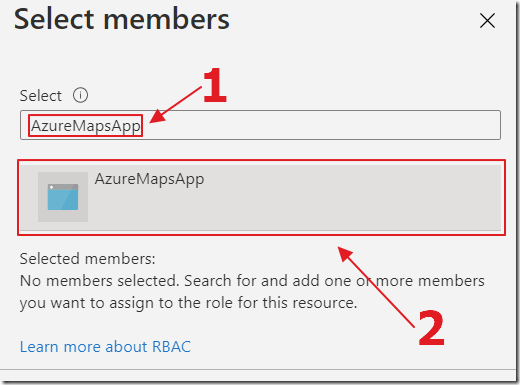
Search for the name of the Azure App Registration, created earlier, and select it.
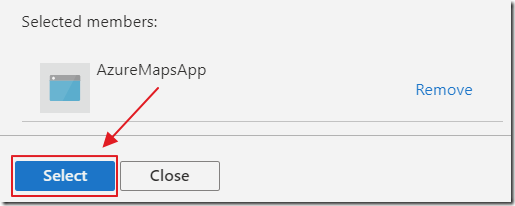
Click Select.
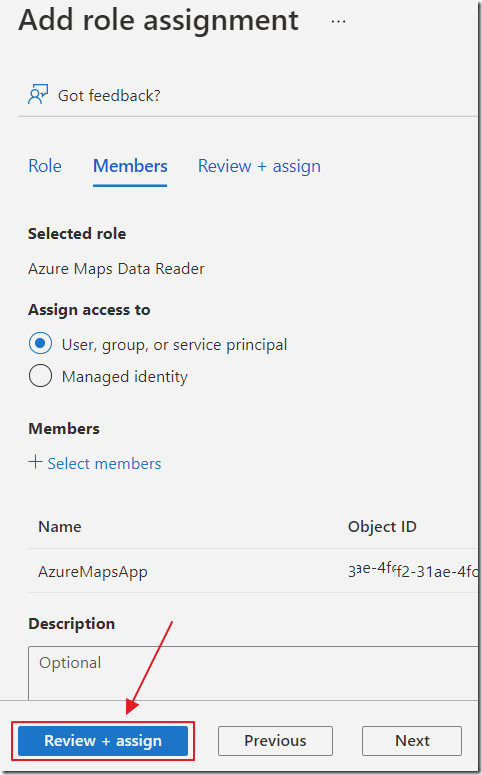
Click Review + assign, then on the next screen, click Review + assign again.
Create The Blazor Application

Open Visual Studio

Select Create a new Project.

Select Blazor Server App and click Next.

Name it AzureMaps and click Next.
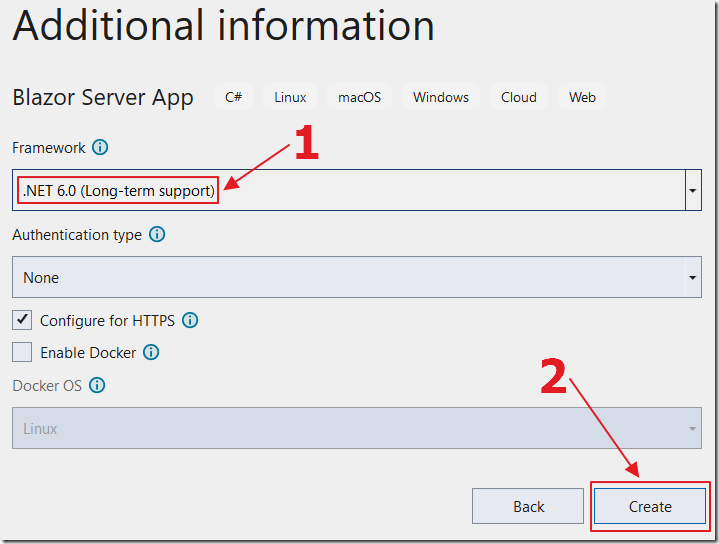
Select .Net 6.
Click Create.
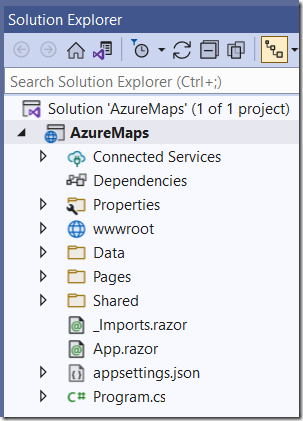
The project will be created.
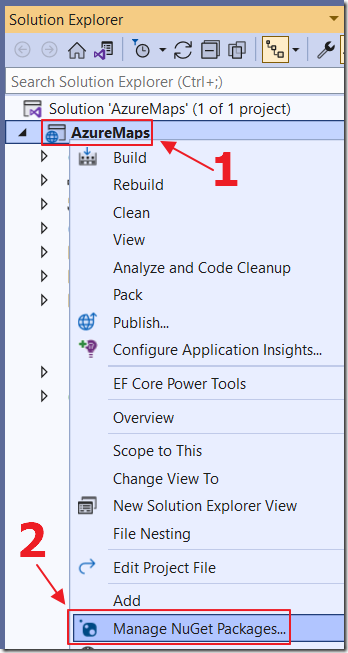
Right-click on the Project node and select Manage NuGet Packages…
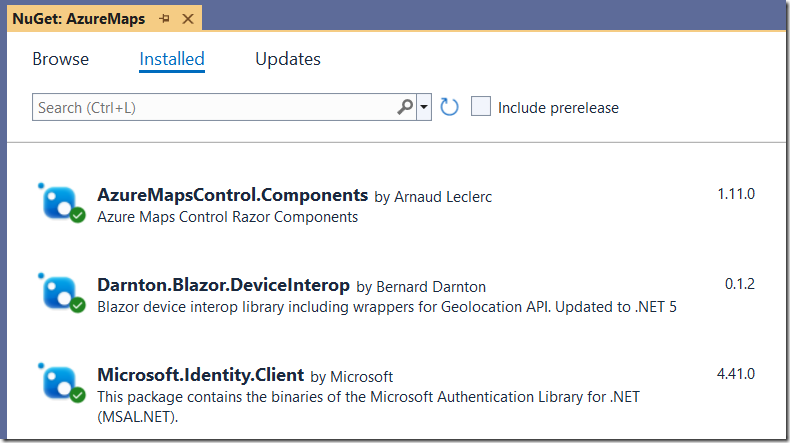
Install the following NuGet packages:
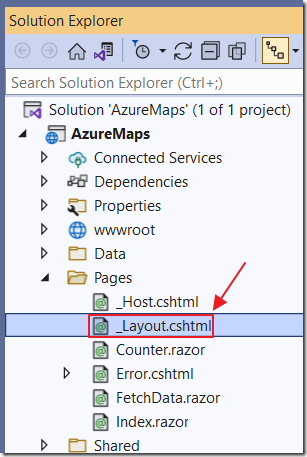
To support the AzureMapsControl.Components, open the _Layout.cshtml page, and add the following lines to the <head> section:
<link rel="stylesheet" href="https://atlas.microsoft.com/sdk/javascript/mapcontrol/2/atlas.min.css" type="text/css" /><link rel="stylesheet" href="https://atlas.microsoft.com/sdk/javascript/drawing/0.1/atlas-drawing.min.css" type="text/css" /><link rel="stylesheet" href="https://atlas.microsoft.com/sdk/javascript/indoor/0.1/atlas-indoor.min.css" type="text/css" /><style>#map {position: absolute;width: 80%;height: 80%;}</style>
Add the following lines to the end of the <body> section (before the </body> tag):
<script src="https://atlas.microsoft.com/sdk/javascript/mapcontrol/2/atlas.min.js"></script><script src="https://atlas.microsoft.com/sdk/javascript/drawing/0.1/atlas-drawing.min.js"></script><script src="https://atlas.microsoft.com/sdk/javascript/indoor/0.1/atlas-indoor.js"></script><script src="_content/AzureMapsControl.Components/azure-maps-control.js"></script><script type="text/javascript">azureMapsControl.Extensions.getTokenCallback = (resolve, reject, map) => {DotNet.invokeMethodAsync('AzureMaps', 'GetAccessToken').then(function (response) {return response;}).then(function (token) {resolve(token);});};</script>
Note: See full directions at this link: https://github.com/arnaudleclerc/AzureMapsControl.Components
Display Your Current Location
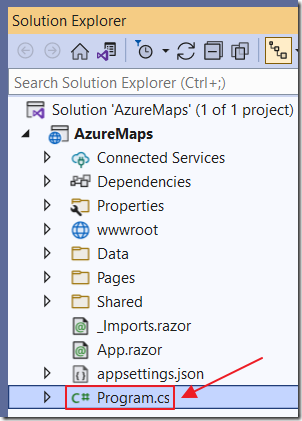
As a first step, we will display our current location (then later have the map show us that location).
Open the Program.cs file and add the following code (before the var app = builder.Build(); line):
builder.Services.AddScoped<Darnton.Blazor.DeviceInterop.Geolocation.IGeolocationService,Darnton.Blazor.DeviceInterop.Geolocation.GeolocationService>();
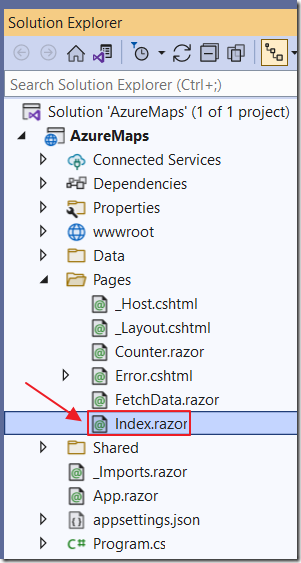
Open the Index.razor page and change all the code to the following:
@page "/"@using AzureMapsControl.Components.Map@using Microsoft.Identity.Client@using Darnton.Blazor.DeviceInterop.Geolocation;@inject IJSRuntime JS@inject IConfiguration _configuration@inject IGeolocationService GeolocationService<p>CurrentLatitude: @CurrentLatitude</p><p>CurrentLongitude: @CurrentLongitude</p>
@code {protected GeolocationResult? CurrentPositionResult { get; set; }protected string CurrentLatitude =>CurrentPositionResult?.Position?.Coords?.Latitude.ToString("F2");protected string CurrentLongitude =>CurrentPositionResult?.Position?.Coords?.Longitude.ToString("F2");protected override async Task OnAfterRenderAsync(bool firstRender){if (firstRender){CurrentPositionResult = await GeolocationService.GetCurrentPosition();StateHasChanged();}}}
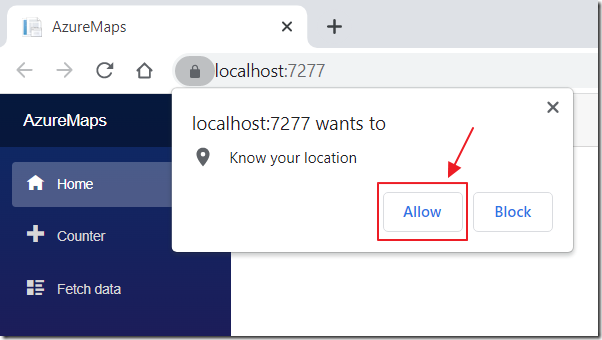
In Visual Studio, hit F5 to run the project.
The web browser will open and a popup will show asking for permission to get your current location.
Click Allow.
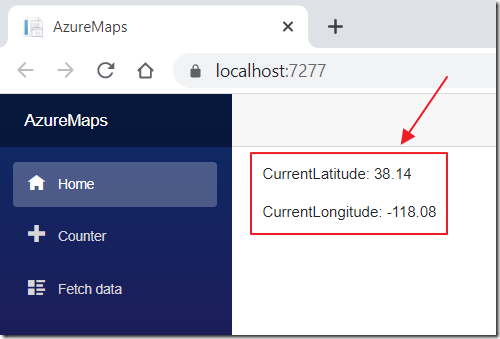
The coordinates of your current location will show.
Show The Map
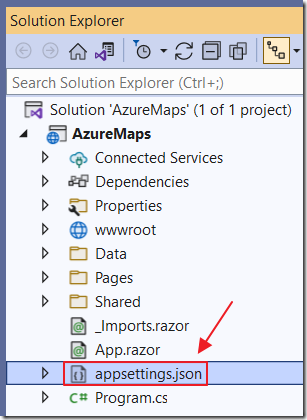
To implement AAD Authentication, the first step is to put the required values in the appsettings.json file (replacing the highlighted yellow parts with your own values):
{"AzureMaps": {"ClientId": "{{ Client ID From Azure Maps Account }}","AadTenant": "{{ Azure Tenant ID }}","AadAppId": "{{ Client ID From Azure App Registration }}","AppKey": "{{ AppKey (secret) From Azure App Registration }}"},"Logging": {"LogLevel": {"Default": "Information","Microsoft": "Warning","Microsoft.Hosting.Lifetime": "Information","AzureMapsControl.Components": "Debug"}},"AllowedHosts": "*"}
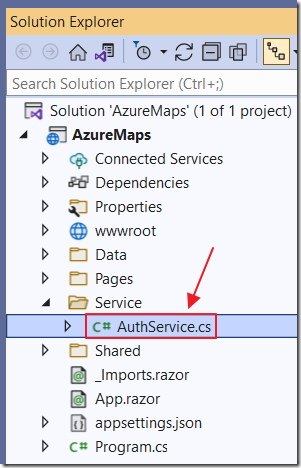
We then create a AuthService.cs static class (that will be called by the azureMapsControl.Extensions.getTokenCallback method in the _Layout.cshtml file) using the following code:
using Microsoft.Identity.Client;using Microsoft.JSInterop;namespace AzureMaps.Service{public static class AuthService{private const string AuthorityFormat = "https://login.microsoftonline.com/{0}/oauth2/v2.0";private const string MSGraphScope = "https://atlas.microsoft.com/.default";static string objTenantID;static string objAadAppId;static string objAppKey;internal static void SetAuthSettings(IConfigurationSection AzureMaps){objTenantID = AzureMaps.GetValue<string>("AadTenant");objAadAppId = AzureMaps.GetValue<string>("AadAppId");objAppKey = AzureMaps.GetValue<string>("AppKey");}[JSInvokable]public static async Task<string> GetAccessToken(){IConfidentialClientApplication daemonClient;daemonClient = ConfidentialClientApplicationBuilder.Create(objAadAppId).WithAuthority(string.Format(AuthorityFormat, objTenantID)).WithClientSecret(objAppKey).Build();AuthenticationResult authResult =await daemonClient.AcquireTokenForClient(new[] { MSGraphScope }).ExecuteAsync();return authResult.AccessToken;}}}
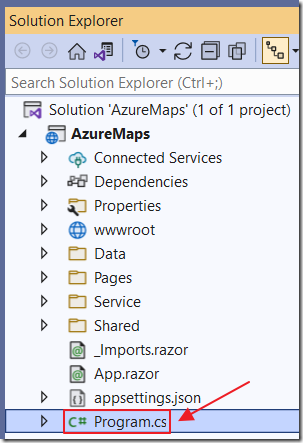
Next we add the following using statements to the top of Program.cs:
using AzureMaps.Data;using AzureMaps.Service;using AzureMapsControl.Components;
Then the following code to get the ClientId from the appsettings.json file, and pass it to the AzureMapsControl service that will be used to display the map:
var AzureMaps = builder.Configuration.GetSection("AzureMaps");//This code uses an anonymous authenticationbuilder.Services.AddAzureMapsControl(configuration => configuration.ClientId = AzureMaps.GetValue<string>("ClientId"));
Finally we add the following code that will initialize the static AuthService class with the settings from the appsettings.json file:
AuthService.SetAuthSettings(AzureMaps);
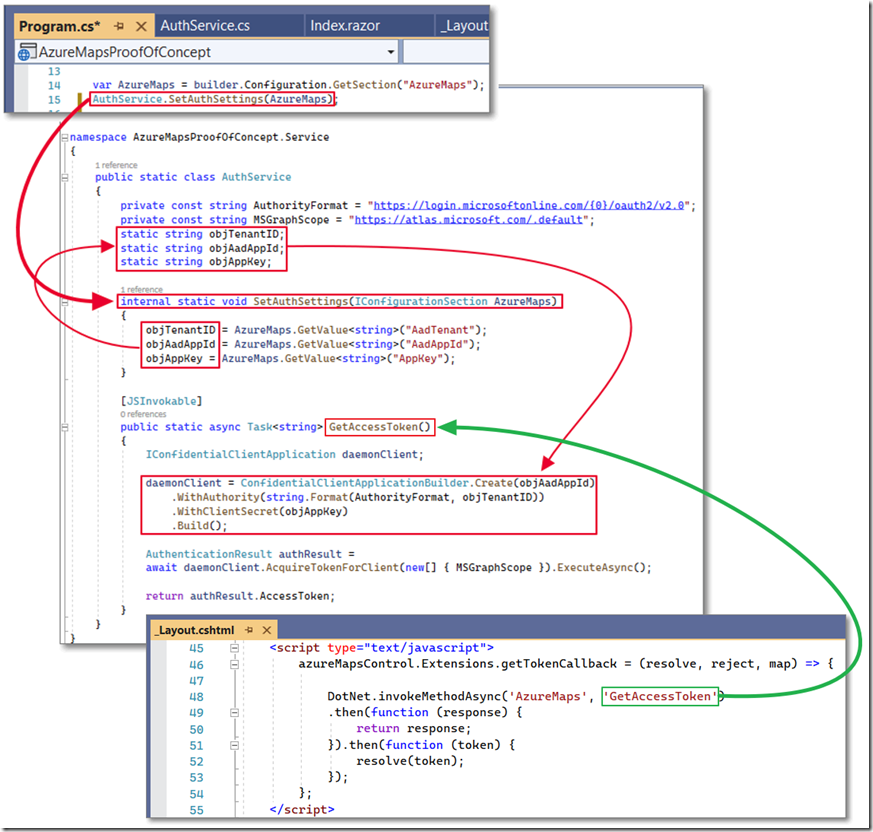
Note: This uses a technique to get the values from the appsettings.json file into a static class that can be called by Blazor JavaScript from the article: Calling static .NET methods (in Blazor), from: https://blazor-university.com.

Lastly, we replace all the HTML Markup in the Index.razor file with the following:
<AzureMap Id="map"CameraOptions="new CameraOptions { Zoom = 10 }"StyleOptions="new StyleOptions { ShowLogo = false }"EventActivationFlags="MapEventActivationFlags.None().Enable(MapEventType.Ready)"TrafficOptions="new AzureMapsControl.Components.Traffic.TrafficOptions {Incidents = false,Flow = AzureMapsControl.Components.Traffic.TrafficFlow.Relative }"OnReady="OnMapReadyAsync" />
Also, we replace the OnAfterRenderAsync method with the following:
public async Task OnMapReadyAsync(MapEventArgs eventArgs){CurrentPositionResult = await GeolocationService.GetCurrentPosition();if (CurrentPositionResult.IsSuccess){await eventArgs.Map.SetCameraOptionsAsync(options => options.Center =new AzureMapsControl.Components.Atlas.Position(Convert.ToDouble(CurrentLongitude), Convert.ToDouble(CurrentLatitude)));await eventArgs.Map.SetTrafficOptionsAsync(options => options.Incidents = true);}}

When we run the application, the map, showing traffic, will show for our current location.
Download
The project is available on the Downloads page on this site.
You must have Visual Studio 2022 (or higher) installed to run the code.
Links
