6/16/2021 Admin
Blazor Azure Communication Services
NOTE: The sample code is out of date and contains components that have been deprecated / For an updated sample see: https://github.com/EthanG78/BlazorVideoChat
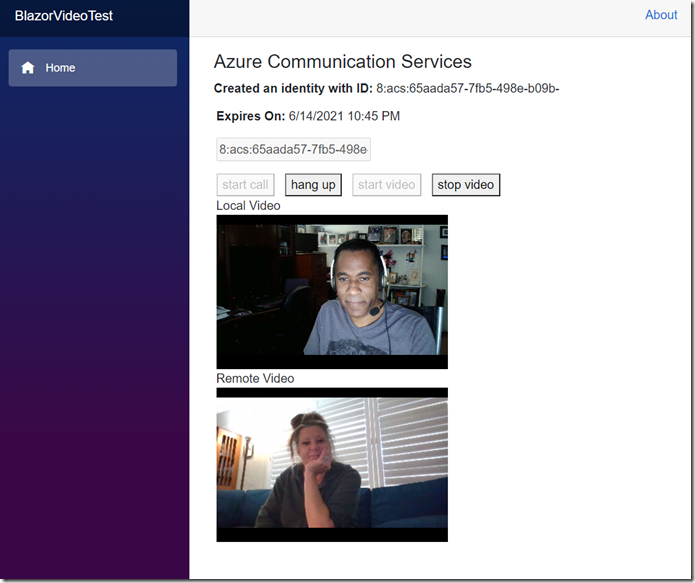
You can make a Microsoft Blazor application that leverages Azure Communications Services.
Azure Communication Services allows you to build custom communication applications using the same platform used by Microsoft Teams. You can implement solutions using video, audio, SMS (Texting) and web base text chat. It also allows Microsoft Teams interoperability.
The Application
(Note: At the time of this article, this only works in Google Chrome or Microsoft Edge web browsers).
After creating an Azure Communication Service (see: Create a Communication Services resource), and obtaining a connection string (see: this link), download he sample application from the Downloads page on this site.
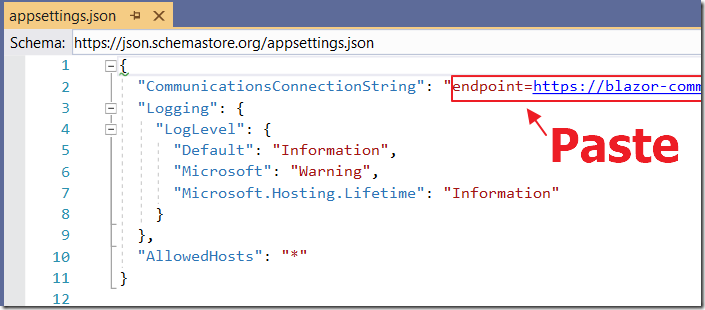
On a computer, that has a web camera, unzip the files and open it in Visual Studio.
Paste the connection string in the CommunicationsConnectionString property in the appsettings.json file.
Note: You will also need to install Node.js.
Hit F5 to run the application in Visual Studio.
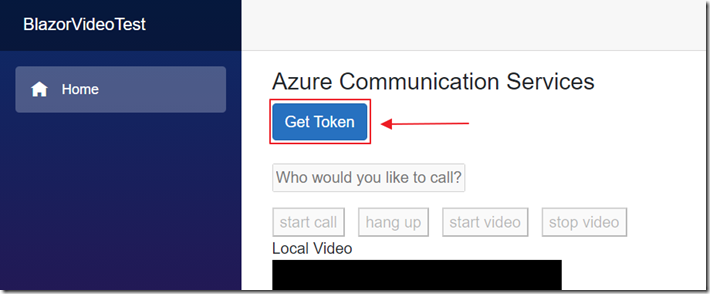
When the application displays, click the Get Token button.
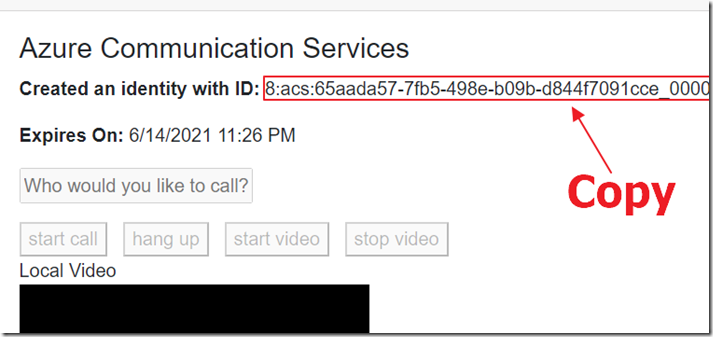
Copy the Identity ID that is created that displays.
Keep the web browser open and the site running.
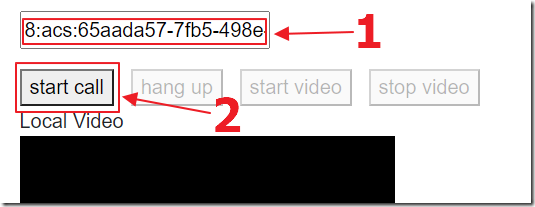
Open another instance of the application, on another computer, that has a camera, and follow the same process.
This time, paste the Identity ID that was displayed on the first computer, in the “Who would you like to call?” box, and click the start call button.
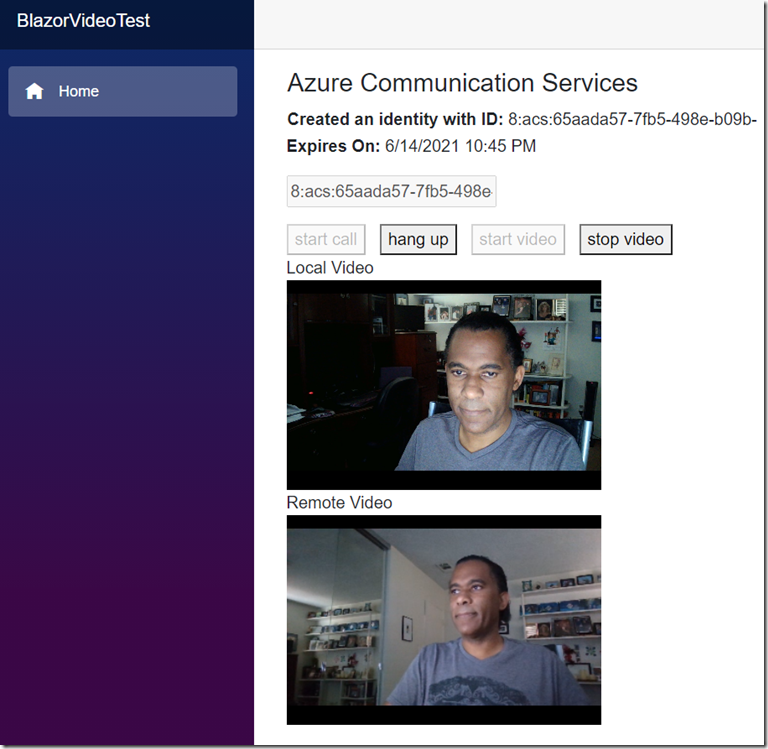
The two computers will connect to each other and you will be able to talk and see video.
Set Up Azure Communications Services
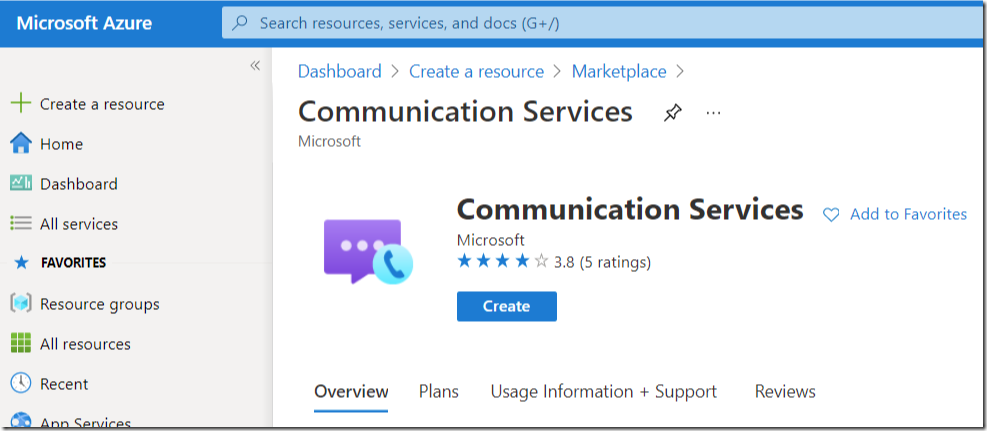
To run the sample code, first obtain a Microsoft Azure account with an active subscription (see: Create an account for free).
Next, create a Communication Services resource (see: Create a Communication Services resource).
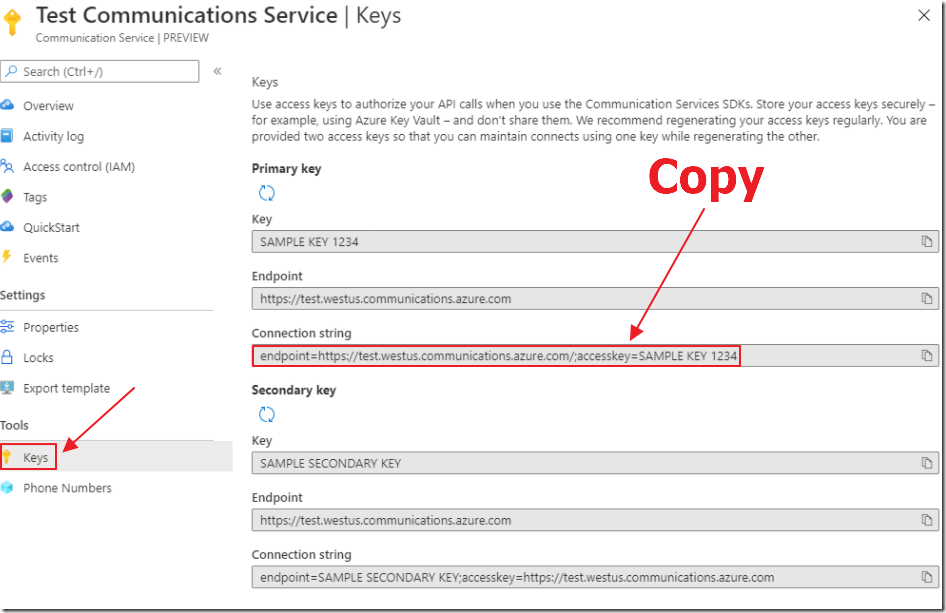
Finally, copy the Connection string from the Keys section (see: this link).
Set Up Node JS

Install Node.js Active LTS and Maintenance LTS versions (8.11.1 and 10.14.1).
Creating The Blazor Application

In Visual Studio, we create a normal Server Side Blazor application.
We install the Azure.Communication.Identity NuGet package.
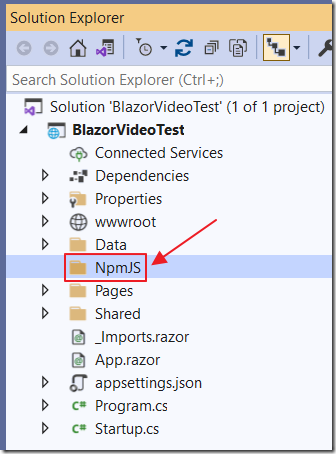
(Note: much of this was taken from How to Use NPM Packages in Blazor - Brian Lagunas)
Then add a folder called NpmJS.
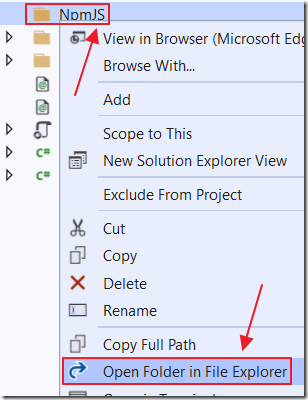
We right-click on that folder and select Open Folder in File Explorer.
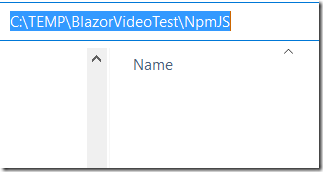
We can highlight the path…
![]()
Type CMD and press enter…

This will open up the command line.
Enter:
npm init –y
and press Enter.
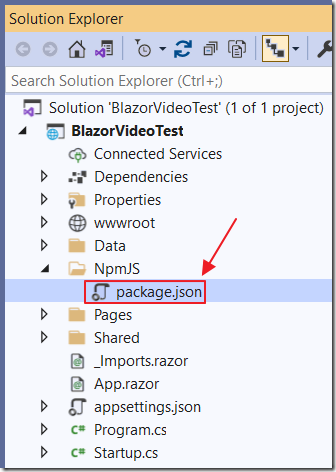
This will create the package.json file.
Install NPM Packages

Next, type:
npm install webpack@4.42.0 webpack-cli@3.3.11 webpack-dev-server@3.10.3 --save-dev
and press Enter.
This will create a node_modules folder (you will need to switch to “Show All files” in Visual Studio to see it), and install the required components.
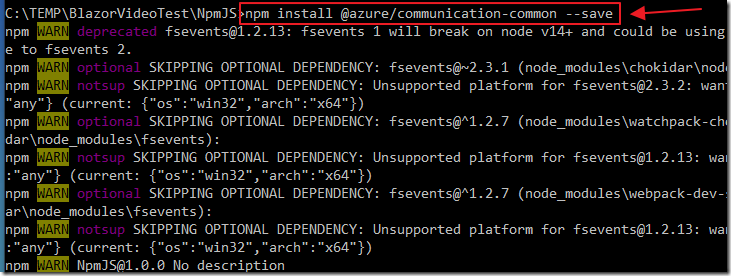
Next, install the Azure Communication Services Calling SDK for JavaScript by entering:
npm install @azure/communication-common --save
and press Enter.
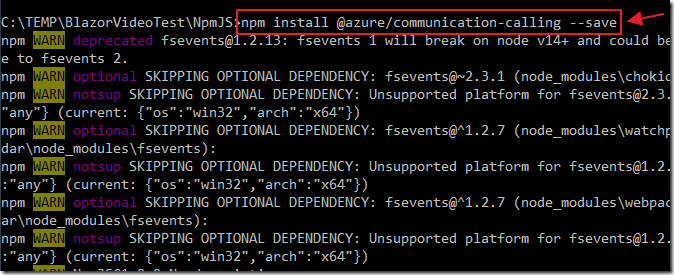
Type:
npm install @azure/communication-calling --save
and press Enter.
Add JavaScript Script
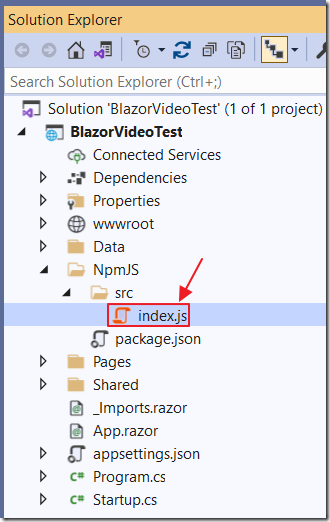
Create a src directory under the NpmJS folder, and add a index.js file using the following code:
import { CallClient, CallAgent, VideoStreamRenderer, LocalVideoStream } from "@azure/communication-calling";import { AzureCommunicationTokenCredential } from '@azure/communication-common';let call;let callAgent;const calleeInput = document.getElementById("callee-id-input");const callButton = document.getElementById("call-button");const hangUpButton = document.getElementById("hang-up-button");const stopVideoButton = document.getElementById("stop-Video");const startVideoButton = document.getElementById("start-Video");let placeCallOptions;let deviceManager;let localVideoStream;let rendererLocal;let rendererRemote;window.showAlert = async function (message) {await alert(message);}window.init = async function (USER_ACCESS_TOKEN) {const callClient = new CallClient();const tokenCredential = new AzureCommunicationTokenCredential(USER_ACCESS_TOKEN);callAgent = await callClient.createCallAgent(tokenCredential, { displayName: 'optional ACS user name' });// Receive an incoming call// To handle incoming calls you need to listen to the `incomingCall` event of `callAgent`.// Once there is an incoming call, you need to enumerate local cameras and construct// a `LocalVideoStream` instance to send a video stream to the other participant.// You also need to subscribe to`remoteParticipants` to handle remote video streams.You can// accept or reject the call through the `incomingCall` instance.callAgent.on('incomingCall', async e => {const videoDevices = await deviceManager.getCameras();const videoDeviceInfo = videoDevices[0];localVideoStream = new LocalVideoStream(videoDeviceInfo);localVideoView();stopVideoButton.disabled = false;callButton.disabled = true;hangUpButton.disabled = false;const addedCall = await e.incomingCall.accept({ videoOptions: { localVideoStreams: [localVideoStream] } });call = addedCall;subscribeToRemoteParticipantInCall(addedCall);});// Subscribe to call updates// You need to subscribe to the event when the remote participant ends the call to// dispose of video renderers and toggle button states.callAgent.on('callsUpdated', e => {e.removed.forEach(removedCall => {// dispose of video rendersrendererLocal.dispose();rendererRemote.dispose();// toggle button stateshangUpButton.disabled = true;callButton.disabled = false;stopVideoButton.disabled = true;})})deviceManager = await callClient.getDeviceManager();callButton.disabled = false;calleeInput.disabled = false;callButton.addEventListener("click", async () => {const videoDevices = await deviceManager.getCameras();const videoDeviceInfo = videoDevices[0];localVideoStream = new LocalVideoStream(videoDeviceInfo);placeCallOptions = { videoOptions: { localVideoStreams: [localVideoStream] } };localVideoView();stopVideoButton.disabled = false;startVideoButton.disabled = true;const userToCall = calleeInput.value;call = callAgent.startCall([{ communicationUserId: userToCall }],placeCallOptions);subscribeToRemoteParticipantInCall(call);hangUpButton.disabled = false;callButton.disabled = true;calleeInput.disabled = true;});hangUpButton.addEventListener("click", async () => {// dispose of the renderersrendererLocal.dispose();rendererRemote.dispose();// end the current callawait call.hangUp();// toggle button stateshangUpButton.disabled = true;callButton.disabled = false;stopVideoButton.disabled = true;calleeInput.disabled = false;});stopVideoButton.addEventListener("click", async () => {await call.stopVideo(localVideoStream);rendererLocal.dispose();startVideoButton.disabled = false;calleeInput.disabled = false;stopVideoButton.disabled = true;});startVideoButton.addEventListener("click", async () => {await call.startVideo(localVideoStream);localVideoView();stopVideoButton.disabled = false;startVideoButton.disabled = true;calleeInput.disabled = true;});}function handleVideoStream(remoteVideoStream) {remoteVideoStream.on('isAvailableChanged', async () => {if (remoteVideoStream.isAvailable) {remoteVideoView(remoteVideoStream);} else {rendererRemote.dispose();}});if (remoteVideoStream.isAvailable) {remoteVideoView(remoteVideoStream);}}function subscribeToParticipantVideoStreams(remoteParticipant) {remoteParticipant.on('videoStreamsUpdated', e => {e.added.forEach(v => {handleVideoStream(v);})});remoteParticipant.videoStreams.forEach(v => {handleVideoStream(v);});}function subscribeToRemoteParticipantInCall(callInstance) {callInstance.on('remoteParticipantsUpdated', e => {e.added.forEach(p => {subscribeToParticipantVideoStreams(p);})});callInstance.remoteParticipants.forEach(p => {subscribeToParticipantVideoStreams(p);})}async function localVideoView() {rendererLocal = new VideoStreamRenderer(localVideoStream);const view = await rendererLocal.createView();document.getElementById("myVideo").appendChild(view.target);}async function remoteVideoView(remoteVideoStream) {rendererRemote = new VideoStreamRenderer(remoteVideoStream);const view = await rendererRemote.createView();document.getElementById("remoteVideo").appendChild(view.target);}
This is the JavaScript, that leverages the Azure Communications Services SDK, required by the application.
It will be called by C# code added later.
Update package.json File
Open the package.json file and alter it so the contents resemble the following:
{"name": "NpmJS","version": "1.0.0","description": "","main": "index.js","scripts": {"build": "webpack ./src/index.js --output-path ../wwwroot/js --output-filename index.bundle.js"},"keywords": [],"author": "","license": "ISC","devDependencies": {"webpack": "^4.42.0","webpack-cli": "^3.3.11","webpack-dev-server": "^3.10.3"},"dependencies": {"@azure/communication-calling": "^1.0.0","@azure/communication-common": "^1.0.0"}}
This basically adds a build step that will webpack JavaScript from the NpmJS/src/index.js file and compile it to wwwroot\js\index.bundle.js.
Reference JavaScript In _Host.cshtml
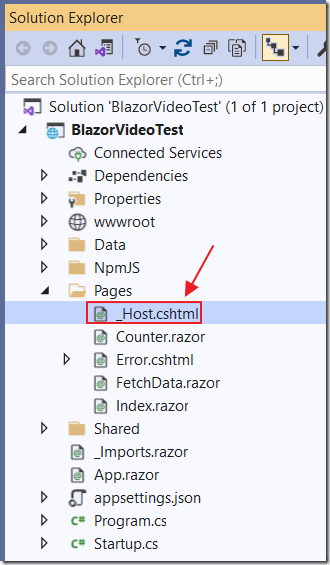
To allow the application to call the JavaScript in the resulting index.bundle.js file, open the _Host.cshtml file and add the following line before the closing </body> tag:
<script src="js/index.bundle.js"></script>
Set NPM Build In Project Settings
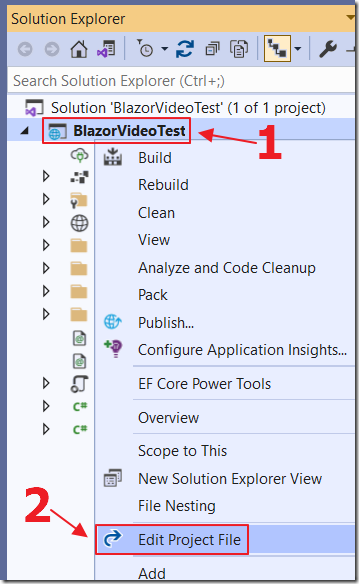
Right-click on the project node and select Edit Project File.
Add the following build step before the closing </Project> tag:
<Target Name="PreBuild" BeforeTargets="PreBuildEvent"><Exec Command="npm install" WorkingDirectory="NpmJS" /><Exec Command="npm run build" WorkingDirectory="NpmJS" /></Target>
Build the project.
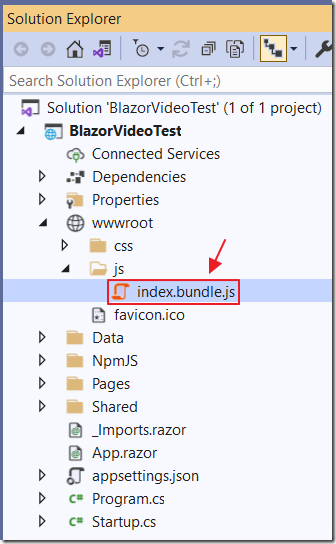
The index.bundle.js file will be created (Note: The build will take a lot longer than usual because of the NPM build steps).
Add the .Razor Code
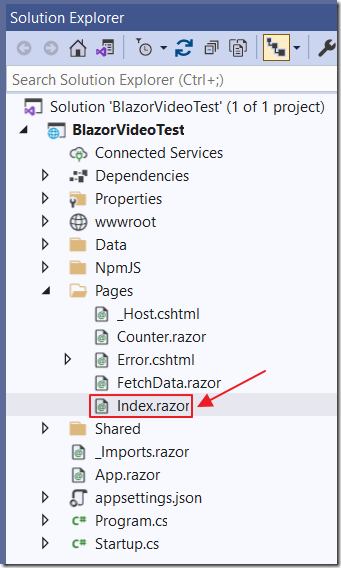
Finally, open the Index.razor page, and replace all the code with the following code:
@page "/"@using Microsoft.Extensions.Configuration@using Azure.Communication;@using Azure.Communication.Identity@inject IJSRuntime JSRuntime;@inject IConfiguration _configuration
<h4>Azure Communication Services</h4>@if (CommunicationUser == null){<button class="btn btn-primary" @onclick="GetToken">Get Token</button><br /><br />}@if (CommunicationUser != null){<p><b>Created an identity with ID:</b> @CommunicationUser.Id</p><p><b>Expires On:</b>@ExpiresOn.DateTime.ToShortDateString()@ExpiresOn.DateTime.ToShortTimeString()</p>}<input id="callee-id-input"type="text"placeholder="Who would you like to call?"style="margin-bottom:1em; width: 200px;" disabled="true" /><div><button id="call-button" type="button" disabled="true">start call</button> <button id="hang-up-button" type="button" disabled="true">hang up</button> <button id="start-Video" type="button" disabled="true">start video</button> <button id="stop-Video" type="button" disabled="true">stop video</button></div><div>Local Video</div><div style="height:200px; width:300px; background-color:black; position:relative;"><div id="myVideo" @ref=myVideostyle="background-color: black; position:absolute; top:50%; transform: translateY(-50%);"></div></div><div>Remote Video</div><div style="height:200px; width:300px; background-color:black; position:relative;"><div id="remoteVideo" @ref=remoteVideostyle="background-color: black; position:absolute; top:50%; transform: translateY(-50%);"></div></div>
@code {private ElementReference myVideo;private ElementReference remoteVideo;private CommunicationUserIdentifier CommunicationUser = null;private string CommunicationsToken;private DateTimeOffset ExpiresOn;private async void GetToken(){string CommunicationsConnectionString =_configuration.GetValue<string>("CommunicationsConnectionString");var client = new CommunicationIdentityClient(CommunicationsConnectionString);// Issue an identity and an access token with the "voip" scope for the new identityvar identityAndTokenResponse = await client.CreateUserAndTokenAsync(scopes: new[] { CommunicationTokenScope.VoIP });CommunicationUser = identityAndTokenResponse.Value.User;CommunicationsToken = identityAndTokenResponse.Value.AccessToken.Token;ExpiresOn = identityAndTokenResponse.Value.AccessToken.ExpiresOn;StateHasChanged();await JSRuntime.InvokeVoidAsync("init", CommunicationsToken);await JSRuntime.InvokeVoidAsync("showAlert", CommunicationUser.Id);}}
Links
Azure Communication Services | Microsoft Docs
Teams meeting interoperability - An Azure Communication Services concept document | Microsoft Docs
