
2/24/2019 Admin
Animation and Visual Effects in Blazor and Razor Components
SQL-MisterMagoo recently posted a GitHub Blazor and Razor Components example that demonstrates a compelling animation. In this post we will examine how he did it.
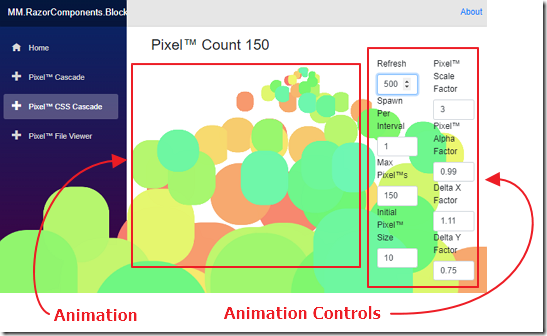
The main sample consists of animation controls and animation.
Get The Code
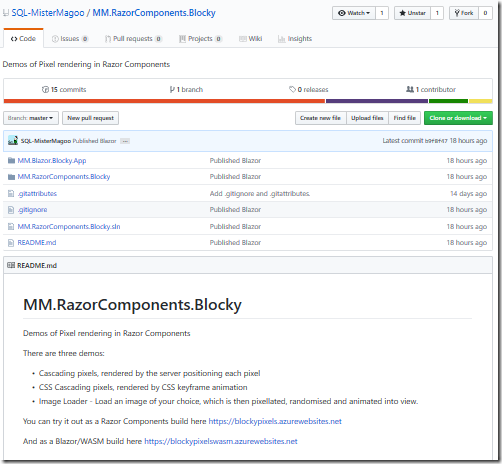
You can download the latest version of the example at this link:
https://github.com/SQL-MisterMagoo/MM.RazorComponents.Blocky
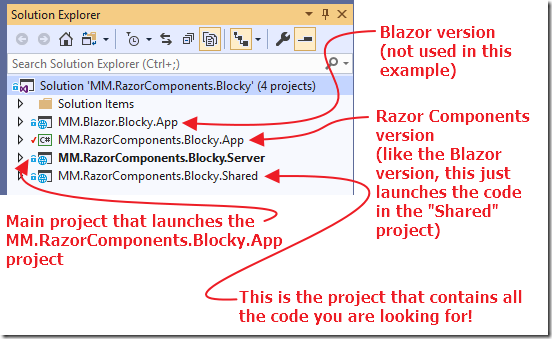
When you pull down the project and open it up in Visual Studio 2019 (or higher), you will see multiple projects.
Run The Sample

When we run the sample, we see that the sample is at route p4.
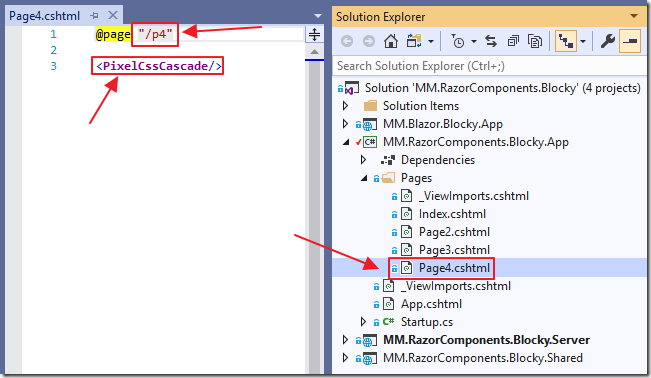
We can see that the p4 route leads to the Page4.cshtml control in the MM.RazorComponents.Blocky.App project, but all that page has on it is the PixelCssCascade control.
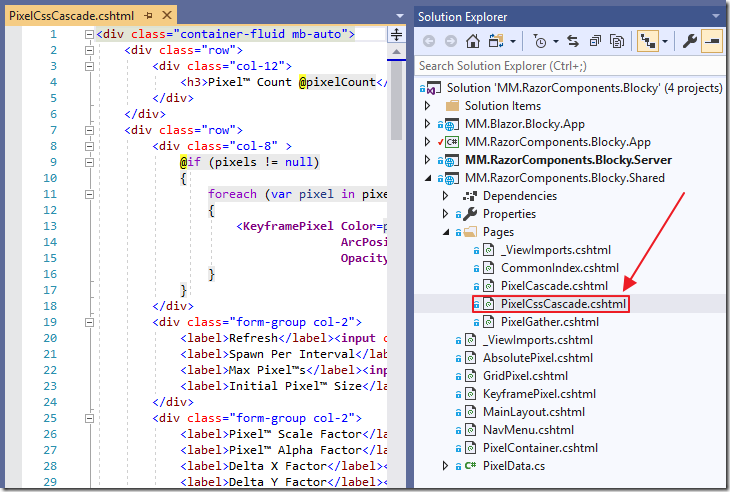
the PixelCssCascade control is in the MM.RazorComponents.Blocky.Shared project.
The PixelCssCascade Control
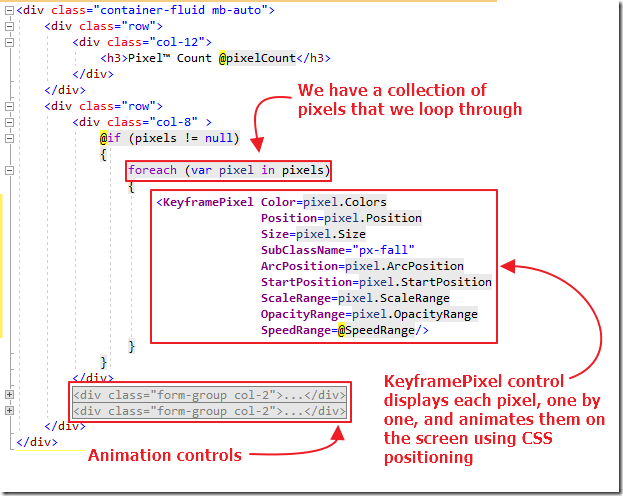
The markup for the control is very basic.
Essentially a collection of pixels is created.
The KeyframePixel control takes the values of each pixel and creates a random CSS (Cascading Style Sheets) style, based on the pixel values.
This style creates a circle and animates it on the screen using CSS positioning.

The code for the PixelCssCascade control creates the collection of pixels based on the values in the animation controls.
Each time the animation control values change, the ShouldRender method is called, and it triggers the Draw method, that is responsible for removing pixels (by calling the TrimPixels method), or calling the SpawnPixel method to create new ones.
Here are the variables that the control uses to control and manage the pixel values:
         bool Redraw = true;
        // The list of active pixels
        List<PixelDTO> pixels;
        // Task that controls refreshing the page
        Task draw;
        // Random number source for variations
        Random random;
        // Pixel spawn point
        double EX, EY;
        // Screen limits - should be read at runtime, but this is just a demo
        const int SCREEN_WIDTH = 1900;
        const int SCREEN_HEIGHT = 700;
        Vector2D SpeedRange = new Vector2D(1000, 3000);
        // Time (ms) between checks for new parameter values
        int RefreshInterval = 500;
        // Number of pixels spawned per interval : lower = fewer pixels, higher = more pixels
        int SpawnPerInterval = 1;
        // Maximum number of pixels allowed
        int MaxPixelCount = 150;
        // Initial pixel size
        double InitialPixelSize = 10.0;
        // Alter pixel size per frame : lower than 1 = reduce in size, higher than 1 = increase in size
        double PixelScaleFactor = 3.0;
        // Alter pixel alpha per frame : lower than 1 = reduce alpha, higher than 1 = increase alpha
        double PixelAlphaFactor = 0.99;
        // Alter X-axis movement delta per frame : deltaX *= DeltaXFactor
        double DeltaXFactor = 1.11;
        // Alter Y-axis movement delta per frame : deltaY += DeltaYFactor
        double DeltaYFactor = 0.75;
        double Hue = 1.0;
        int pixelCount = 0;
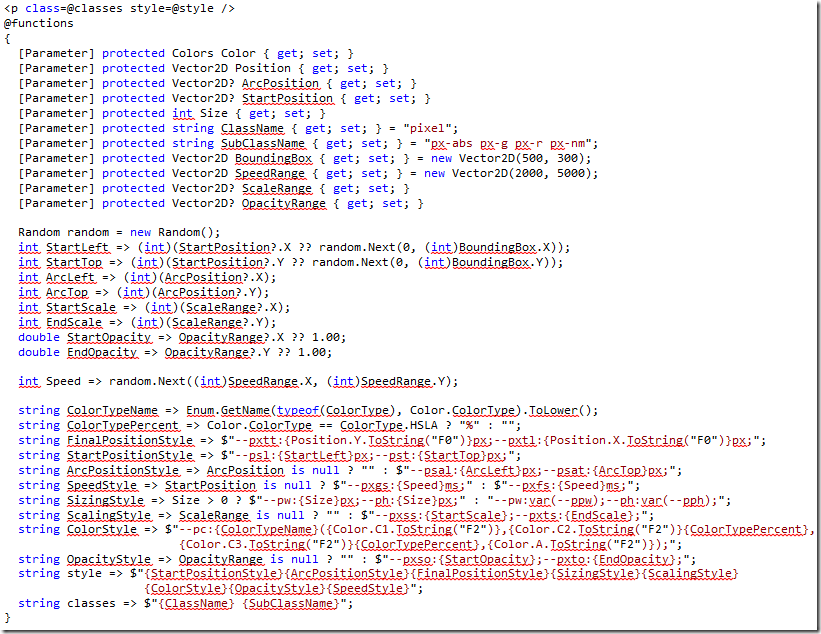
The Pixel
When we look at a pixel, this is where Blazor / Razor Components really shines.
Not only is it just a C# class, but, it contains complex types for the properties like Colors and Vector2D.
This class is the exact same class and instance used for the procedure code and the presentation code.
	public class PixelDTO
	{
		public Colors Colors;
		public Vector2D Position;
		public Vector2D Motion;
		public Vector2D? StartPosition;
		public Vector2D? ArcPosition;
		public Vector2D? ScaleRange;
		public Vector2D? OpacityRange;
		public double Scale;
		public bool ShouldDie { get; private set; }
		public int Size => (int)Scale;
		public void Die() => ShouldDie = true;
	}
The KeyframePixel Control
The KeyframPixel control is essentially a control that has a single html paragraph label that has a class and a style that is animated/manipulated by the random animation defined in the style.
This is what makes the circles grow, and animate across the screen.
Animation Blazor / Razor Components Style
What this example essentially shows is that Blazor / Razor Components is capable of any of the features and performance of any of the other SPA (Single Page Application) frameworks such as Angular, React, or Vue.
In this case, it achieves the performance by simply setting up the animation, but allowing normal CSS animation to do the actual work.
Earlier versions of the code controlled the movement in a loop that was managed by the Razor Components code. This is much less preformat and you can see the results in the Pixel Cascade example in the same solution (see the MovePixel method).