
9/22/2019 Admin
A Simple Blazor User and Role Manager
You can create a simple administration page to allow you to create, update, and delete users in your server side Blazor application by adding a single .razor page. This example also demonstrates how to update the passwords for your users.
It does this by programmatically creating an Administrator role in the Microsoft ASP.NET Core Identity membership and programmatically providing administrator access to a designated user (by placing them in the Administrators role).
The Application
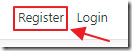
When you run the application for the first time, you will need to click the Register link and create an account called Admin@BlazorHelpWebsite.com.
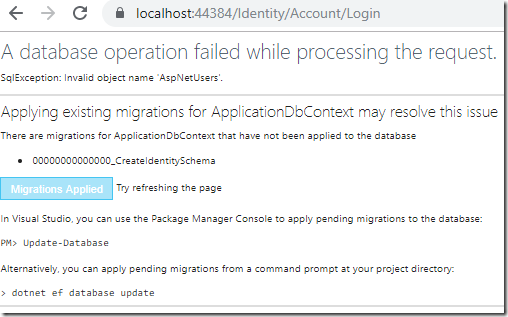
The Entity Framework Core migrations will run (to create the database)…
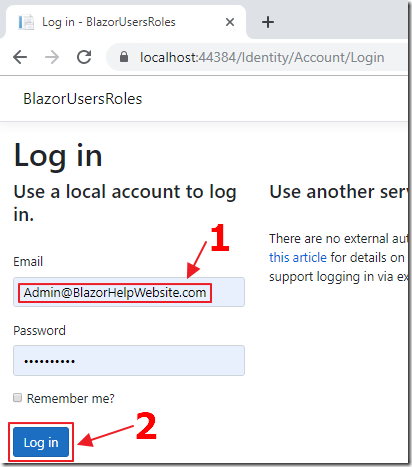
…and you will then be able to log into the application with that account.
The application is coded to programmatically add that account to the Administrators role if the user navigates to the Administration page and they are not an Administrator…
…but to have the application recognize this, you will have to log out and log back in.
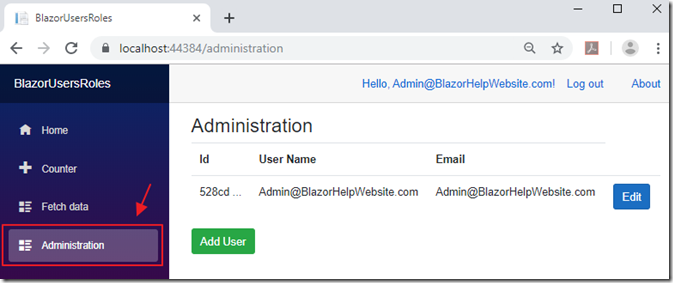
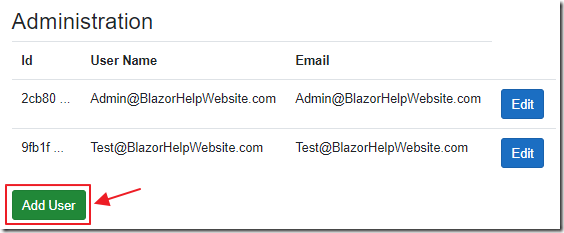
When you log back in, you will be able to navigate to the Administration page and see the User Administration.
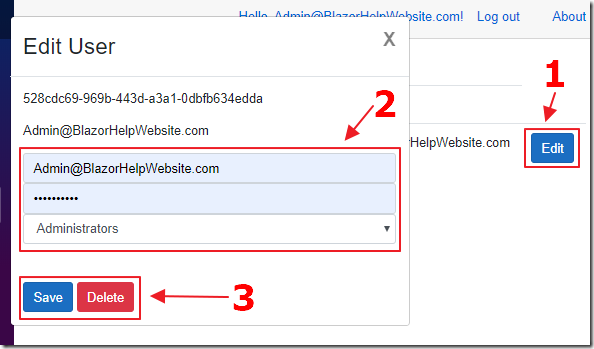
Clicking the Edit button next to an existing user allows you to update the email address of the user, their password (the password will only update if you actually make a change), and their Role (either Users or Administrators – Note: only users in the Administrators role can access the Administration page).
You can either press Save to update the user, or Delete to remove the user from the application.
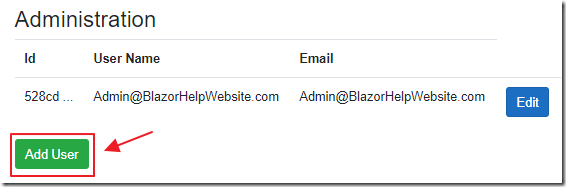
The Add User button allows you to create a new user.
Create The Application

Using Visual Studio 2019 (or higher), create a Blazor server side application.
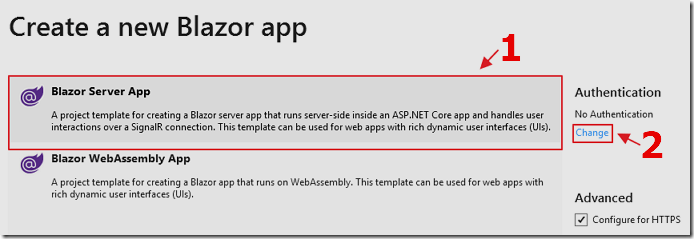
Change the Authentication…
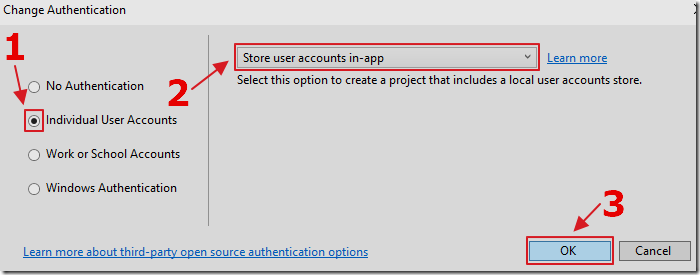
… and select Individual User Accounts.
Click OK and complete the process to create the application.
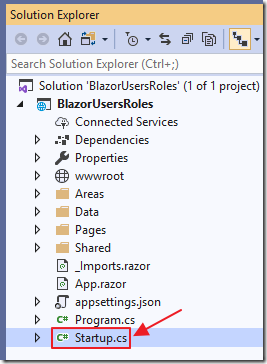
When the application opens in Visual Studio, to add support for Roles, open the Startup.cs file, and change the following code:
services.AddDefaultIdentity<IdentityUser>().AddEntityFrameworkStores<ApplicationDbContext>();
to:
services.AddDefaultIdentity<IdentityUser>().AddRoles<IdentityRole>().AddEntityFrameworkStores<ApplicationDbContext>();
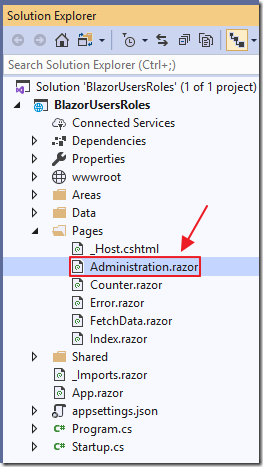
Add a new page to the project (and a link to it in the navigation menu – see: Creating A Step-By-Step End-To-End Database Server-Side Blazor Application for help doing this), called Administration.razor using the following code:
@page "/administration"@using Microsoft.AspNetCore.Authorization;@using Microsoft.AspNetCore.Identity;@inject UserManager<IdentityUser> _UserManager@inject RoleManager<IdentityRole> _RoleManager@inject AuthenticationStateProvider AuthenticationStateProvider<h3>Administration</h3><AuthorizeView><Authorized>@if (@context.User.IsInRole(ADMINISTRATION_ROLE)){<p>You are in @ADMINISTRATION_ROLE </p>}else{<p>You're not signed in as a user in @ADMINISTRATION_ROLE.</p>}</Authorized><NotAuthorized><p>You're not loggged in.</p></NotAuthorized></AuthorizeView>
@code {[CascadingParameter]private Task<AuthenticationState> authenticationStateTask { get; set; }string ADMINISTRATION_ROLE = "Administrators";System.Security.Claims.ClaimsPrincipal CurrentUser;protected override async Task OnInitializedAsync(){// ensure there is a ADMINISTRATION_ROLEvar RoleResult = await _RoleManager.FindByNameAsync(ADMINISTRATION_ROLE);if (RoleResult == null){// Create ADMINISTRATION_ROLE Roleawait _RoleManager.CreateAsync(new IdentityRole(ADMINISTRATION_ROLE));}// Ensure a user named Admin@BlazorHelpWebsite.com is an Administratorvar user = await _UserManager.FindByNameAsync("Admin@BlazorHelpWebsite.com");if (user != null){// Is Admin@BlazorHelpWebsite.com in administrator role?var UserResult = await _UserManager.IsInRoleAsync(user, ADMINISTRATION_ROLE);if (!UserResult){// Put admin in Administrator roleawait _UserManager.AddToRoleAsync(user, ADMINISTRATION_ROLE);}}// Get the current logged in userCurrentUser = (await authenticationStateTask).User;}}
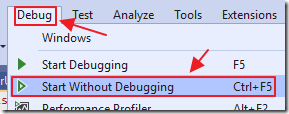
Run the application.
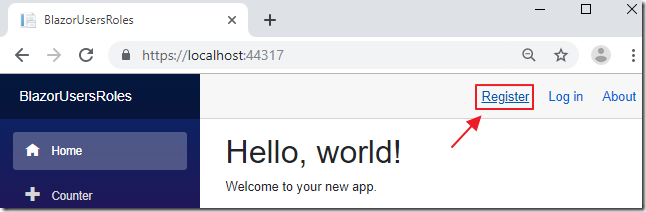
Click the Register link and create a user named Admin@BlazorHelpWebsite.com.

The Entity Framework Core migration page will show.
Click Apply Migrations.
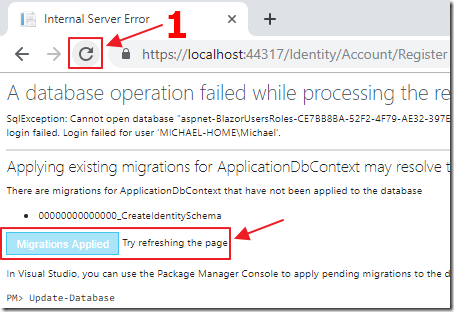
After the migrations are applied, refresh the page in the web browser.
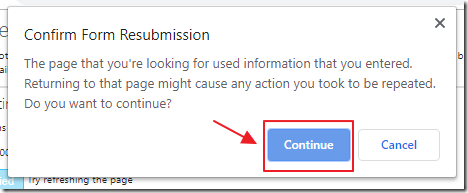
Click Continue.
You will now be logged in.
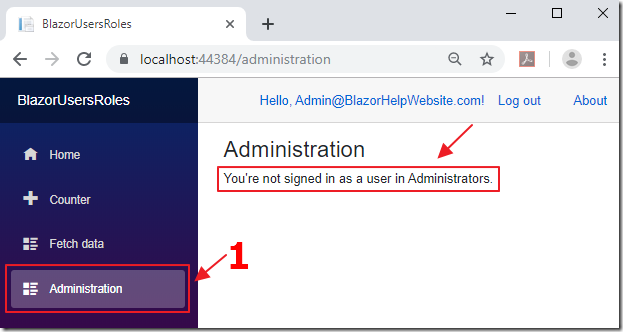
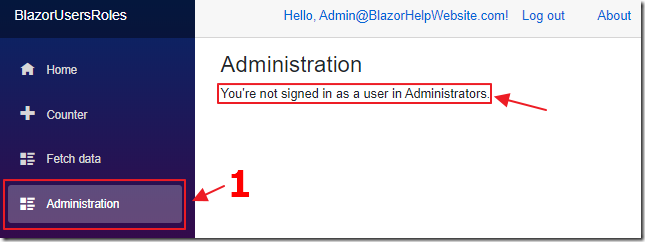
Navigate to the Administration page.
You will see a message that indicates your are not in the Administrators role (even though code has run, because you navigated to that page, to add your account to that Role).
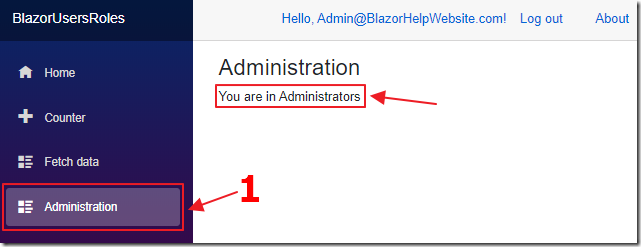
Log out and log back in again, and you will now be recognized as a user in the Administrators role.
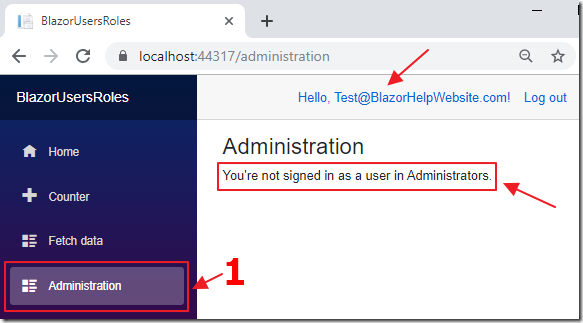
Create another user.
No matter how many times you log in and out, that user will not be placed in the Administrators role.
List Users
The first step is to list the current users in the application.
First, let’s add some fields and variables to the @code section of the Administration.razor page that we will need now and to support code we will add later:
// Property used to add or edit the currently selected userIdentityUser objUser = new IdentityUser();// Tracks the selected role for the currently selected userstring CurrentUserRole { get; set; } = "Users";// Collection to display the existing usersList<IdentityUser> ColUsers = new List<IdentityUser>();// Options to display in the roles dropdown when editing a userList<string> Options = new List<string>() { "Users", "Administrators" };// To hold any possible errorsstring strError = "";// To enable showing the Popupbool ShowPopup = false;
Let’s also add method stubs for methods we will need later.
We add them now because markup that we will add soon, will refer to these methods, and the code will not compile if the methods do not exist (even though at this point the methods will not actually perform the eventual functionality).
void AddNewUser(){}async Task SaveUser(){}async Task EditUser(IdentityUser _IdentityUser){}async Task DeleteUser(){}void ClosePopup(){// Close the PopupShowPopup = false;}
Now let us add the code to display the existing users.
Add the following method:
public void GetUsers(){// clear any error messagesstrError = "";// Collection to hold usersColUsers = new List<IdentityUser>();// get users from _UserManagervar user = _UserManager.Users.Select(x => new IdentityUser{Id = x.Id,UserName = x.UserName,Email = x.Email,PasswordHash = "*****"});foreach (var item in user){ColUsers.Add(item);}}
Also, add the following code to the end of the protected override async Task OnInitializedAsync() method so that the getUsers() method will be invoked when the user navigates to the page:
// Get the usersGetUsers();
Finally, in the HTML markup section, at the top of the file, replace this line of code:
<p>You are in @ADMINISTRATION_ROLE </p>
With the following code:
<table class="table"><thead><tr><th>Id</th><th>User Name</th><th>Email</th></tr></thead><tbody>@foreach (var user in ColUsers){<tr><td>@user.Id.Substring(0, 5) ...</td><td>@user.UserName</td><td>@user.Email</td><td><!-- Edit the current forecast --><button class="btn btn-primary"@onclick="(() => EditUser(user))">Edit</button></td></tr>}</tbody></table>
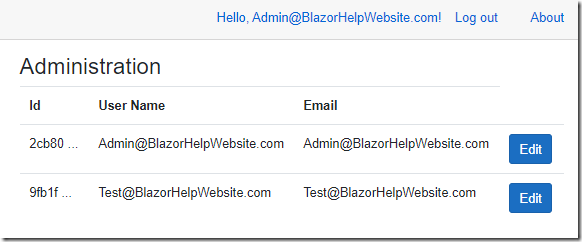
When we log in with the Admin@BlazorHelpWebsite.com account and navigate to the Administration page, we see a list of the users.
Note, the Edit button will not actually work at this point.
Add Users
In the UI markup, under the recently added table markup, add the following code to implement the popup to add and edit users and an Add User button to trigger it:
@if (ShowPopup){<!-- This is the popup to create or edit a user --><div class="modal" tabindex="-1" style="display:block" role="dialog"><div class="modal-dialog"><div class="modal-content"><div class="modal-header"><h3 class="modal-title">Edit User</h3><!-- Button to close the popup --><button type="button" class="close"@onclick="ClosePopup"><span aria-hidden="true">X</span></button></div><!-- Edit form for the current user --><div class="modal-body"><!-- Only show Id if not a new user -->@if (objUser.Id != ""){<p>@objUser.Id</p>}<!-- Only allow edit if a new user -->@if (objUser.Id != ""){<p>@objUser.UserName</p>}else{<input class="form-control" type="text"placeholder="UserName"@bind="objUser.UserName" />}<input class="form-control" type="text"placeholder="Email"@bind="objUser.Email" /><input class="form-control" type="password"placeholder="Password"@bind="objUser.PasswordHash" /><select class="form-control"@bind="@CurrentUserRole">@foreach (var option in Options){<option value="@option">@option</option>}</select><br /><br /><!-- Button to save the user --><button class="btn btn-primary"@onclick="SaveUser">Save</button><!-- Only show delete button if not a new record -->@if (objUser.Id != ""){<!-- Button to delete the forecast --><button class="btn btn-danger"@onclick="DeleteUser">Delete</button>}<br /><span style="color:red">@strError</span></div></div></div></div>}<button class="btn btn-success" @onclick="AddNewUser">Add User</button>
In the procedure code, change the AddNewUser() method to the following (this is triggered when the Add User button is clicked):
void AddNewUser(){// Make new userobjUser = new IdentityUser();objUser.PasswordHash = "*****";// Set Id to blank so we know it is a new recordobjUser.Id = "";// Open the PopupShowPopup = true;}
Finally, alter the SaveUser() method to the following:
async Task SaveUser(){try{// Is this an existing user?if (objUser.Id != ""){// To be implemented later...}else{// Insert new uservar NewUser =new IdentityUser{UserName = objUser.UserName,Email = objUser.Email};var CreateResult =await _UserManager.CreateAsync(NewUser, objUser.PasswordHash);if (!CreateResult.Succeeded){if (CreateResult.Errors.FirstOrDefault() != null){strError =CreateResult.Errors.FirstOrDefault().Description;}else{strError = "Create error";}// Keep the popup openedreturn;}else{// Handle Rolesif (CurrentUserRole == ADMINISTRATION_ROLE){// Put admin in Administrator roleawait _UserManager.AddToRoleAsync(NewUser, ADMINISTRATION_ROLE);}}}// Close the PopupShowPopup = false;// Refresh UsersGetUsers();}catch (Exception ex){strError = ex.GetBaseException().Message;}}
When we run the application, we can now click the Add User button to open the popup.
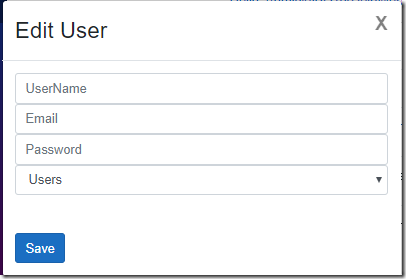
The popup allows us to enter the information required to create a new user.
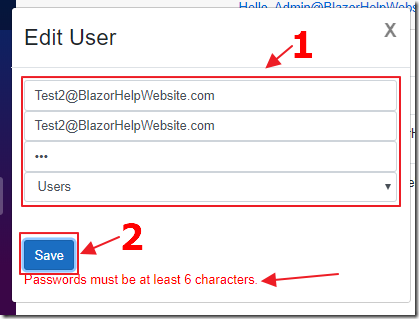
We can enter information to create a new user, and receive error messages if there are any.

The new user is created and can now log in using the password we created.
Update (And Delete)
To enable the Edit button to work, alter the EditUser method to the following:
async Task EditUser(IdentityUser _IdentityUser){// Set the selected user// as the current userobjUser = _IdentityUser;// Get the uservar user = await _UserManager.FindByIdAsync(objUser.Id);if (user != null){// Is user in administrator role?var UserResult =await _UserManager.IsInRoleAsync(user, ADMINISTRATION_ROLE);if (UserResult){CurrentUserRole = ADMINISTRATION_ROLE;}else{CurrentUserRole = "Users";}}// Open the PopupShowPopup = true;}
Next, to enable updating to work, alter the SaveUser() method to replace the following code:
// To be implemented later...
with:
// Get the uservar user = await _UserManager.FindByIdAsync(objUser.Id);// Update Emailuser.Email = objUser.Email;// Update the userawait _UserManager.UpdateAsync(user);// Only update password if the current value// is not the default valueif (objUser.PasswordHash != "*****"){var resetToken =await _UserManager.GeneratePasswordResetTokenAsync(user);var passworduser =await _UserManager.ResetPasswordAsync(user,resetToken,objUser.PasswordHash);if (!passworduser.Succeeded){if (passworduser.Errors.FirstOrDefault() != null){strError =passworduser.Errors.FirstOrDefault().Description;}else{strError = "Pasword error";}// Keep the popup openedreturn;}}// Handle Roles// Is user in administrator role?var UserResult =await _UserManager.IsInRoleAsync(user, ADMINISTRATION_ROLE);// Is Administrator role selected// but user is not an Administrator?if ((CurrentUserRole == ADMINISTRATION_ROLE)&(!UserResult)){// Put admin in Administrator roleawait _UserManager.AddToRoleAsync(user, ADMINISTRATION_ROLE);}else{// Is Administrator role not selected// but user is an Administrator?if ((CurrentUserRole != ADMINISTRATION_ROLE)&(UserResult)){// Remove user from Administrator roleawait _UserManager.RemoveFromRoleAsync(user, ADMINISTRATION_ROLE);}}
Finally, alter the DeleteUser() method to the following:
async Task DeleteUser(){// Close the PopupShowPopup = false;// Get the uservar user = await _UserManager.FindByIdAsync(objUser.Id);if (user != null){// Delete the userawait _UserManager.DeleteAsync(user);}// Refresh UsersGetUsers();}
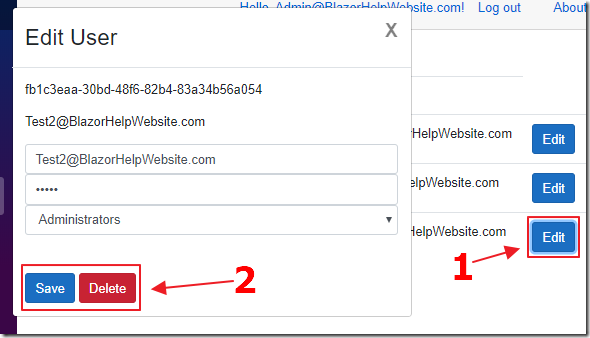
When you run the application, you will now have the ability to update and delete users.
Links
Introduction to Identity on ASP.NET Core
Role-based authorization in ASP.NET Core
Role Based Security in an ASP.NET Core Application
Download
The project is available on the Downloads page on this site.
You must have Visual Studio 2019 (or higher) installed to run the code.