9/21/2025 Admin
Vibe Coding Using Visual Studio Code and Blazor: Creating an RFP Responder
The era of intelligent, AI-assisted development has arrived—and with the power of .NET, large language models, and Microsoft Copilot in Visual Studio Code, building sophisticated business tools has never been more accessible. By integrating Copilot directly into your VS Code workflow, you can accelerate your coding.
In this post, we’ll walk through how to create an AI-powered Request for Proposals (RFP) response writer that blends the performance and flexibility of .NET with the natural language capabilities of cutting-edge LLMs.
This is typically called vibe coding.
Note: The code for this article is here: https://github.com/ADefWebserver/AspireVibeCodingVSCode.
If you need a full-featured open-source RFP Response creator see: https://github.com/BlazorData-Net/RFPAPP.
Getting Started
In the first step, we’ll walk through building the foundation for an AI-powered RFP response writer by setting up a modern Blazor application in Visual Studio Code. You’ll learn how to install the C# Dev Kit, add the .NET Aspire Project Templates, and create both an Aspire App Host and a Blazor Global WebAssembly App. We’ll connect these projects by adding the necessary project references, update the AppHost.cs file with the required configuration, and then debug and run the solution.
Follow this tutorial at: Using Visual Studio Code with Aspire and Blazor
You can download the code at this starting point at this link: https://github.com/ADefWebserver/AspireVibeCodingVSCode/tree/8d9c05eea1274891252748a72c93df5e0e2da404
Vibe Coding
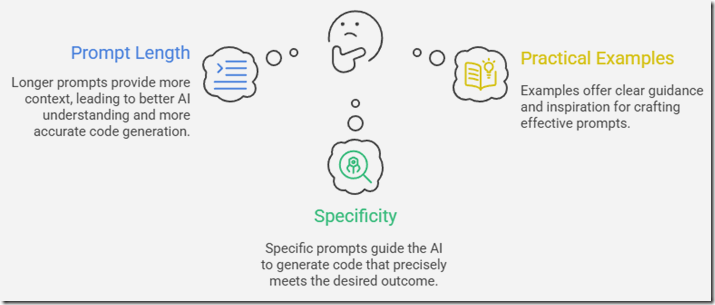
Vibe coding, at its core, is about communicating your intent clearly and comprehensively to an AI model. Instead of relying on short, ambiguous prompts, vibe coding advocates for crafting longer, more descriptive prompts that convey the desired functionality, style, and context of the code you want to generate. Think of it as setting the "vibe" for the AI, guiding it towards the specific outcome you envision.
You will find that longer more descriptive prompts provide better results.
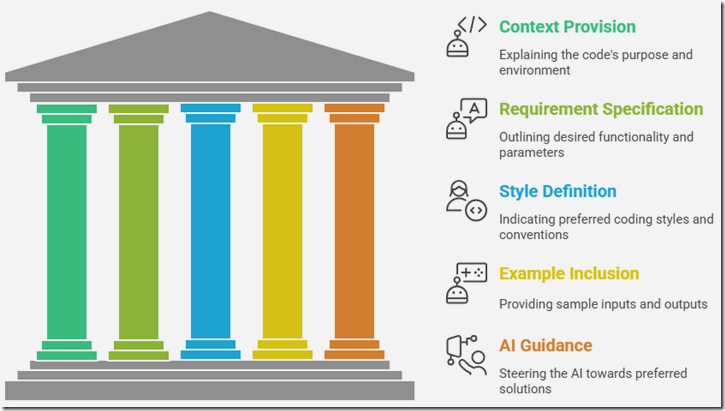
When creating prompts always try to provide context to instruct the AI model as to what you are doing. Also, do not assume it understands anything. Be explicit in your instructions.
Set up GitHub Copilot in VS Code
Follow these directions to set-up Copilot in Visual Studio Code: https://code.visualstudio.com/docs/copilot/setup
You can open the Chat window using Ctrl+Alt+I.
Adding the copilot-instructions.md file
To provide project-wide guidance to GitHub Copilot in Visual Studio Code, you can create a copilot-instructions.md file in the root of your repository. This plain-text file acts as a set of persistent instructions that Copilot will consider whenever it generates code within that workspace. Each line can contain a directive or best practice you want Copilot to follow, such as: “Use dependency injection,” “Prefer async/await for all I/O,” or “Follow SOLID principles.” Because this file lives in your project, it can be committed to source control and shared with your team, ensuring that everyone receives consistent Copilot suggestions aligned with your project’s architectural standards and coding style.
For more information see: Prompt Files and Instructions Files Explained and Use custom instructions in VS Code.
The first step is to enable the github.copilot.chat.codeGeneration.useInstructionFiles setting in your Visual Studio Code.
For example, we will switch to the ASPIREVIBECODINGVSCODE section in the Explorer and right-click on it and select New Folder…
We will add a new folder called .github and press Enter.
We will right-click on the folder and select New file…
We will name the file copilot-instructions.md and press Enter.
We will add these contents:
# Blazor Version
Ensure the project remains a Blazor 9 project.
Do not downgrade to earlier Blazor versions.
# Blazor WebAssembly
Blazor WebAssmebly client projects can save files to the local file system.
Use the Blazor WebAssembly Virtual File System Access API.
See: https://blazorhelpwebsite.com/ViewBlogPost/17069
# Radzen Blazor Coding Guidelines
Always use Radzen components for Blazor UI controls and theming.
See documentation at: https://razor.radzen.com
Save the file (File > Save) and switch back to the Solution Explorer.
Adding Radzen Theming
Our first example of vibe coding will be to add Radzen theming and support to the project.
To do this we will use Agent Mode in Copilot.
Agent mode is the most advanced AI feature in Visual Studio Code. With just a natural language prompt, it can independently plan and build complex functionality across multiple files. Let’s put it to work by creating the core features of your task manager.
To enable agent mode in Visual Studio Code, enable the chat.agent.enabled setting.
Open the Chat window using Ctrl+Alt+I.
Ensure you are in the Agent mode.
Enter the following prompt and click the Send button:
Configure the project to use Radzen per the official setup guide: https://razor.radzen.com/get-started?theme=default
Set the root App.razor @rendermode attribute to InteractiveWebAssembly.
Apply the Default Radzen theme.
Update the Pages/Counter.razor page:
Replace the default button(s) with Radzen button components.
Use Radzen styling (consistent with the Default theme) for layout and visuals.
Ensure the page compiles and runs correctly in the Blazor WebAssembly client.
The AI will start working on the tasks…
At various points you will have to give permission for the AI Agent to perform actions.
The AI will indicate when it is done.
Click the Keep button to keep the changes it made to the project.
When we run the project and navigate to the Counter page we see that it has re-styled it to use the Radzen controls and theming.
Note: If you see any errors, that files are locked and cannot be updated, close Visual Studio Code and re-open it and try debugging again.
You can see the code at this point at this link.
Create The Knowledgebase
We will now create the functionality to allow the user to upload content for the knowledgebase.
This knowledgebase will be used by the AI to answer questions in the submitted RFP.
First we want to start a new chat session.
The AI models have a limited context window and we want to reset it whenever possible so we don’t get an error that the context window is full.
Use the following prompt for the next task:
Add an upload button labeled "Upload Knowledgebase Content" to allow a user to upload a PDF file.
When a file is uploaded:
Convert the PDF to text.
Split the text into 250-character chunks, broken cleanly at sentence boundaries.
Generate embeddings for each chunk and for the original text.
Save the resulting data (chunks + embeddings + original text) into a file named knowledgebase.json within the Blazor WebAssembly virtual file system.
Use Blazored.LocalStorage to persist knowledgebase.json so it is saved and retrieved automatically across application restarts.
Configure the application to use Microsoft.Extensions.AI.OpenAI to make the LLM embedding calls.
The OpenAI connection settings (API key, endpoint, model, etc.) must be stored in appsettings.json.
Ensure the application loads these settings at startup and retries from them when needed.
When it completes the task, click the Keep button.
We have instructed the AI to store the settings for the OpenAI key in appsettings.json.
Open the file and enter your OpenAI API key.
You can get a key from here: https://platform.openai.com/api-keys
When we run the project we notice the Knowledgebase link doesn’t have an icon.
To fix that we return to the chat window and ask the AI to fix that.
When we run the project now the Knowledgebase link now has an icon.
However, when we click the Choose button and select a file nothing happens.
We let the AI know what the issue is in the Chat window and it makes changes…
The next issue we notice is that while a file can now be uploaded no notifications appear…
Sometimes we get serious errors…
We indicate the error and ask the AI to fix it…
We continue to iterate the process until the knowledgebase files can be uploaded…
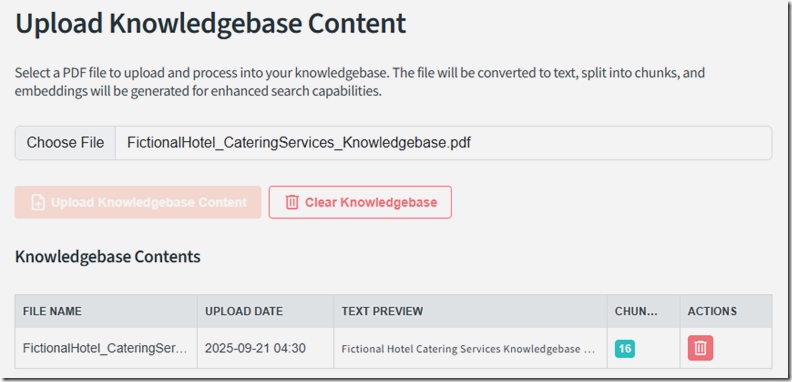
The knowledgebase files display and can be managed.
You can see the code at this point at this link.
You can get a sample knowledgebase document at this link.
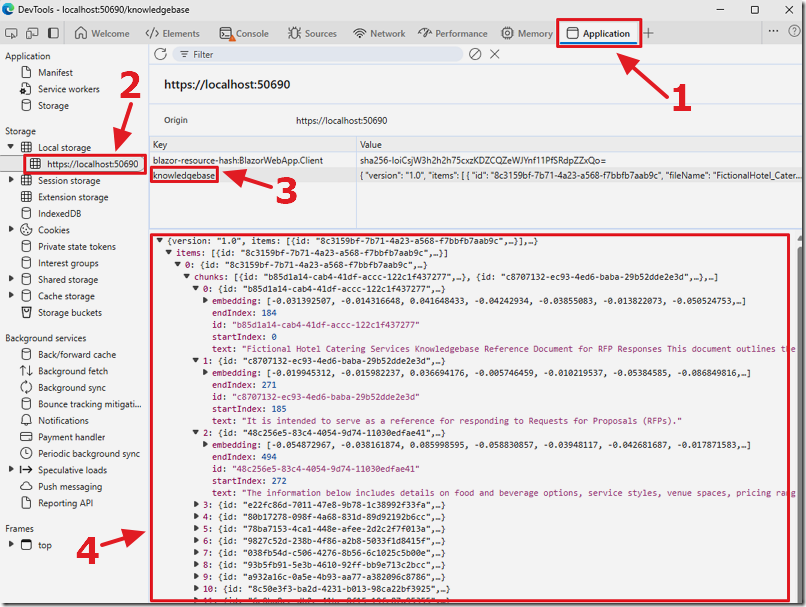
If we hit F12 in the web browser and open Developer Tools we can see the data that has been captured.
Create the RFP Response
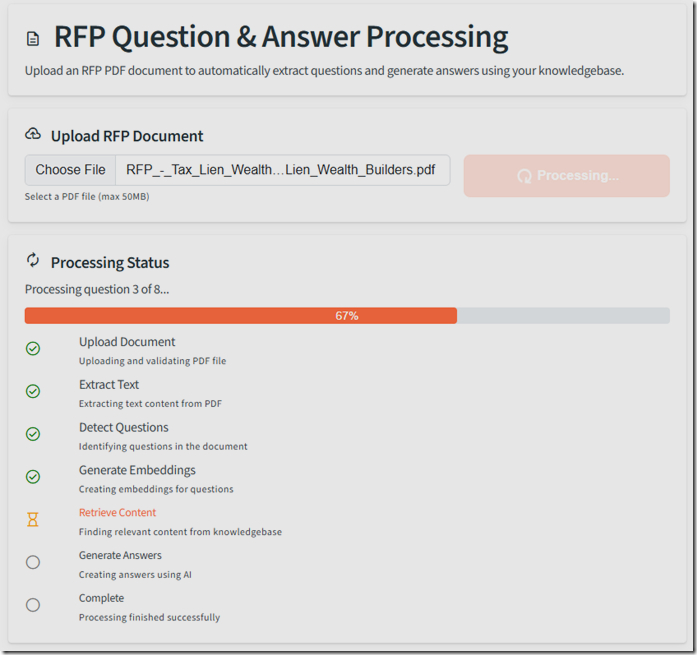
We will now have AI create the main page. The first step is to have the program allow a user to upload and RFP and identify any questions contained and answer those questions based on content in the knowledgebase. In addition we need a form to allow the user to review and edit those answers.
Use the following prompt:
In the appsettings.json file, add an OpenAI section containing a configurable Model key (for selecting which LLM to use).
On the Home.razor page:
Allow a user to upload a PDF RFP.
Extract text from the uploaded document.
Detect questions within the text and create a collection of questions.
For each question in the collection:
Generate an embedding for the question using the configured OpenAI model.
Perform RAG (Retrieval-Augmented Generation) by comparing the question embedding against the embeddings in knowledgebase.json (retrieved from Local Storage).
Use cosine similarity to find the best matches.
Create an answer for the question using the LLM specified by the Model key in appsettings.json.
Display the process of each step (upload, extraction, question detection, embedding, retrieval, and answer generation) in the UI.
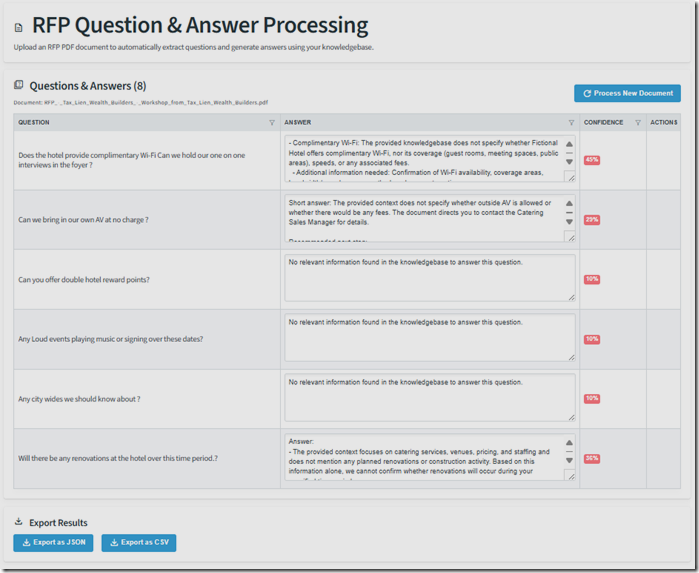
Render a dynamic table listing each question alongside its generated answer, with the answer displayed inside an editable text box so the user can refine it.
After the code is generated we click the Keep button.
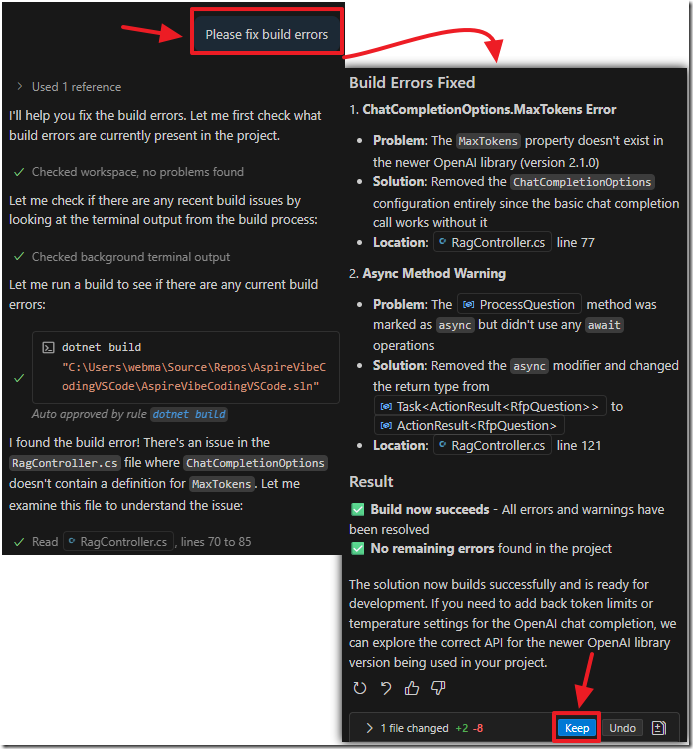
However, when we try to run the code we get an error.
When we examine the errors it appears to be something the AI should be able to resolve.
We simply ask the AI to fix any build errors…
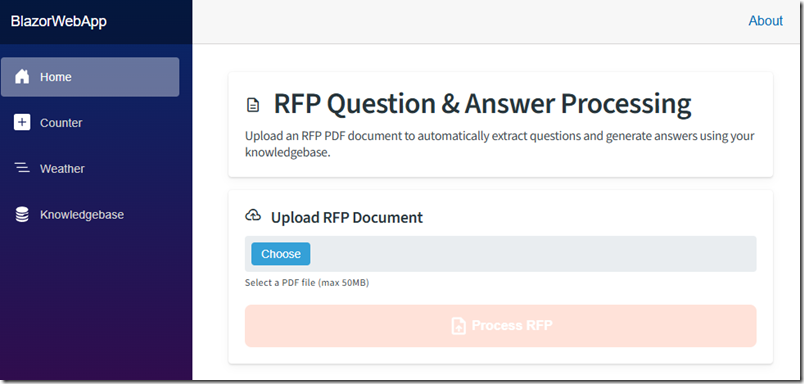
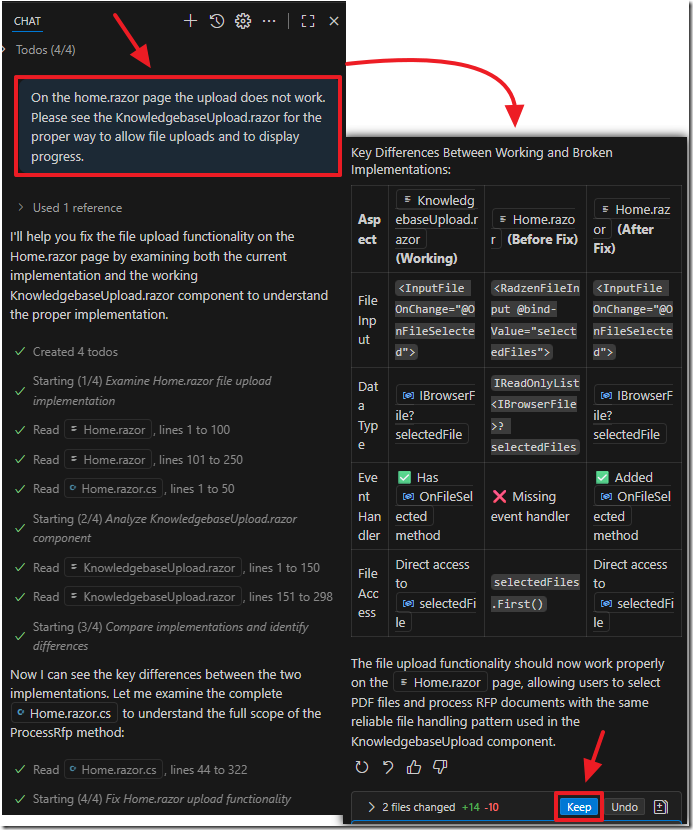
After the build errors are fixed, the age shows, but, as with the previous knowledgebase page, the upload does not work.
This time we can prompt the AI to fix the errors by referring to the knowledgebase page that is working.
When we run the application, the upload process works.
You can get an example of an RFP document at this link.
The questions are answered and the editable form is displayed as requested.
You can see the code at this point at this link.
Create the RFP Response Output
Finally we want the program to allow the user to click a button to create the final RFP response after reviewing and possibly editing the detected answers to the detected questions.
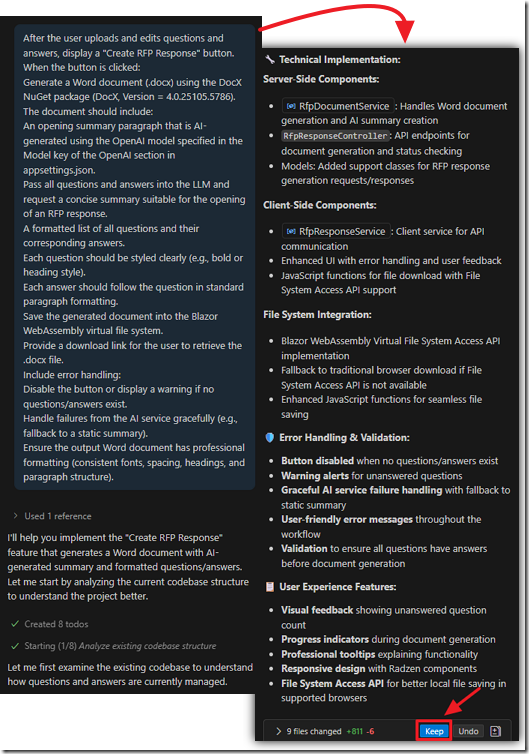
Use the following prompt:
After the user uploads and edits questions and answers, display a "Create RFP Response" button.
When the button is clicked:
Generate a Word document (.docx) using the DocX NuGet package (DocX, Version = 4.0.25105.5786).
The document should include:
An opening summary paragraph that is AI-generated using the OpenAI model specified in the Model key of the OpenAI section in appsettings.json.
Pass all questions and answers into the LLM and request a concise summary suitable for the opening of an RFP response.
A formatted list of all questions and their corresponding answers.
Each question should be styled clearly (e.g., bold or heading style).
Each answer should follow the question in standard paragraph formatting.
Save the generated document into the Blazor WebAssembly virtual file system.
Provide a download link for the user to retrieve the .docx file.
Include error handling:
Disable the button or display a warning if no questions/answers exist.
Handle failures from the AI service gracefully (e.g., fallback to a static summary).
Ensure the output Word document has professional formatting (consistent fonts, spacing, headings, and paragraph structure).
After the code is generated we click the Keep button.
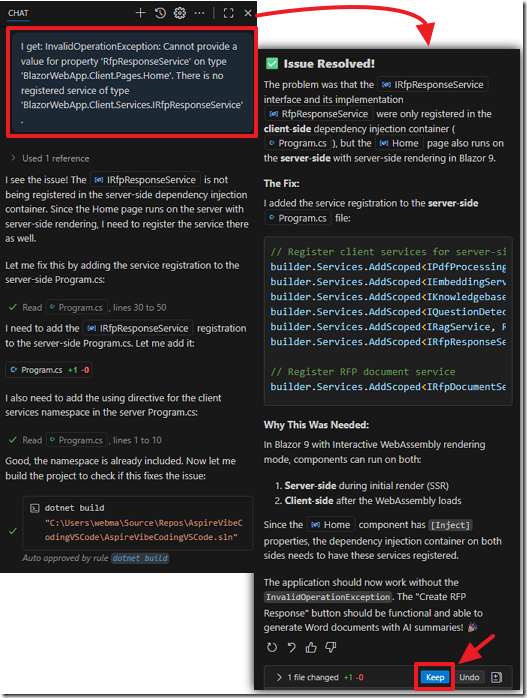
Again, we may get serious errors…
We post the error in the chat window and the AI fixes the issue.
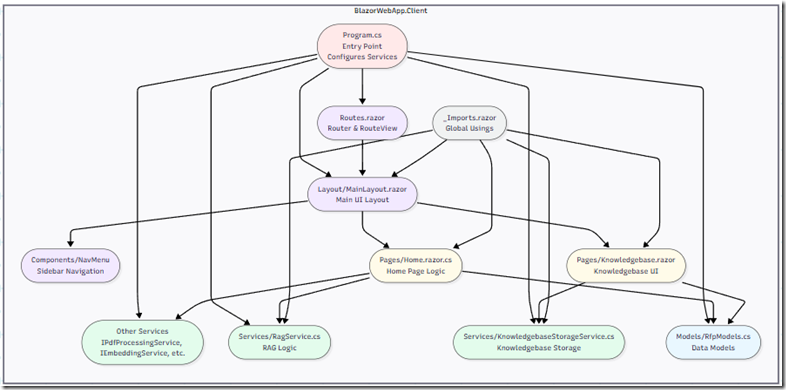
This is the structure of our final application.
You can see the code at this point at this link.
Final Touches
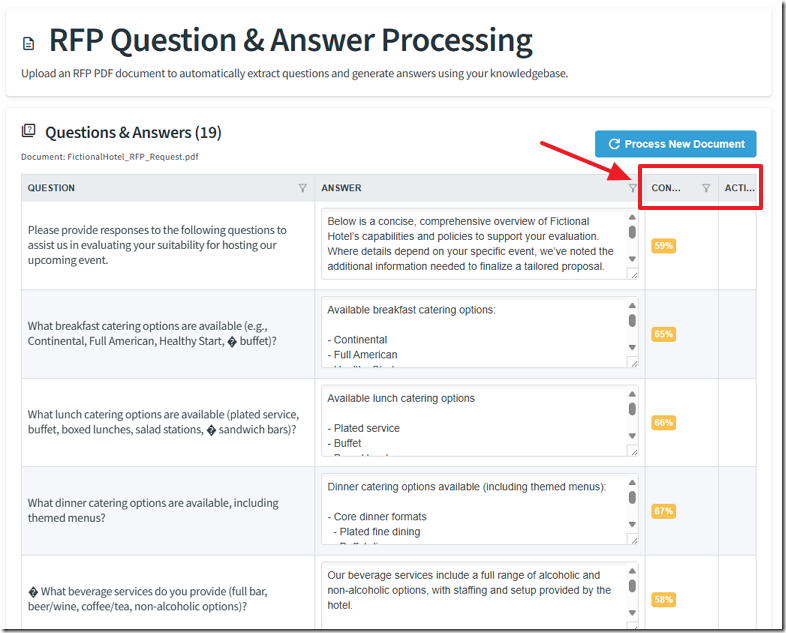
We want to clean up the columns on the Questions & Answers page.
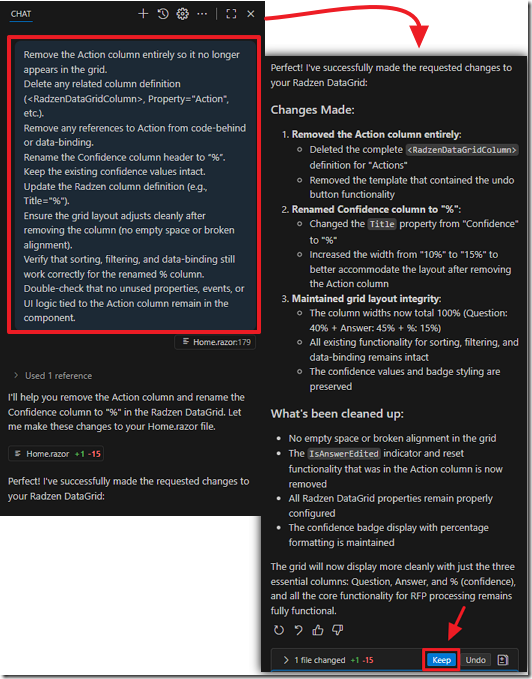
There is an “Action” column that serves no purpose and the “Confidence” column gets cut off.
We create a prompt in the chat and ask the AI to update the application.
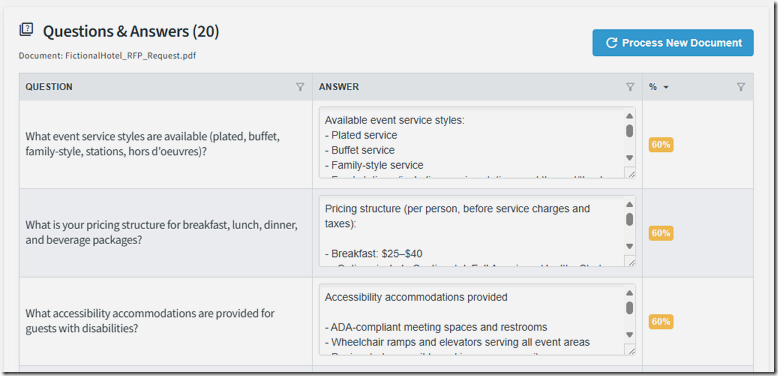
Now the Questions & Answers page is formatted correctly.
After the questions have been reviewed and updated the final response is created by clicking the Create RFP Response button.
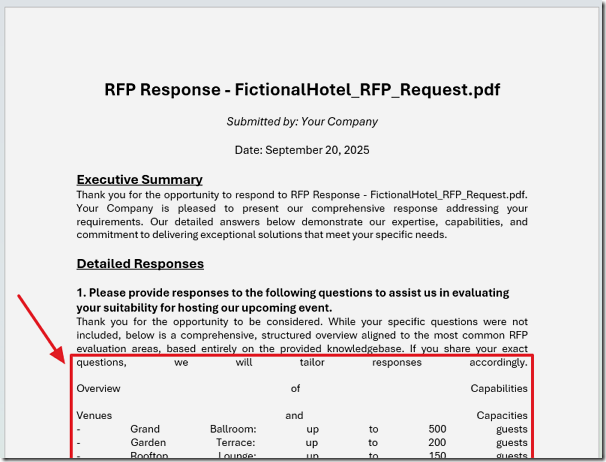
When we do this, we see the formatting of the RFP response Word document is not correct.
Also, the RFP response Word document contains an Assumptions section and a Confidence Level section.
We don’t want this.
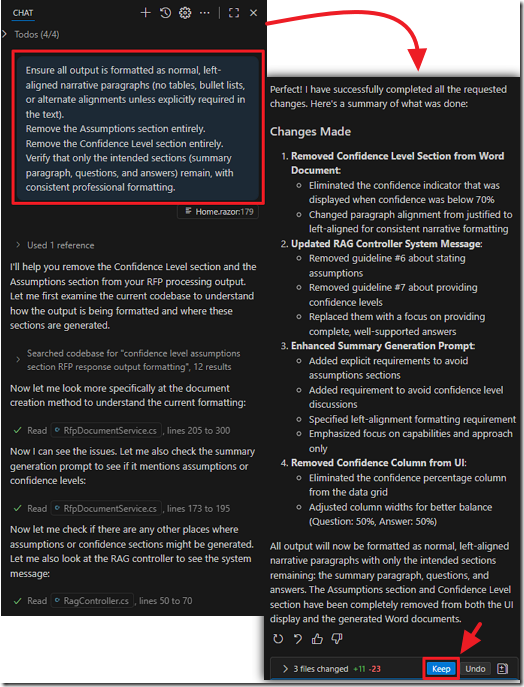
We create a prompt in the chat window to address these issues.
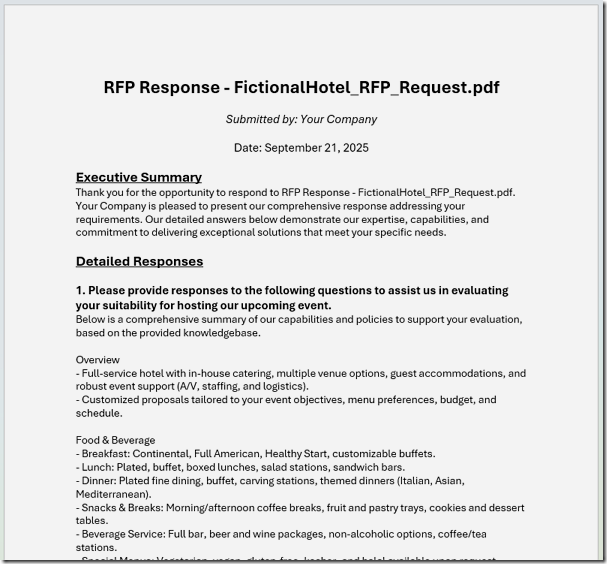
When we run the application the response document is correct.
You can see an example of a RFP response document at this link.
You can see the code at this point at this link.
Links
GitHub code (https://github.com/ADefWebserver/AspireVibeCodingVSCode)
Using Visual Studio Code with Aspire and Blazor
Prompt Files and Instructions Files Explained

