11/24/2024 Admin
DotNet Aspire: Publishing to an Existing Azure Container Registry
When working with Microsoft Azure Aspire, ensuring your deployment aligns with your organizational standards and project needs is crucial. One common scenario is deploying Aspire projects into an existing Azure Resource Group instead of creating a new one with default naming conventions.
Deploying a Microsoft Aspire application to Azure involves a streamlined three-step process. First, developers build the Aspire application in Visual Studio, which produces an image file. This image is then pushed to the Azure Container Registry, ensuring it’s securely stored and easily accessible. The final step involves creating a container from the stored image within the Azure Container Registry and deploying this container to the Azure Container Apps Environment.
The container instance delivers the application to the end-users. This process not only ensures efficient deployment but also leverages the robust capabilities of Microsoft Azure for scalable and reliable application management.
Why Choose This Approach?
The official Microsoft documentation describes a method to perform these steps. However, it creates objects that have weird names and doesn’t allow you to deploy multiple Aspire applications to the same Azure objects. Instead, we can create the Azure objects in advance and use them instead.
The reason for doing this is:
-
Control Over Naming Conventions
The default Azure Aspire deployment using the azd Command Line Interface (Azure Developer CLI), generates names that are functional but lack the clarity or consistency your team might need. By deploying Aspire projects into an existing Azure Resource Group, you can ensure that resource names reflect your chosen structure, improving maintainability and ease of identification. -
Consolidated Management for Multiple Aspire Projects
Many organizations run multiple Aspire projects. Deploying these projects into a shared Azure Resource Group simplifies resource management and enables efficient cost tracking, role assignments, and monitoring.
By following this approach, you maintain control, streamline operations, and ensure your Azure environment is tailored to your specific needs. This post will guide you through the steps to deploy Microsoft Azure Aspire to an existing Azure Resource Group, Azure Container Registry, and Azure Container Apps Environment.
Create The Azure Resource Group and Objects Manually
The best way to understand what the normal publishing process does is to set it up ourselves manually. This will also allow us to give all the objects names that make sense.
Go to: https://portal.azure.com/ and log in with an Administrator account.
Create a Resource Group
Select Resource groups and then select the Create button.
Give the resource group a name that begins with RG- (at this time, for all this to work, this is required) .
Create a Container Registry
Click Create a resource.
Search for Container Registry and click Create.
Ensure you select the resource group you just created, give the registry a name, and click Review + create, then the Create button.
When the deployment is complete, click the button to Go to the resource.
Create a Azure Container Apps Environment
In order to create a Container Apps Environment you must first create a Container. To create a Container, you deploy a image from the container registry.
Click the Quick start link, and follow the directions to install Docker, and push the hello-world image to your container registry (Note: Using PowerShell to do this is recommended).
Note: You will need to first click Access keys and click the Admin user check box to create a Username and password that you will need to access the container registry from Docker.
After you have pushed the image to your container registry, you will see it when you click on Repositories.
We will now create a container and that will consume this image.
Select the Create a resource button, search for Container App and click Create.
On the Create Container App screen, select the existing resource group, give the container app a name, and click the Create new button for Container Apps Environment.
Give the Container Apps Environment a name and click Create.
This will return you to the main screen, click the Next: Container button.
Select the existing image and click the Next: Ingress button.
Enable Ingress, accepting traffic from anywhere, and click the Review + create button.
On the next screen click the Create button.
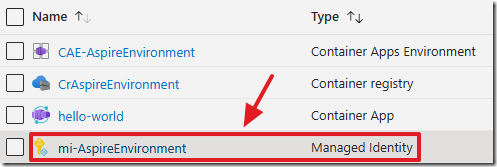
Create a Managed Identity
We will now create a Managed Identity that will be used by the Azure Developer CLI to push the Docker image into the registry.
Select the Create a resource button, search for User Assigned Managed Identity and click Create.
Given a name that begins with mi- , and click the Review + create button.
Click the Create button.
After it is created click the Resource groups link.
Select the resource group.
This will always bring you to the best place to manage all the Azure objects that are part of the resource group.
Important: When deploying from Aspire, this is the root of the deployment, and the environment name that it will use, will be the name of your resource group without the “RG-“ part.
Click on the container registry.
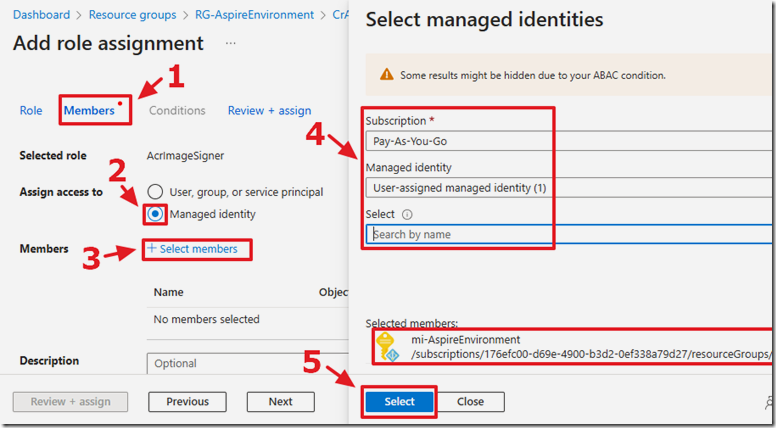
Select Access control (IAM), and select Add, then Add role assignment.
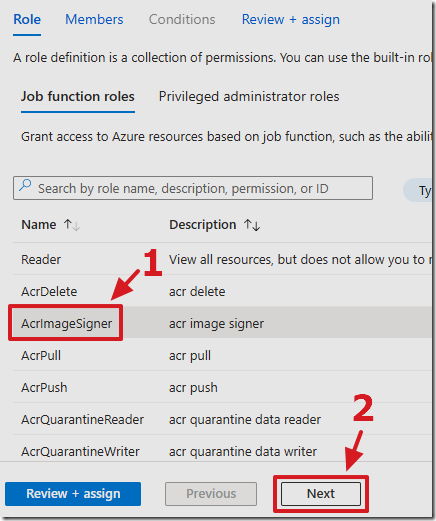
Select AcrImageSigner and click Next.
Select the the Managed Identity you created earlier.
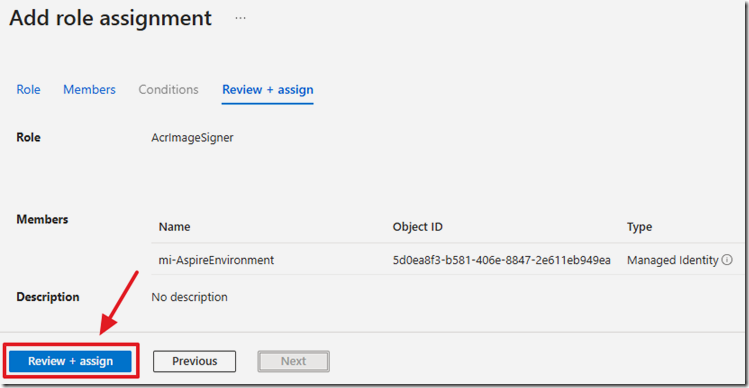
Click Review+assign.
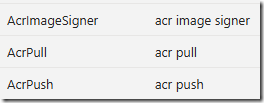
Repeat the process until you have assigned it the following roles: acrpull, acrpush, acrimagesigner.
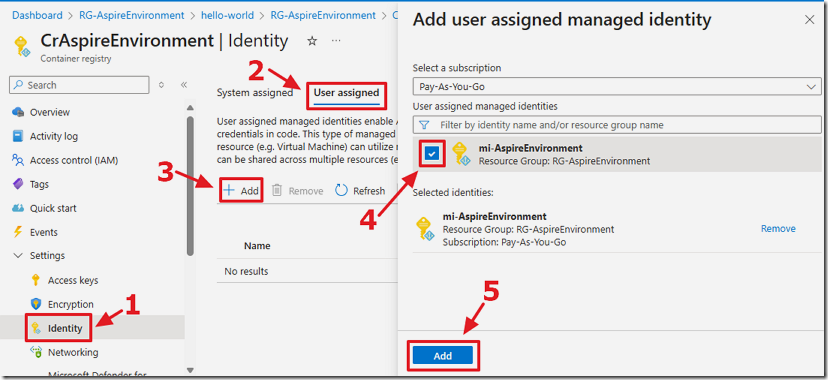
Navigate to the Identity page, select the User assigned tab, click Add, and assign the Managed Identity you created earlier.
We now have our Azure objects created with names that make sense and we can use these objects for all our deployments.
Create The Aspire Application
Now that Azure is fully set-up, we can now create an application using Aspire and deploy to Azure.
This is a step-by-step breakdown of the process:
-
Build Aspire Application in Visual Studio:
-
Start by developing your Aspire application in Visual Studio.
-
-
Create an Image:
-
Once the application is built, create a Docker image of the application. This image encapsulates the application and its environment, making it portable and ready for deployment.
-
-
Push Image to Azure Container Registry:
-
After creating the image, push it to the Azure Container Registry. This step involves authenticating with Azure and using the Azure Developer CLI to upload the image to your Azure Container Registry.
-
-
Create Container from Image in Registry:
-
With the image now in the Azure Container Registry, create a container instance from this image.
-
-
Deploy Container to Azure Container Apps Environment:
-
Finally, deploy the created container to the Azure Container Apps Environment. This step ensures that your application is running in a managed environment, allowing for scaling and management of resources.
-
Using the latest Visual Studio 2022 (or higher), create an Aspire application.
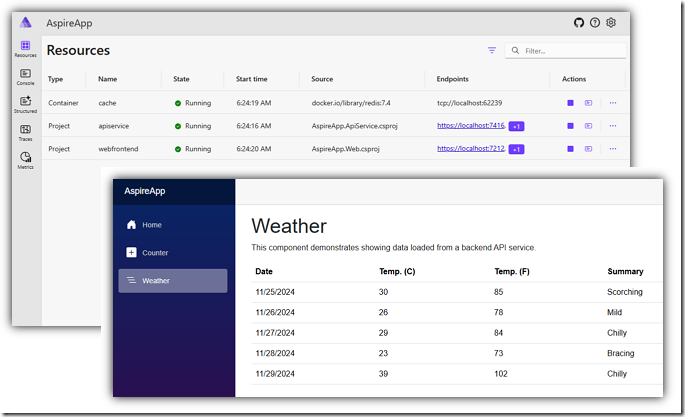
Ensure that it builds and runs locally.
At this point your have completed the following steps:
-
Build Aspire Application in Visual Studio
-
Create an Image
Deploy The Aspire Application To Azure

We will deploy the application using the Azure Developer CLI. You can install Azure Developer CLI using this documentation.
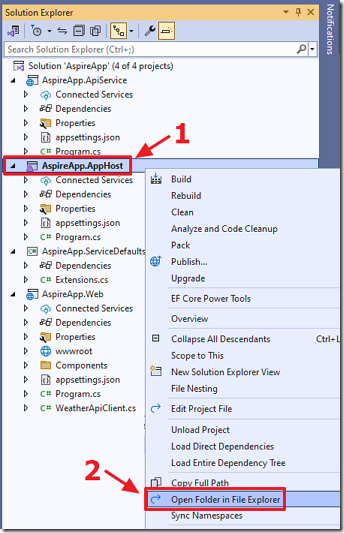
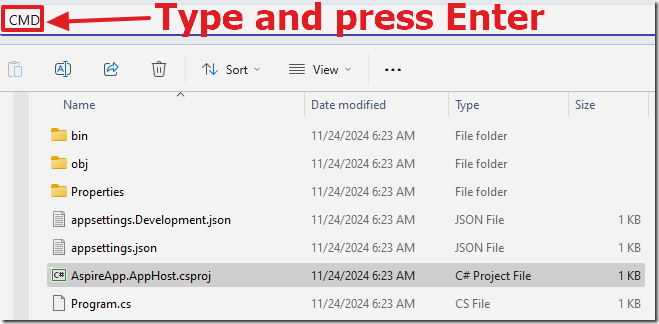
In Visual Studio, right-click on the AppHost project and select Open Folder in File Explorer.
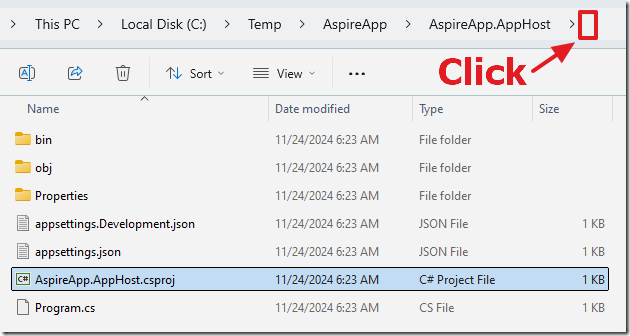
This will open the folder in File Explorer. In the address bar, click on it.
Type CMD and press the Enter key.
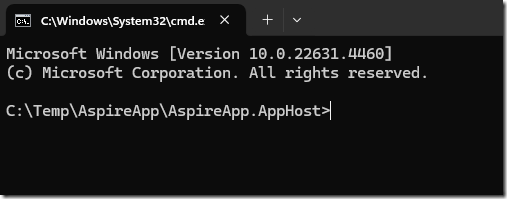
This will put you on the command window, in the correct location, and allow you to use the Azure Developer CLI to deploy the application to Azure.
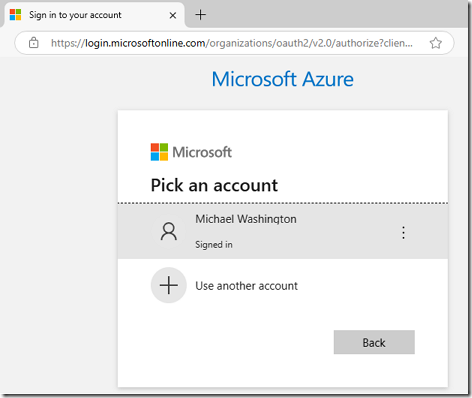
Type azd auth login and press Enter.
A web browser window will open and ask you to log into your portal.azure.com administrator account.
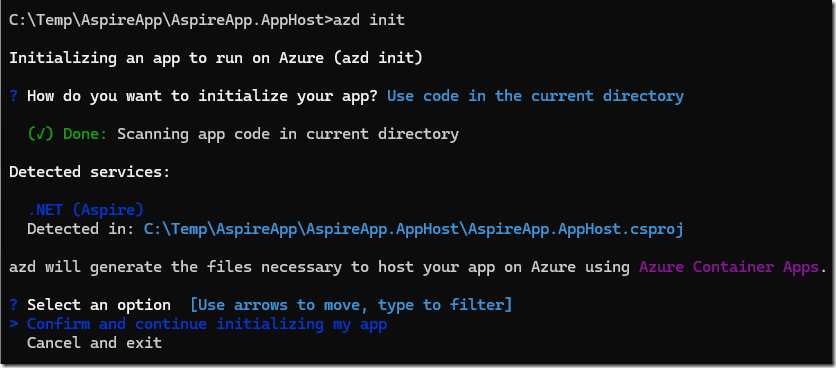
Return to the command window and type azd init and press Enter.
A list of options will display, press Enter to select Use code in the current directory.
It will scan the AppHost project, discovering all the parts of the Aspire application.
Press Enter to select Confirm and continue initializing my app.
You will now be prompted to enter an environment name.
Important: Enter the name of your existing Azure resource group without the beginning “RG-“ part.
(In my case my Azure resource group is called RG-AspireEnvironment, so I simply enter AspireEnvironment and press Enter).
The environment is set-up and ready for deploy.
Update the Environment (.env) File
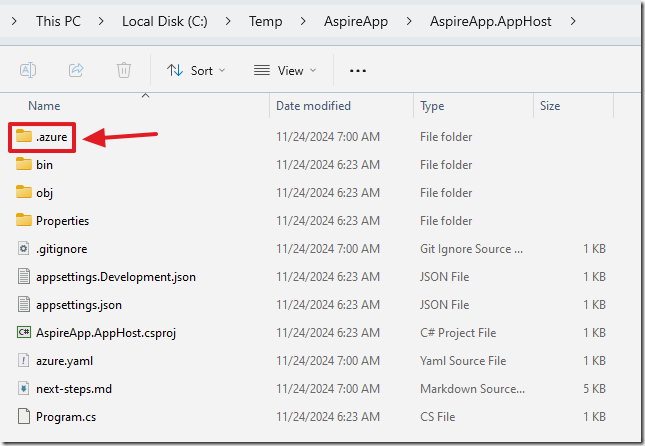
Navigate to the .azure folder that was just created.
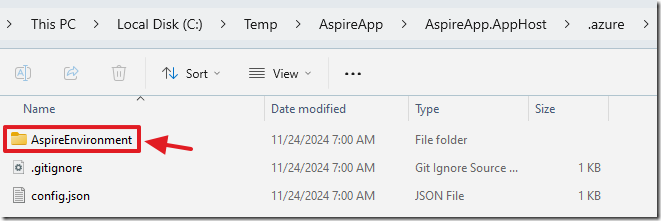
We open the environment folder.
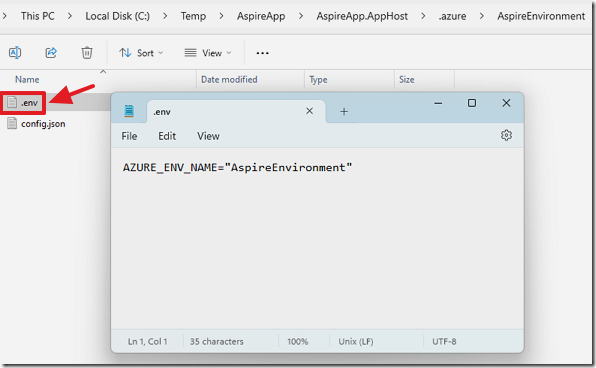
We then open the .env file in notepad.
The AZURE_ENV_NAME will be the only environment value set.
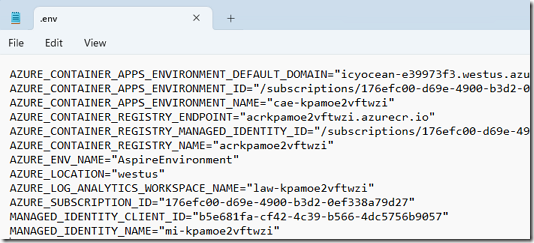
Add the following lines:
AZURE_LOCATION=""
AZURE_CONTAINER_APPS_ENVIRONMENT_DEFAULT_DOMAIN=""
AZURE_CONTAINER_APPS_ENVIRONMENT_ID=""
AZURE_CONTAINER_APPS_ENVIRONMENT_NAME=""
AZURE_CONTAINER_REGISTRY_ENDPOINT=""
AZURE_CONTAINER_REGISTRY_MANAGED_IDENTITY_ID=""
AZURE_CONTAINER_REGISTRY_NAME=""
AZURE_LOG_ANALYTICS_WORKSPACE_NAME=""
AZURE_SUBSCRIPTION_ID=""
MANAGED_IDENTITY_CLIENT_ID=""
MANAGED_IDENTITY_NAME=""
We now need to update the values…
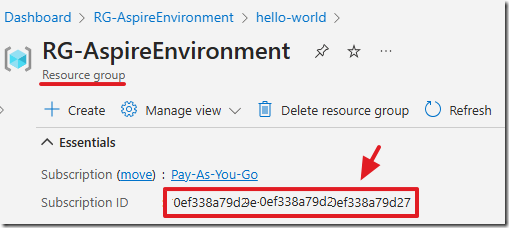
On the Resource group page, in the Azure portal, you can get:
- AZURE_SUBSCRIPTION_ID (Subscription ID)
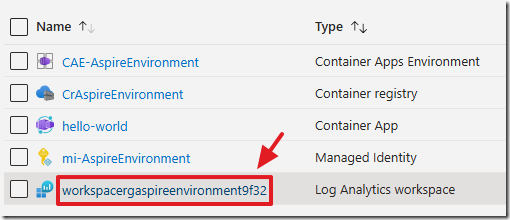
In the list of objects in the Resource group (available when you click the Overview tab), you will see that a Log Analytics workspace has been created when we created the Container App.
Use this name for:
- AZURE_LOG_ANALYTICS_WORKSPACE_NAME
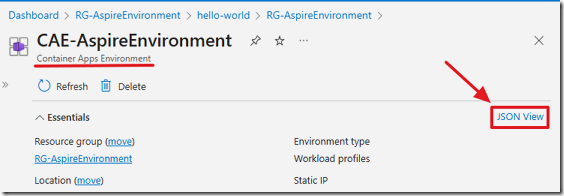
Go to Container Apps Environment.
Click on the JSON button to get:
- AZURE_CONTAINER_APPS_ENVIRONMENT_DEFAULT_DOMAIN (defaultDomain)
- AZURE_CONTAINER_APPS_ENVIRONMENT_ID (id)
- AZURE_CONTAINER_APPS_ENVIRONMENT_NAME (name)
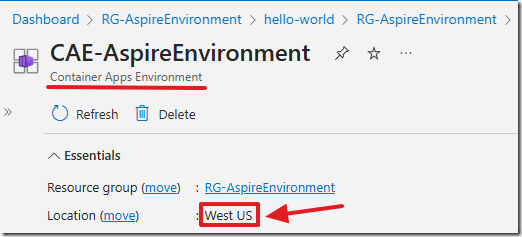
On this page you can also get:
- AZURE_LOCATION
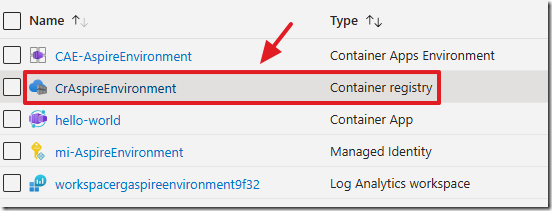
Go to Container Registry.
Click on the JSON button to get:
- AZURE_CONTAINER_REGISTRY_ENDPOINT (loginServer)
- AZURE_CONTAINER_REGISTRY_NAME (name)
Go to Managed Identity.
Click on the JSON button to get:
- MANAGED_IDENTITY_CLIENT_ID (clientId)
- MANAGED_IDENTITY_NAME (name)
- AZURE_CONTAINER_REGISTRY_MANAGED_IDENTITY_ID (id)
IMPORTANT: SAVE the values in another file because they will be overwritten in the next step, and you will need to paste them in again.
Deploy To Azure
At this point we put the values in the .env file so that our desired Resource group will be used.
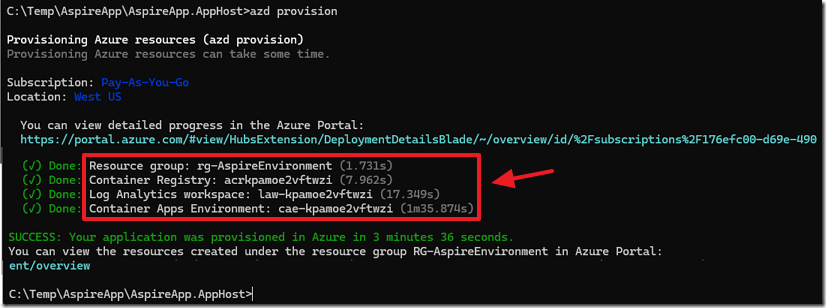
Return to the command window and type azd provision and press Enter.
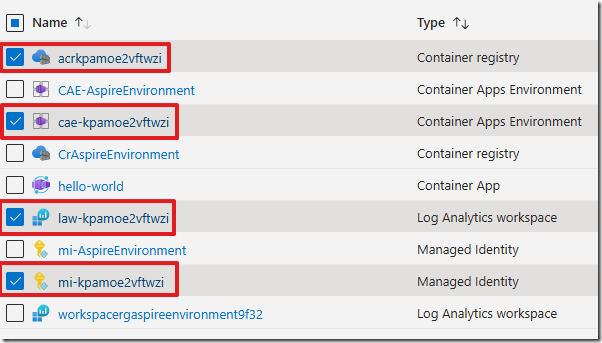
It will create an environment and add a bunch of Azure objects we don’t want…
We also see them in the Azure portal.
Check them…
.. and click the Delete button to delete them.
(Note: This may take some time to complete. You can continue but you may still see these objects for 20 minutes)
You will also see that the .env file has been updated to point to the Azure objects we just deleted.
Replace the entire contents of the .env file with the values we created earlier.
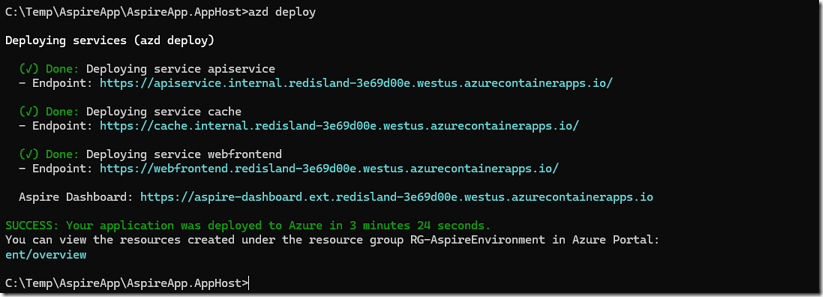
Return to the command window and type azd deploy and press Enter.
It will deploy the Aspire application.
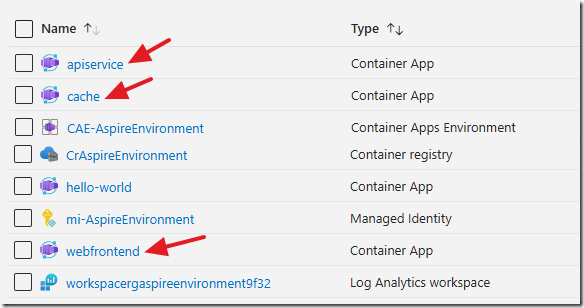
When we look in the Azure portal we see the new elements have been deployed from the Aspire solution.
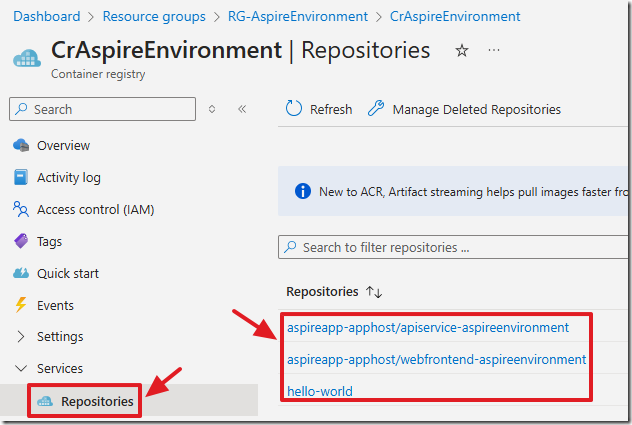
If we go into our Azure Container Registry…
We see the images have been properly deployed to the correct place.
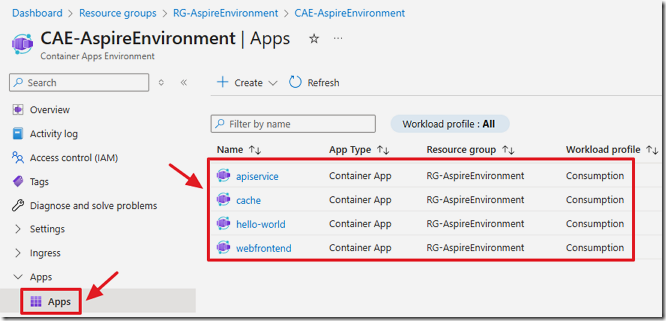
If we go into our Azure Container Apps Environment…
We see the containers have been properly deployed to the correct place.
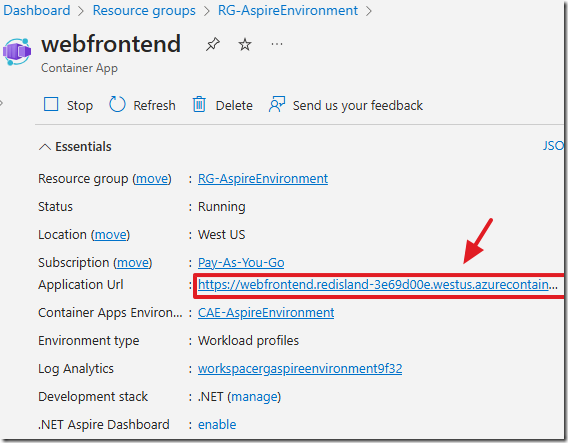
If we select a container…
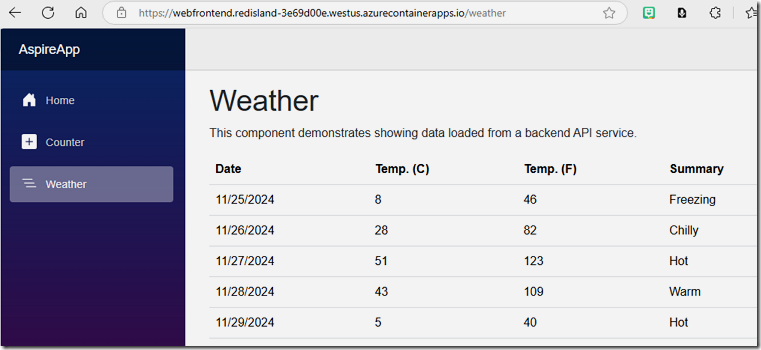
…and navigate to it…
Everything will work as intended.
Performing Updates
- Run azd deploy to update Azure with the latest changes at any time
- If you only wanted to deploy one part of the application, like the frontend project, you could use a command like: azd deploy webfrontend
- Do not run azd provision again, it will wipe out the values
Links
- Customize a .NET Aspire app to use existing Azure resources
- Deploy a .NET Aspire project to Azure Container Apps using the Azure Developer CLI (in-depth guide)
- Install or update the Azure Developer CLI
- Billing in Azure Container Apps
- Add a user-assigned identity
- Securing an Azure Container Registry with Azure Container Apps


